Shiozuke (塩漬け), literally salt (shio) + pickling (zuke), is the simplest Japanese pickle, known collectively as tsukemono (漬物). Salt pickles were first produced in ancient times as a means of preserving food, and over the years became an important part of the basic Japanese meal. In this post, I’ll explain more about the different types of Japanese pickles. I’ll also teach you how to make delicious and refreshing Shiozuke at home.
What is Tsukemono?
Tsukemono (漬物), or Japanese pickles, are a classic side dish in a traditional Japanese meal. Some popular ones you may be familiar with include takuan (pickled daikon), umeboshi (pickled plum), gari (pickled sushi ginger), and fukujinzuke, the Japanese curry rice condiment. Pickles are used to cleanse the palate between courses, such as pickled ginger in a sushi dinner. They help to preserve other foods, like a pickled plum tucked into a rice ball to help preserve the rice. Pickles that are crunchy also provide a textural contrast to any meal. There are several types of tsukemono. Here are the different types and the pickling agent used:
Shiozuke (塩漬け) – salt Suzuke (酢漬け) – vinegar Amazuzuke (甘酢漬け) – sugar and vinegar Misozuke (味噌漬け) – miso Shoyuzuke (醤油漬け) – soy sauce Kasuzuke (粕漬け) – sake kasu (lees) Shiokojizuke (塩麹) – rice koji (mold-cultured rice) Nukazuke (糠漬け) – nuka (rice bran) Karashizuke (からし漬け) – Japanese hot mustard karashi Satozuke (砂糖漬け) – sugar
Today, let’s talk about shiozuke. If you’re interested in learning more about different types of tsukemono, read Tsukemono: A Guide to Japanese Pickles on my blog.
What is Shiozuke?
Shiozuke (塩漬け) is tsukemono made with just salt and vegetables. Therefore, the amount of salt used for the brine and the pickling time make the difference in the final dish. When it’s done right, tsukemono is simply delicious. Shiozuke not only prevents the food from going bad, but also helps break down the fibers, keeps the vibrant color, and tenderizes any tough vegetables that could be hard to eat raw. It also adds umami to the vegetables.
Basic Brine for Shiozuke
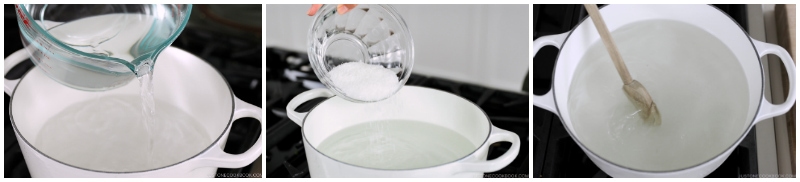
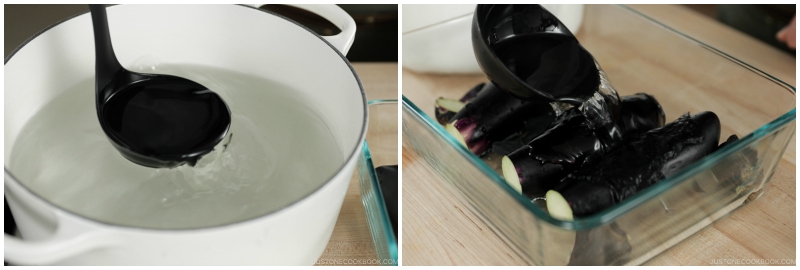
The basic brine that I learned from a tsukemono book, Honkaku Tsukemono written by a culinary & tsukemono expert Takako Yokoyama, is 10 percent. That means:
100 grams of sea salt in 1000 ml (grams) of water, or 6 tablespoons of sea salt (16 g per tbsp) for every 4 cups of water
In general, the percentage of salt in the water for shiozuke brine is from 2% to 10%. It’s quite a large range, but as I mentioned earlier, the amount of salt and pickle time is up to one’s preference. Today, I made my shiozuke with 5% brine and pickled it for 8 hours.
Asazuke vs. Shiozuke
When you pickle vegetables in a light brine for a short period of time, this method is called asazuke (浅漬け), literally “shallow pickling.” Asazuke doesn’t develop deep flavors that fermented pickles do, yet the result tastes wonderfully refreshing. Since it’s easy to make, asazuke frequently appears on our daily dinner table.
shiozuke: 2% to 10% brine, pickle for 6 to 12 hours, enjoy in 3 to 4 days. asazuke (quick pickling): 2% to 5% brine, pickle for 2 to 3 hours, and enjoy in 1 to 2 days.
2 Simple Ingredients You’ll Need
1. Vegetables
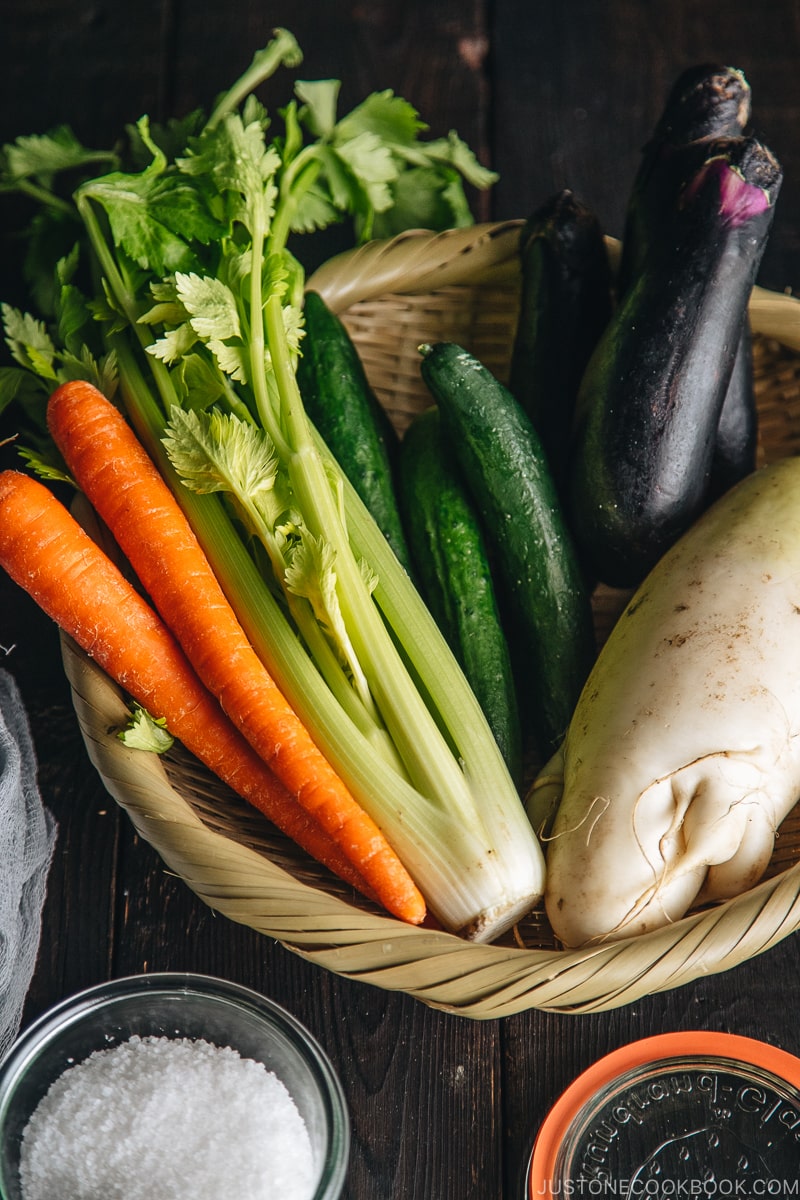
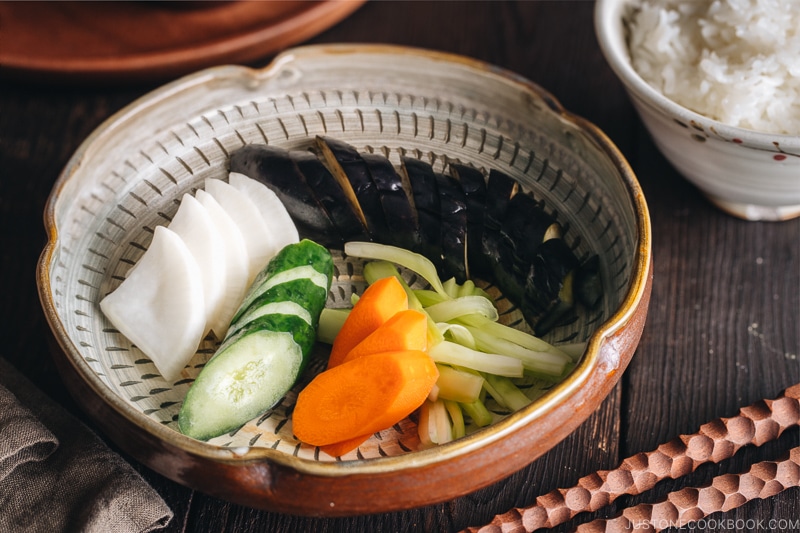
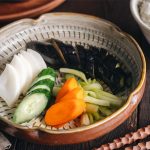
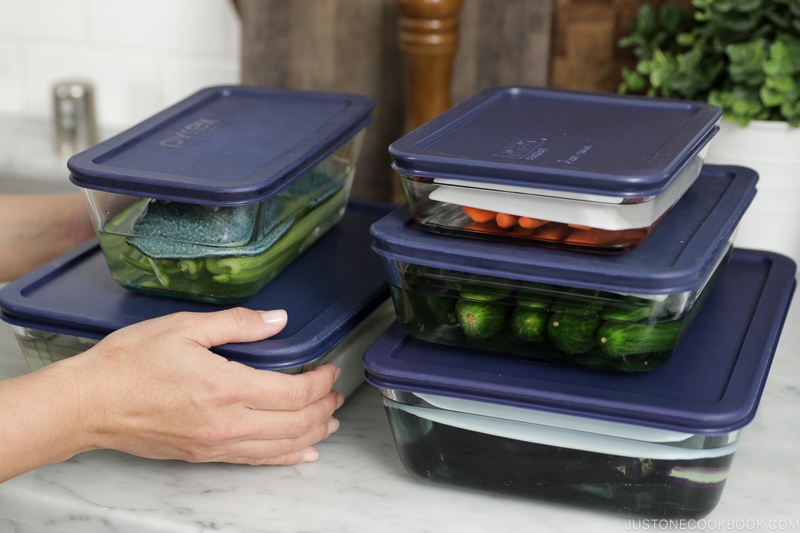
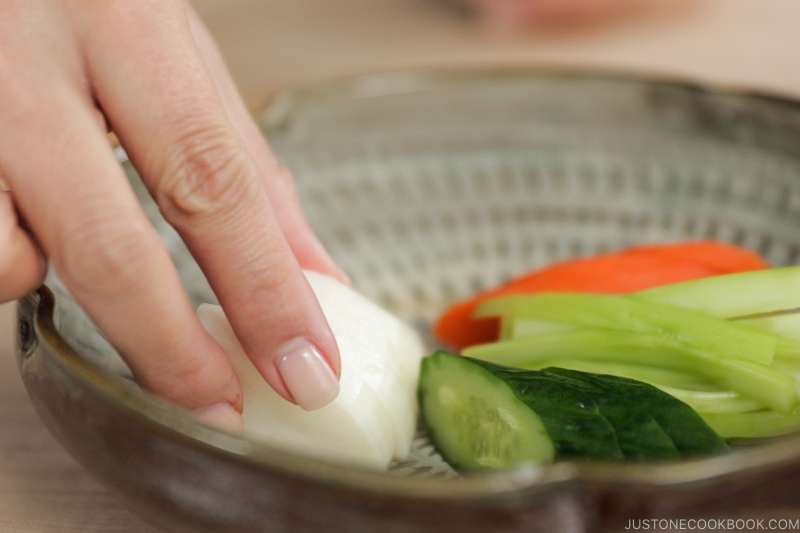
The best choice is seasonal vegetables because they are fresh, easy to get, and at an affordable price. You can taste the freshness through the pickling process when you use fresh vegetables. Today, I used the common shiozuke vegetables:
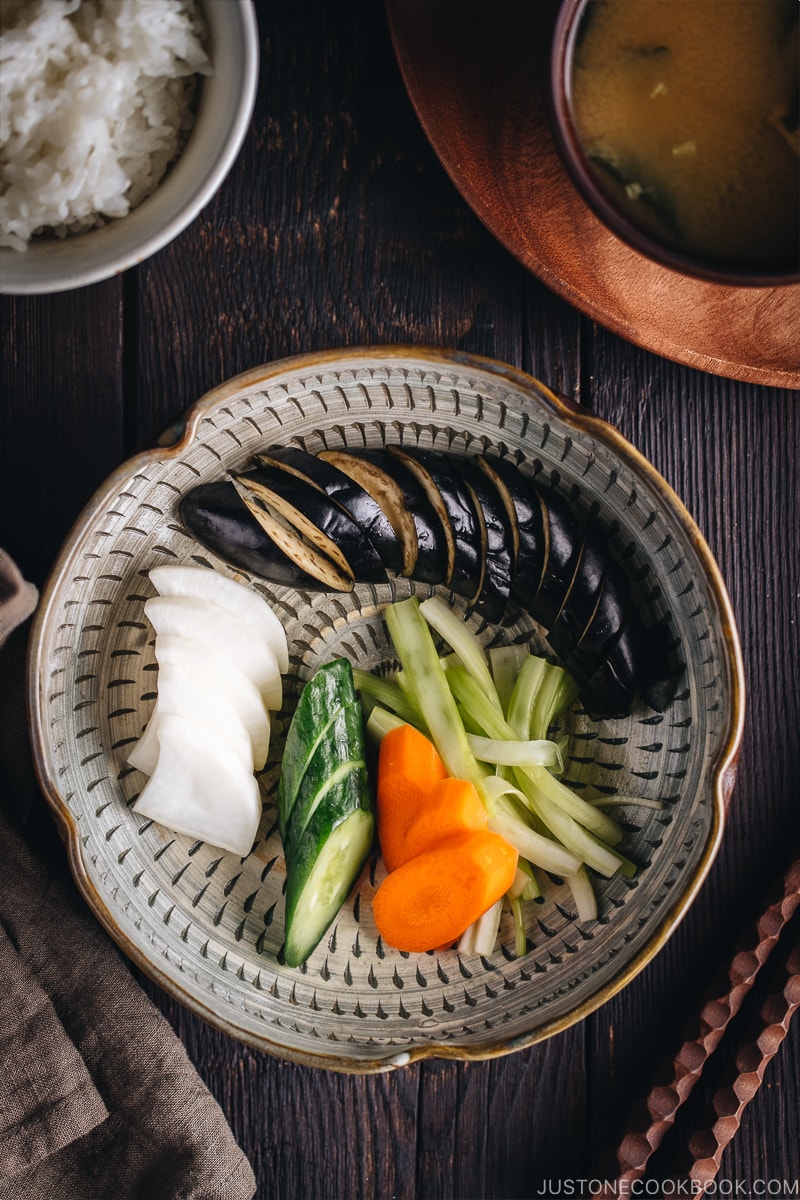
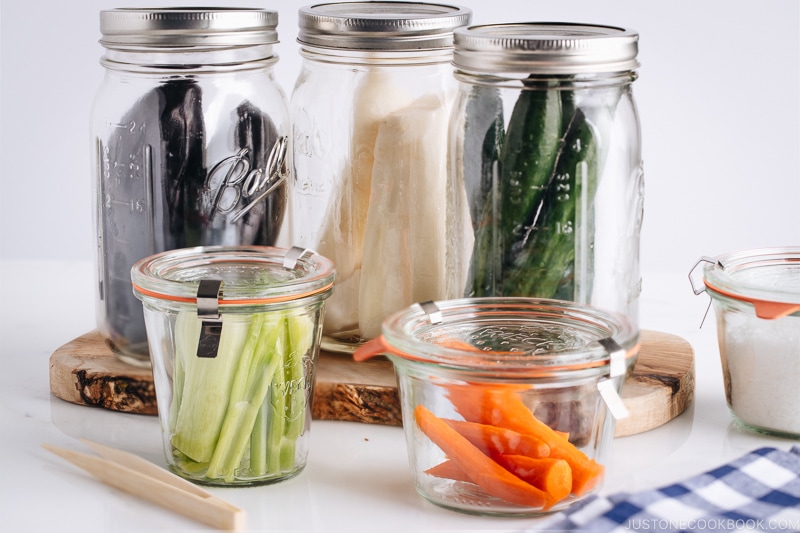
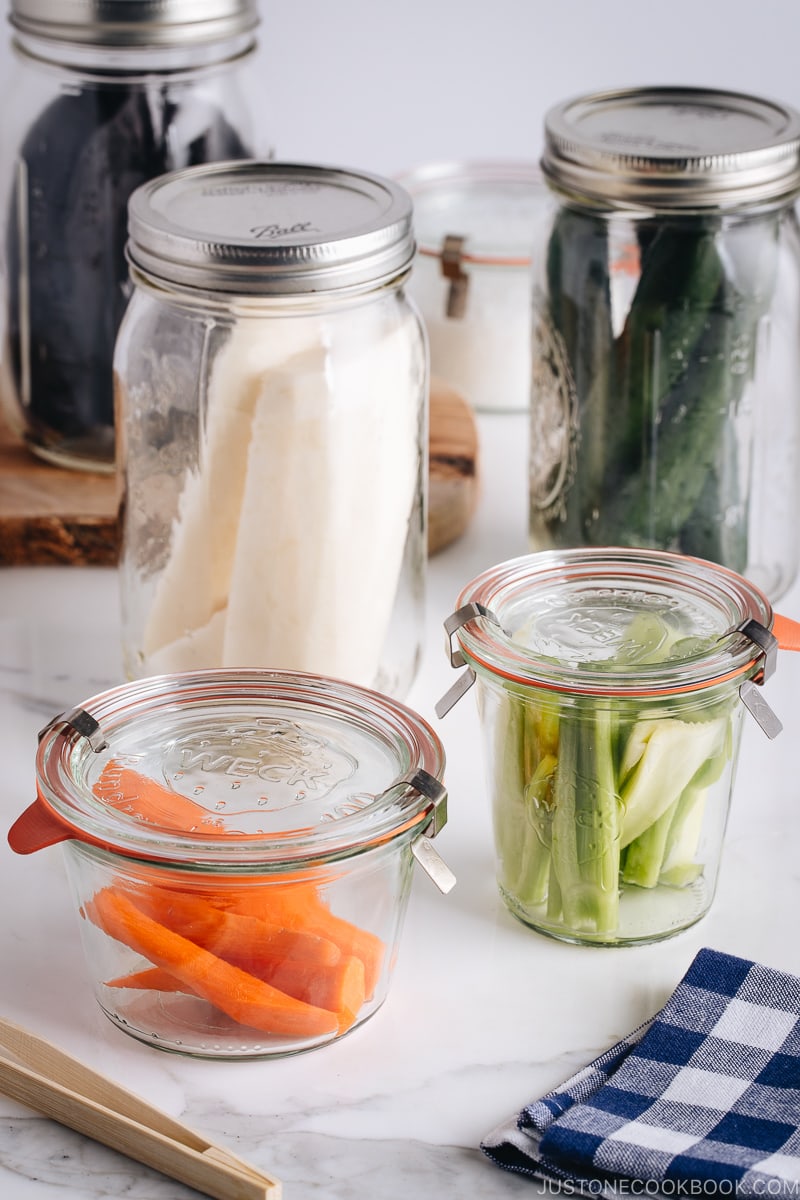
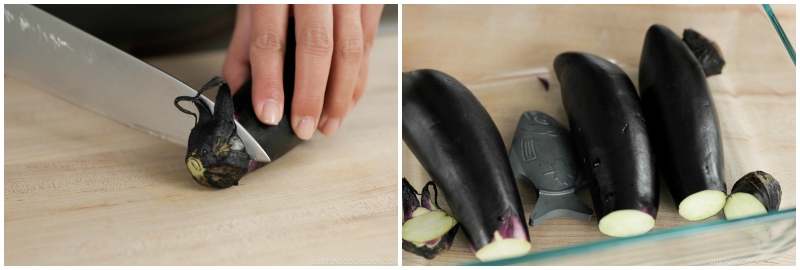
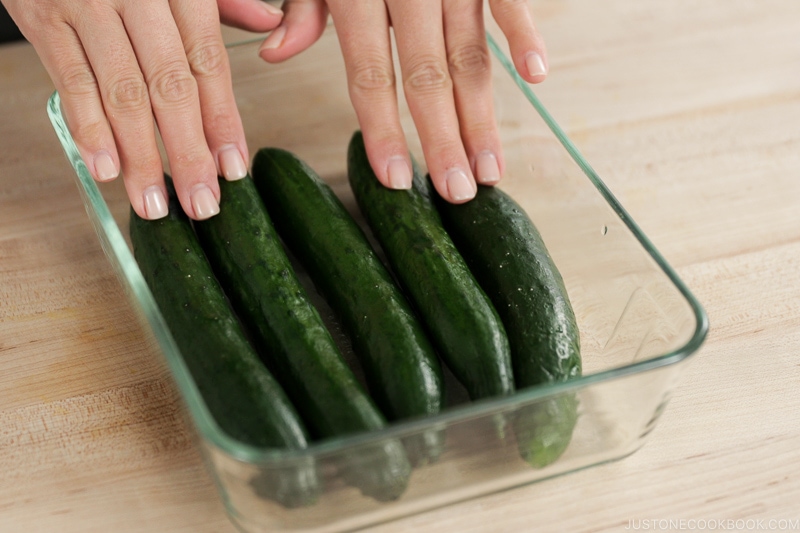
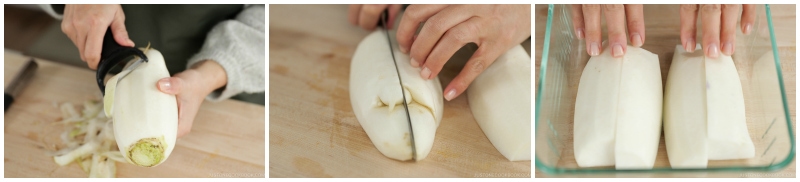
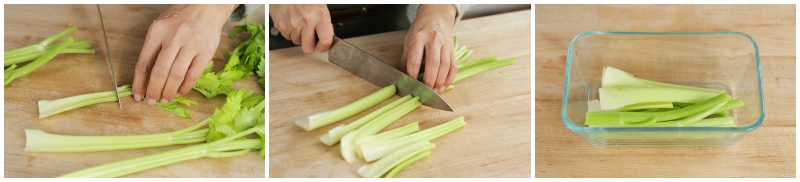
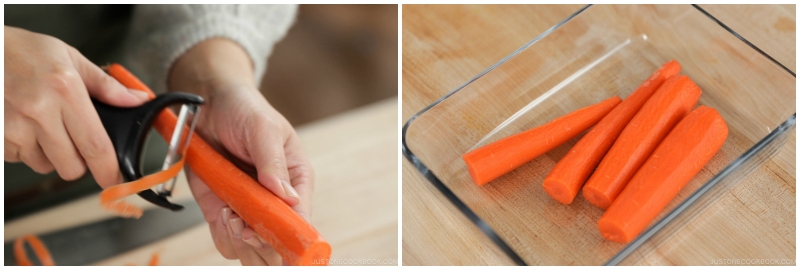
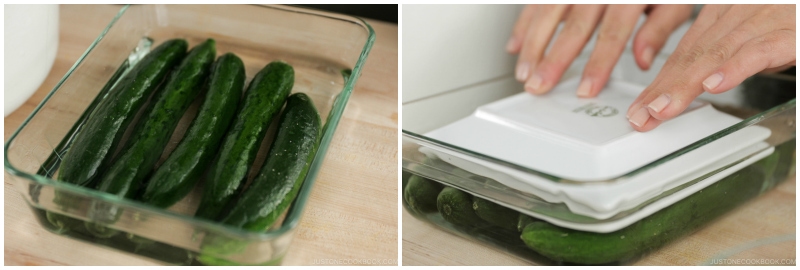
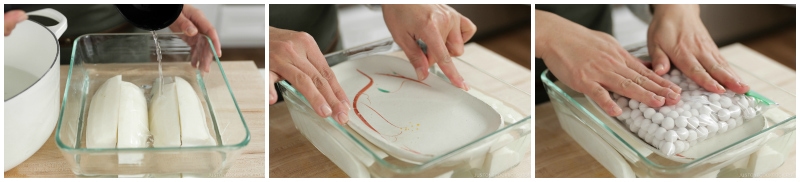
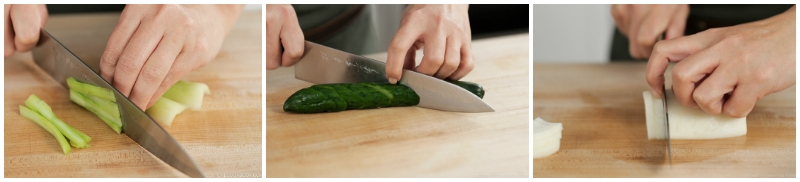
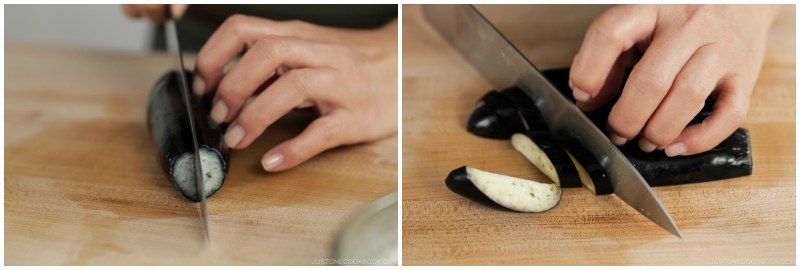
Eggplant – longer, thinner, and smaller; use the Japanese/Chinese/Italian kind Cucumber – short, skinny, and smaller; use the Japanese/Persian kind Daikon radish – green-top, long, thick; use the Japanese/Korean kind Carrot Celery
You can make shiozuke with a wide variety of vegetables. In this recipe, I made a colorful batch of shiozuke with the above 5 types of vegetables. You can, of course, choose to make it with less or more vegetables. For first-timers, I’d recommend following my pickling time indicated in the recipe, which is 8 hours, then you could adjust the brine and timing in your next batch. If you want to pickle leafy vegetables (napa cabbage, cabbage, greens, etc.), I recommend asazuke (quick pickling) with 2–5% brine.
2. Salt
I like to go with the traditional method: Use natural sea salt when you make tsukemono, and do not use table salt. Sea salt is produced through evaporation of ocean water or water from saltwater lakes, usually with little processing. This leaves behind certain trace minerals and elements, which add flavor and color to sea salt. On the other hand, table salt is typically mined from underground salt deposits, is more heavily processed to eliminate minerals, and usually contains an additive to prevent clumping.
Additional Mix-ins (Optional)
In this recipe, I decided to keep it basic. However, we can make different variations of shiozuke using additional ingredients. You can include:
garlic ginger kombu (dried kelp) red chili pepper yuzu zest (you can use other types of citrus)
How to Make Shiozuke
3 Tools You’ll Need to Make Shiozuke
1. Kitchen Scale
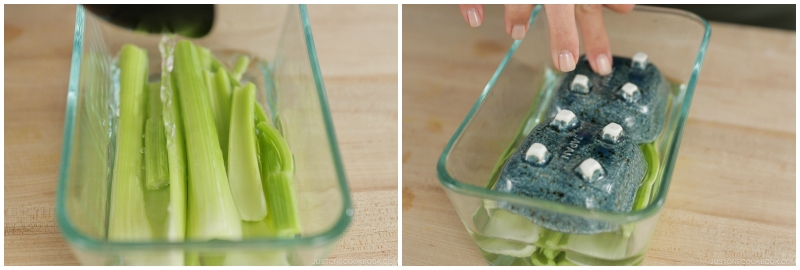
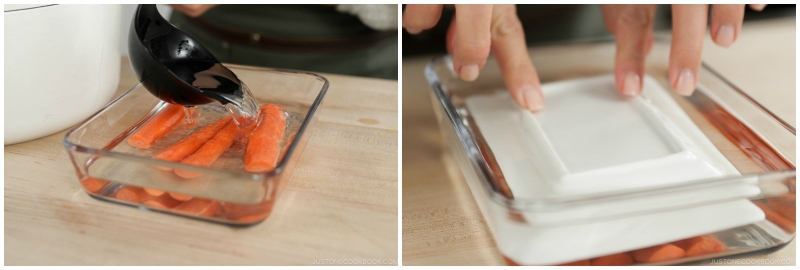
I understand that it’s not common to have a kitchen scale in the American household, but now that you want to make tsukemono, it’s very important to measure 1) the total weight of the vegetables you’re going to pickle, 2) the weight of sea salt, and 3) the heavy object you put on top of the vegetables.
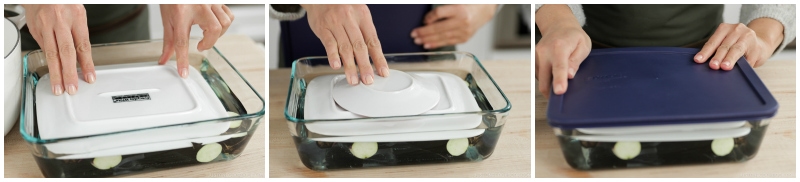
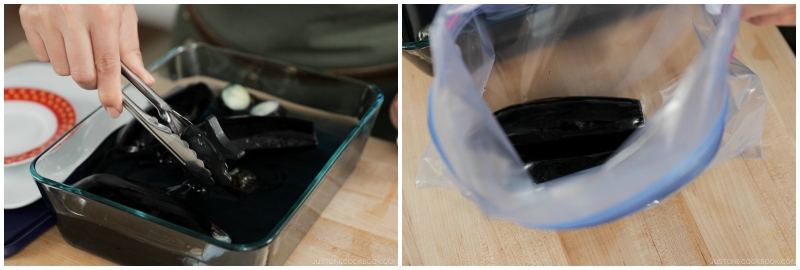
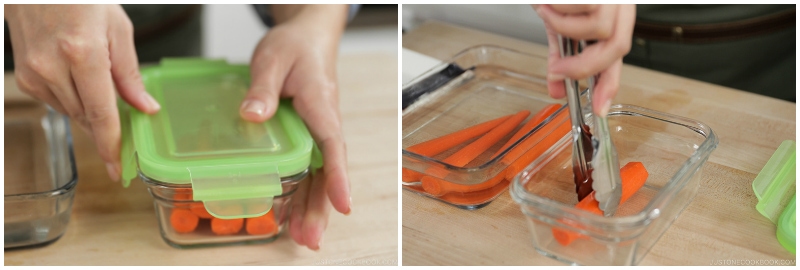
2. Glass Containers
You will need slightly deeper containers with lids so you can put in the vegetables, brine, plates, and weights. Instead of plastic containers, I like to use glass containers that don’t retain the odor of the pickles. I do not have a special pickle press for tsukemono (tsukemono-ki 漬物器), but you can use it if you have one.
3. Weights (Stone Weights)
You will need something heavy to apply downward pressure on top of the pickles. You can use several plates, pie weights in a plastic bag, clean rocks, etc. Traditionally, the pressure is generated by heavy stones called tsukemono-ishi (漬物石) with a weight of 1–2 kg. The ideal weight to use is between 1.5 and 2 times the weight of the pre-pickled vegetables. When using weights, make sure to:
first weigh the vegetables before you soak them in the brine place a plate under the stone or heavy object inside the pickling container; this distributes the weight equally among the vegetables.
My Recommendations and Tips
My favorite shiozuke: 5% brine, pickle for 8 hours, enjoy in 3–4 days; and 10% brine, pickle for 5 hours, enjoy for 5 days. Make asazuke (quick pickling) if you are going to serve tsukemono for tonight’s dinner. Again, get a kitchen scale. Decide to pickle either whole or sliced pieces. The way you cut the vegetables affects the finishing time and texture of the tsukemono. If you cut the vegetables to create more surface area, pickling is done faster than with whole, halved, or quartered vegetables. Reuse the leftover brine for your next pickling. Once in a while, it’s good to boil the brine again and add more salt as needed. Make the brine the previous day. The brine has to be at room temperature. When I first made shiozuke, I was impatient as my brine didn’t cool fast enough. In wintertime, you can keep the pot of brine outside to cool faster. In summertime, make the brine ahead of time, so you don’t have to sit around and wait for it to cool. Set a timer for removing the pickles from the brine. I sometimes forget and end up with salty vegetables!
What to Serve with Shiozuke
With a crunchy texture and refreshing flavor, shiozuke is definitely one of the easiest ways to enjoy vegetables. For a quick dinner, I often serve these pickled vegetables as a side with steamed rice and miso soup and I’d add along with a protein dish like Miso Butter Salmon or Ginger Pork. On a cold day, you can serve pickled vegetables with okayu (rice porridge). It could not be more simple, healthy, and full of flavor. Wish to learn more about Japanese cooking? Sign up for our free newsletter to receive cooking tips & recipe updates! And stay in touch with me on Facebook, Pinterest, YouTube, and Instagram.