WATCH: Key Lime Cheesecake Recipe
PIN THIS RECIPE TO SAVE FOR LATER
Reasons to love this Lime Cheesecake
Easy to make Won’t crack! Won’t leak thanks to my special waterproofing technique 100% make ahead friendly including the whipped cream Freezer friendly Irresistibly sweet & tangy with just the right kick of lime Uses key limes OR lime juice + lemon juice so everyone can make it Sensationally smooth and creamy Perfect for every spring & summer get together!
This Lime Cheesecake Recipe is a guaranteed favorite!
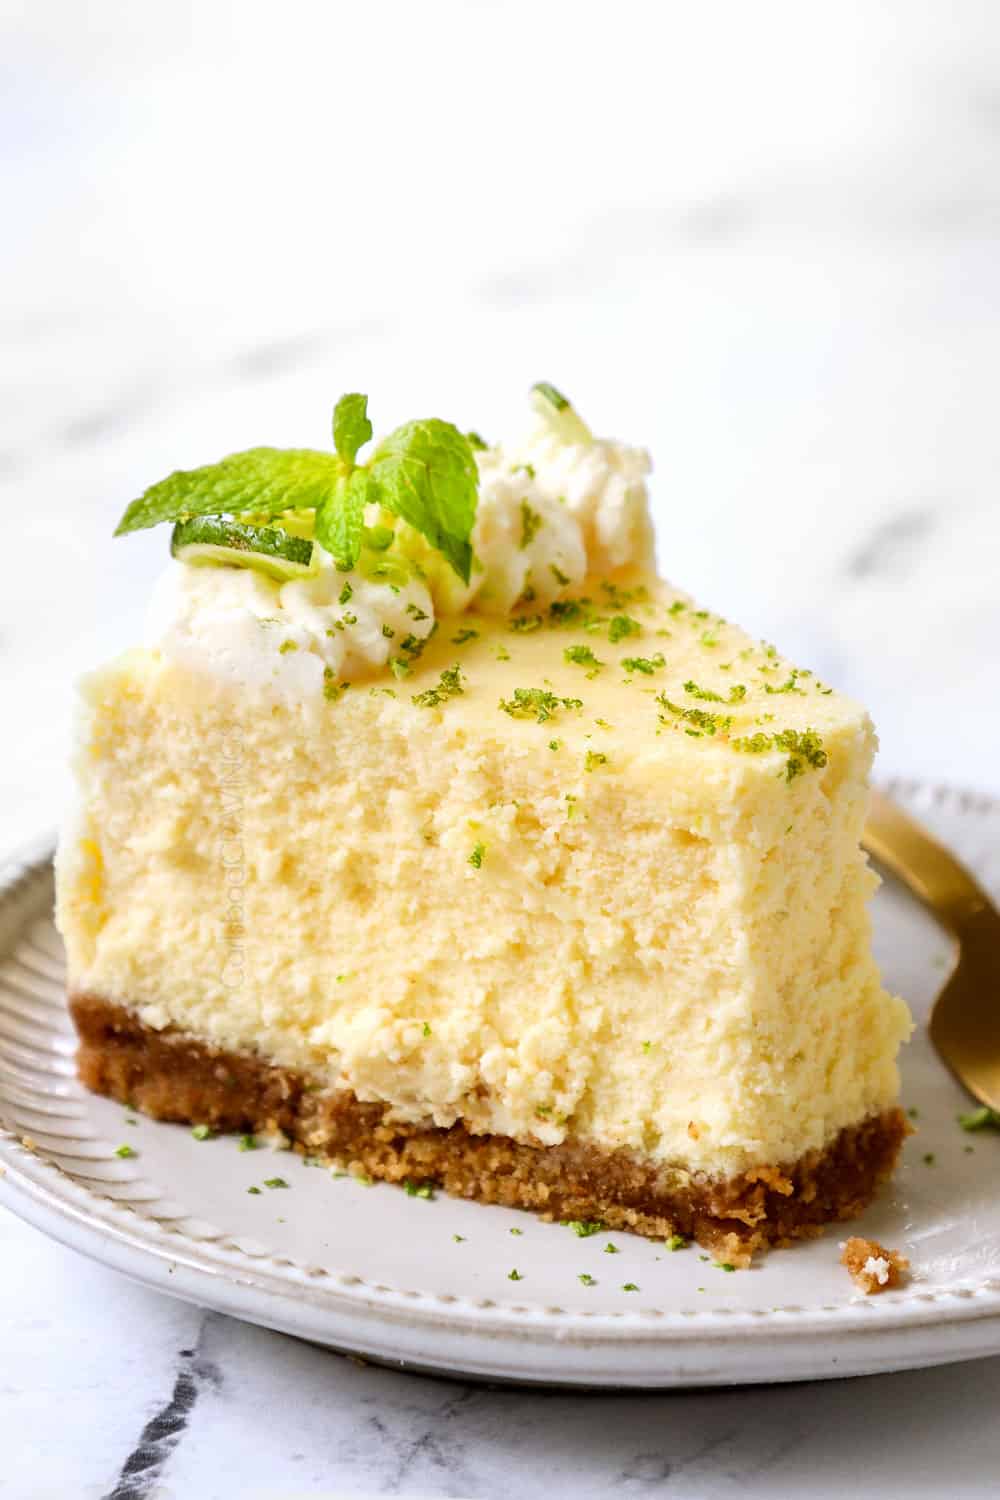
This key lime cheesecake recipe is one of my favorites because it’s not only rich, smooth, decadent, dense and creamy, just like cheesecakes should be, but it’s lightened and brightened with fresh lime juice and lime zest so it’s not overly sweet or heavy, just smooth, tangy, bright, summery perfection. I know you might be intimidated by making homemade cheesecake, but cheesecake is actually one of the absolute easiest deserts to make! You don’t have to make frosting, layer cakes, or even use multiple bowls! Instead, this entire key lime cheesecake recipe is made in one bowl with your electric mixer. Most of the “work” is hands-off waiting while the cheesecake bakes and cools. In addition, you don’t have to worry about your lime cheesecake being lumpy, leaking or cracking with this recipe because it’ basically foolproof! Just follow my tips and tricks and you will be rewarded with the best key lime cheesecake of your life.
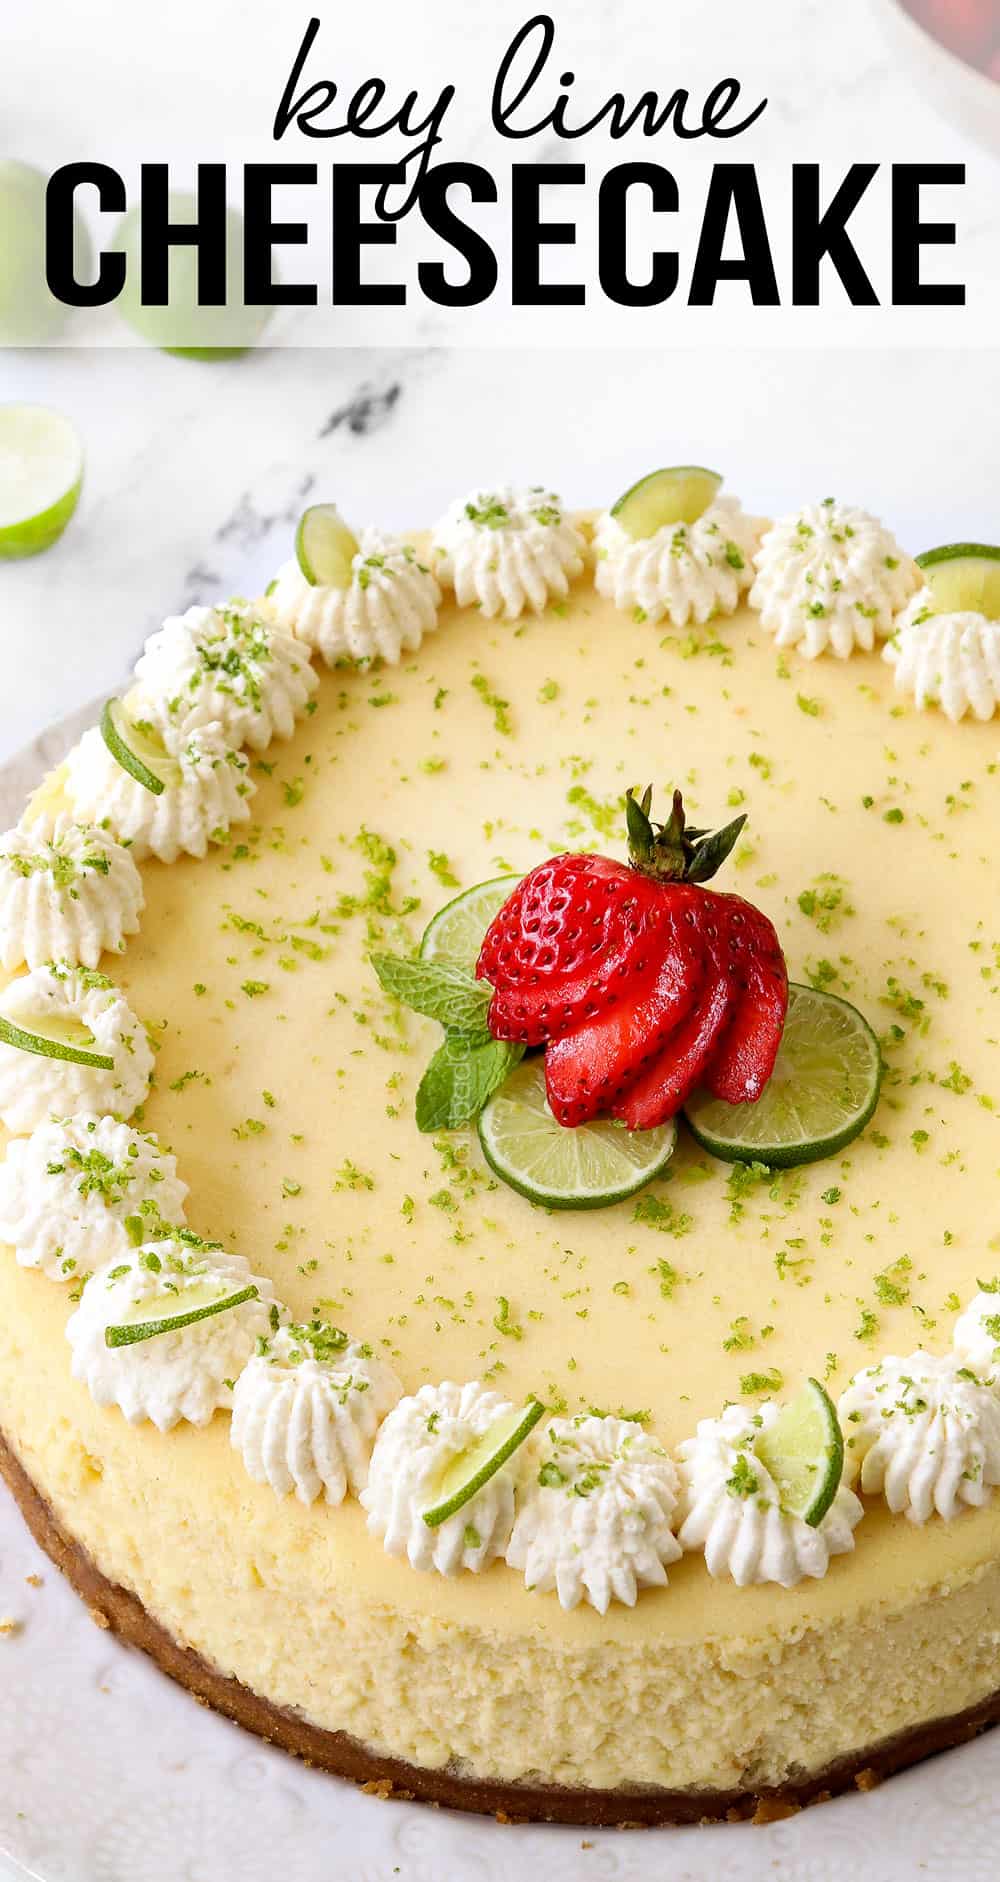
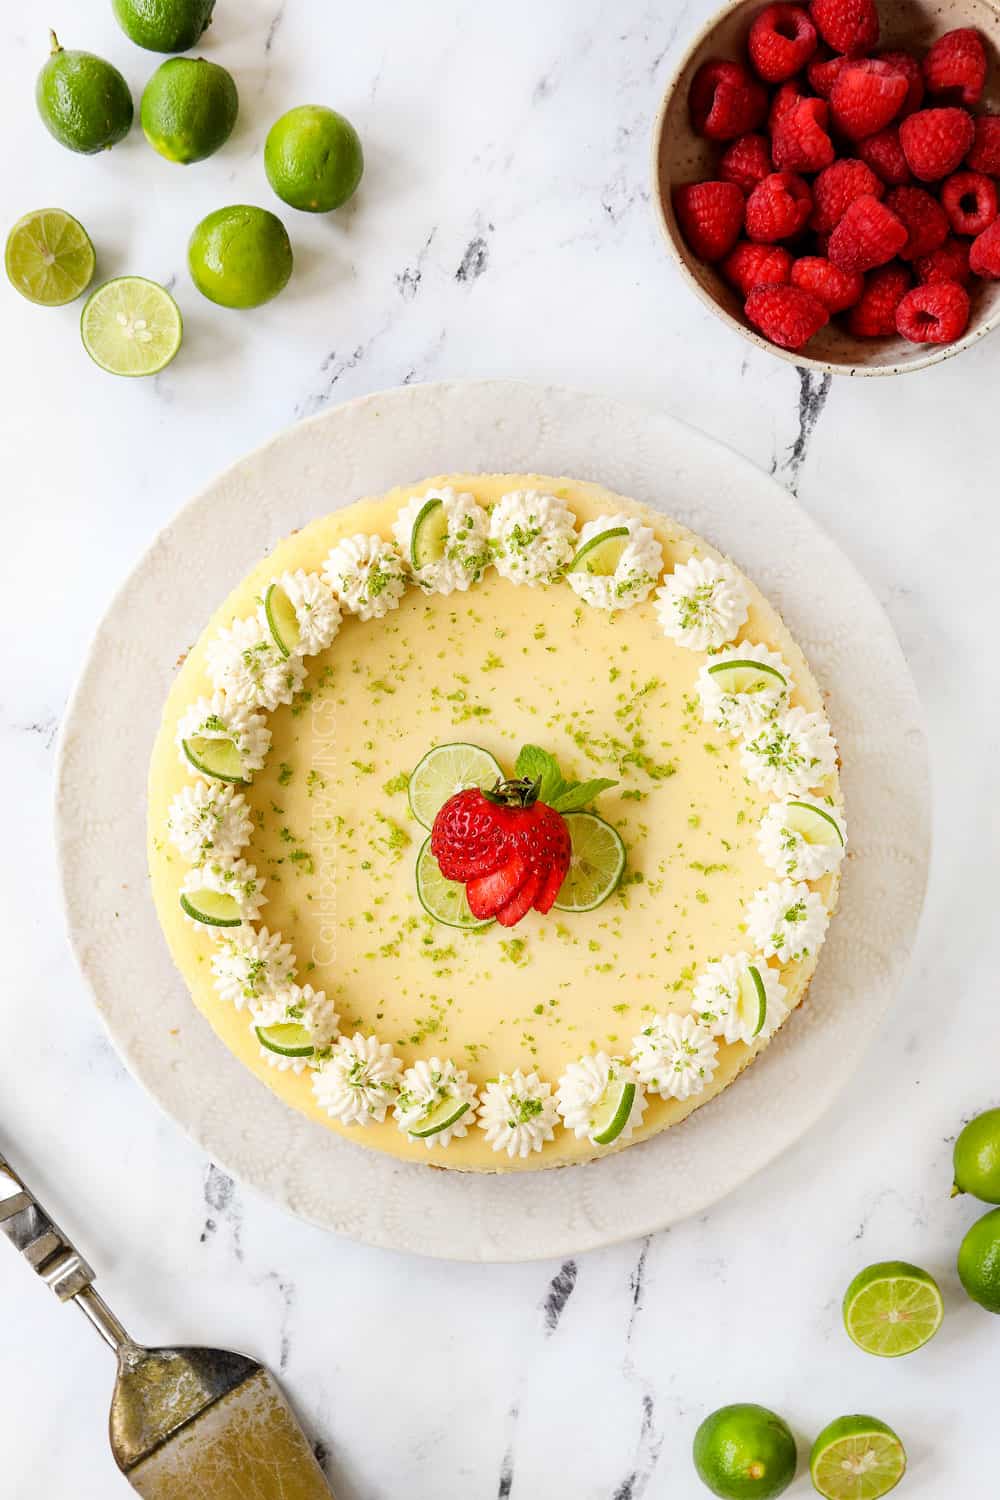
Make Ahead Key Lime Cheesecake with stabilized whipped cream
Key lime cheesecake is the perfect dessert for all your spring and summer festivities because it’s not only fabulous but make ahead friendly! This means you can make the cheesecake 24 hours up to 7 days ahead of time, or freeze for up to two months! No more stress free, last minute hustle desserts!
My goal for this key lime cheesecake recipe was to create a dessert that was 100% make ahead friendly and stress free for Easter/entertaining – that includes the whipped cream. If you make traditional whipped cream and pipe it onto the cheesecake, it will deflate, or even worse, it will be weeping within the hour. This is where miraculous stabilized whipped cream saves the day.
Stabilized whipped cream is heavy cream that has been whipped with sugar and gelatin in order to give it structure but it doesn’t alter the flavor – it’s magic!
To use this stabilized whipped cream, you’ll pipe it onto the cheesecake any time after it’s cooled to room temperature, then refrigerate until ready to serve. The whipped cream will hold its shape long after the last bite of cheesecake is gone (it holds indefinitely). This mean your key lime cheesecake can be 100% ready to serve days before Easter! And bonus, it tastes even better the second day.
Keylime Cheesecake Ingredients
Other than key limes, the rest of the key lime cheesecake recipe ingredients should be easy to come by. You will need:
FOR THE CRUST
Graham crackers: I’ve stuck with honey graham crackers to keep the crust delish but neutral so the key lime cheesecake can really shine. You will need 14 whole graham cracker sheets or a a scant 2 cups crumbs of your favorite cookies/crackers. Butter: Use unsalted butter so we can control the salt in the recipe. Sugar: Granulated sugar please.
GLUTEN FREE CRUST
To make a gluten free crust, simply use your favorite gluten free cookie such as gluten-free graham crackers.
for THE CHEESECAKE
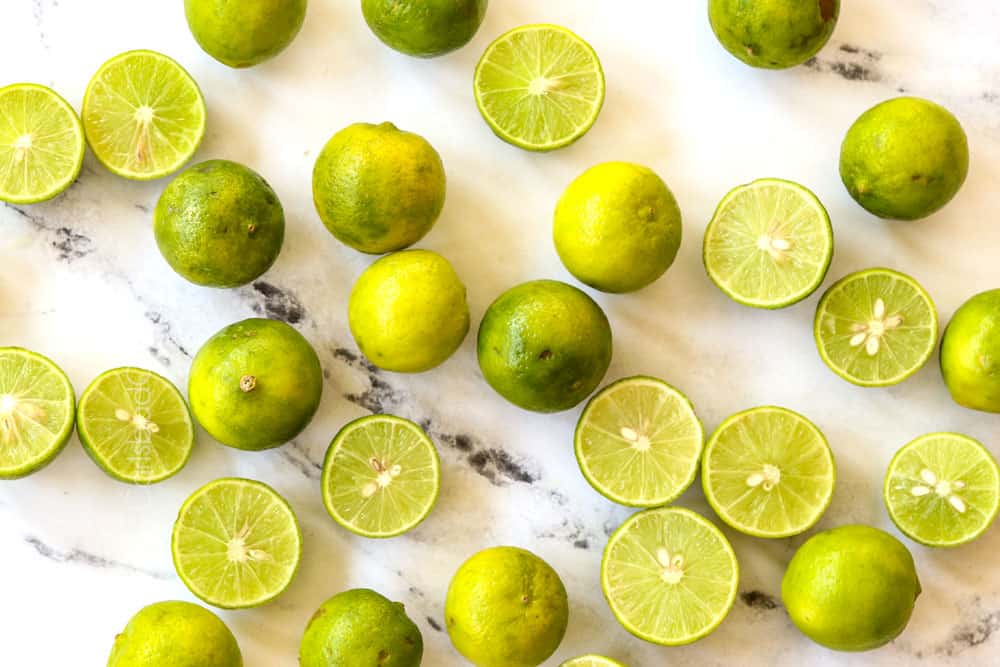
Cream cheese: I used full fat cream cheese but it will also work with less fat, but remember less fat = less flavor and creaminess. Please do NOT use nonfat cream cheese. Sour cream: Full fat please at room temperature. It will make your cheesecake luxuriously creamy and never dry. Sugar: Granulated sugar will sweeten the cheesecake filling while letting the key lime flavor shine. Cornstarch: Helps the filling set. If you don’t have cornstarch, you may substitute it with 3 tablespoons flour. Egg: Use four large eggs and one large egg yolk (so you will need a total of five eggs). The eggs bind the cheesecake together and the extra yolk makes it extra creamy. Take care your eggs are at room temperature. Key lime juice: Bottled or fresh is fine; you may substitute 6 tablespoons regular (Persian) lime juice and 2 tablespoons lemon juice. Key lime zest. You’ll need one teaspoon. If you don’t have key limes, use the zest of a regular lime. Vanilla extract: Use quality extract for best results.
STABILIZED WHIPPED CREAM (OPTIONAL)
You can make stabilized whipped cream or just plain whipped cream by omitting the unflavored gelatin and water.
Heavy cream: Look for “heavy whipping cream” at the grocery store. You must use heavy cream – no other substitutions will work. Take care that your heavy cream is very cold, remove it from the refrigerator just when ready to use. Powdered sugar: Also known as confectioner’s sugar interacts better with the gelatin better than granulated sugar. You also want to use powdered sugar in homemade whipped cream when you’re using more than a couple tablespoons. Vanilla extract: Use quality extract for best results. Unflavored gelatin: Is a common baking ingredient and can be found next to the packages of Jell-O and pudding at your grocery store. It is what makes this “stabilized” whipped cream and not just whipped cream. Water: Cold tap water is used to dissolve the gelatin.
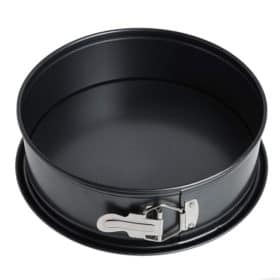
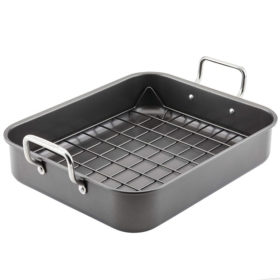
What pans do I need for cheesecake?
Why use a springform pan? You need a 9-inch springform pan to make this key lime cheesecake recipe. You can also use a 10-inch springform pan but be prepared to reduce the baking time. A springform pan is tall enough to hold the cheesecake and most importantly, it springs open and the outside of the pan is removed. This allows you to easily remove the cheesecake and slice it. What if I don’t have a springform pan? If you don’t have a springform pan, you can use a 9×13 baking dish and make key lime cheesecake bars. Bake at 325 for approximately 45-55 minutes. I don’t suggest a cake pan because they are not deep enough for this recipe and the cheesecake will be difficult to remove. Why use a roasting pan? A roasting pan allows you to place the springform inside and pour water around it to create a water bath so the cheesecake doesn’t crack. What if I don’t have a large roasting pan? You can purchase a large, disposable foil pan from the grocery store for just a dollar or so if you don’t have a roasting pan. I suggest double stacking two pans because they are quite flimsy and can buckle under the pressure of the water. Take care to use oven mitts and two hands when removing the pans from the oven so you don’t lose your cheesecake!
What If I Don’t Like Sour Cream?
Sour cream is a secret ingredient I use in all of my cheesecake recipes – you will not be able to taste it! It adds smoothness, creaminess and most importantly, moisture, which prevents your cheesecake from drying out. Trust me when I say adding sour cream to your cheesecake will create the best textured cheesecake you’ve ever tasted!
HOW TO SOFTEN CREAM CHEESE FOR CHEESECAKE
Cream cheese is a key ingredient in this key lime cheesecake recipe so it’s important that it’s super soft in order to produce lump free cheesecake. To soften cream cheese, you have a couple options:
Microwave: This method works great but you must babysit the cream cheese and microwave at small intervals so you don’t overcook/scorch – so proceed with care and caution. Cube cream cheese and transfer to a microwave safe plate. Microwave for 30 seconds then at 15 second intervals, flip/stir cubes and microwave another 15 seconds. Repeat until cream cheese is very soft. Counter + Microwave: Cube cream cheese and transfer it to a microwave safe plate. Microwave for a few 30 seconds then at 15 second intervals, then allow cream cheese to sit at room temperature for 30 minutes to finish softening. This gives it a head start to soften at room temperature without the threat of scorching.
Can I substitute lime juice for key lime juice?
Key lime juice and lime juice taste very similar but key lime juice is ever so slightly more tart, probably not very noticeable in key lime cheesecake. In fact, in an article by Fine Cooking, the author and her horticulture professor husband, devised a side-by-side taste test of key lime pies made with Persian limes and key limes. When they questioned over 20 dinner guests which pie was which, half the guests were fooled. To me, this proves that lime juice is a perfectly acceptable substitute for key lime juice in this recipe. If you want a closer replica of key lime juice, however, I suggest adding a splash of lemon juice. This adds the hint of brighter acidity that regular lime juice is missing – and now no one will be able to tell he difference!
Can I use bottled lime juice for key lime cheesecake?
Yes! You can use bottled key lime juice or traditional lime juice. Obviously, if you have access to key lime juice, I would choose that. Often stores such as Sprouts and Whole Foods will have key lime juice alongside traditional lime juice. I’m a big fan of Nellie & Joe Key West Lime Juice which comes in handy when key lime are not in season.
How do I juice key limes?
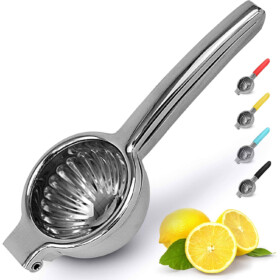
If you have access to fresh key limes, juice them yourself! Key limes are quite small so they take a little longer to juice, maybe 10 minutes or so, but they taste so fresh and fabulous, and again, only 10 minutes. For me, it took 20 key limes to make ½ cup lime juice. I used my citrus press juicer to juice each half and then pressed the lime half down again with my fingers while still in the juicer (because the lime are so small they compact beyond the reach of the juicer so it misses some of the juice). Next, you’ll want to strain the juice through a fine mesh sieve to remove the small seeds.
Lime Cheesecake Variations
I don’t recommend straying too far from the cheesecake recipe as baking is science and can go wrong very quickly, but you can make adjustments to the crust or topping. For the crust, you may substitute with your favorite cookie (scant 2 cups) to create:
shortbread crust vanilla wafer crust vanilla Oreo crust
If using shortbread cookies or vanilla wafer cookies, combine them with the sugar and butter per recipe instructions. If using vanilla Oreos, combine them with sugar but reduce the butter to 4 tablespoons because the Oreo filling creates the same binding effect.
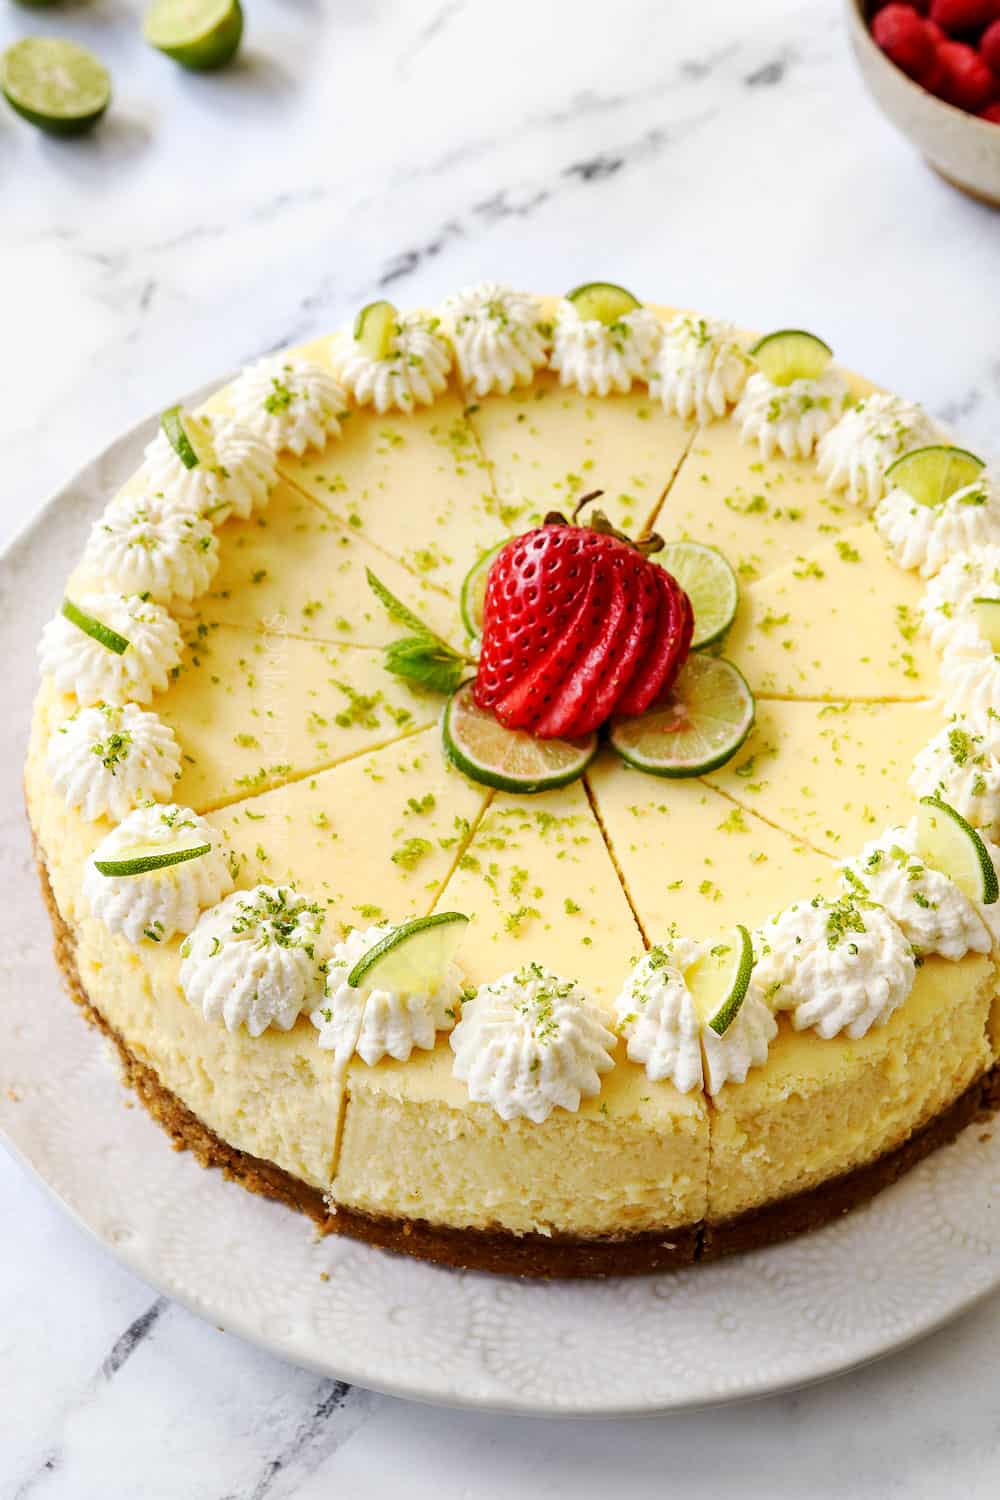
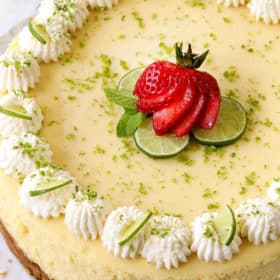
Whipped topping: You can pipe the whipped cream onto just the edges of the cheesecake or you can layer it over the entire top of the cheesecake. Toppings: You can add a few raspberries or strawberries or mix up the flavor profile by covering the entire top with raspberries for a raspberry key lime cheesecake. This would be tasty with a layer of the whipped topping covering the cheesecake as well.
How to make a Key Lime Cheesecake
Now onto the main event – how to make this key lime cheesecake recipe! There are a quite few steps, but each one is very simple and you can make them at different stages/parts of the day if you wish:
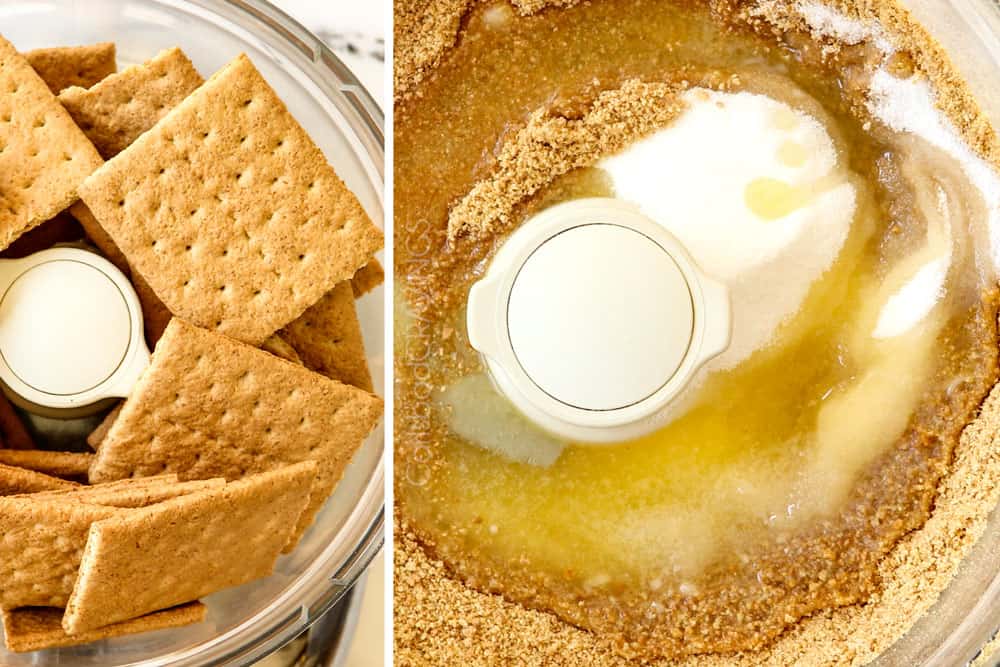
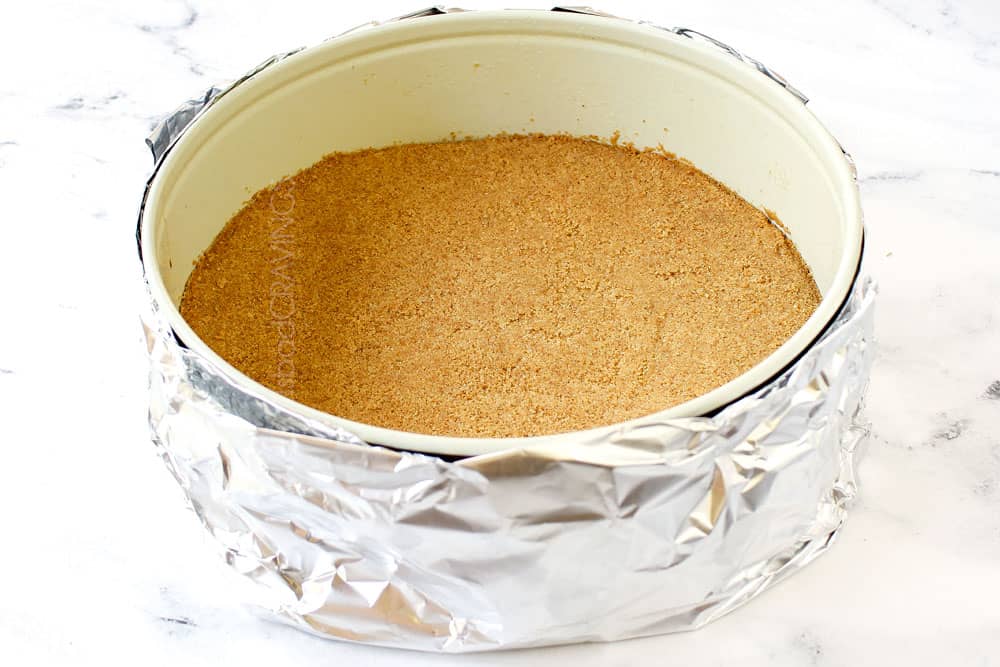
STEP 1: how to make the CRUST
Grind Graham crackers: First, you’ll want to make crumbs by either pulsing the Graham crackers in your food processor or in a sealable bag with a rolling pin/side of a can. You’ll want very finely ground crumbs because they stick together better. Combine crumbs, sugar and butter: If you use your food processor, simply add the sugar and butter directly to the processor and process until the crumbs are moistened. If you don’t have a food processor, add the crumbs, butter and sugar to a bowl and stir until the crumbs are evenly moistened. Make the crust: Transfer the moistened crumbs to your lightly greased springform pan and press firmly into the bottom of the pan in an even layer. You’ll want to use a small bowl or bottom of a measuring cup to really compact the crumbs. This will help the crust stay intact and not crumble. Bake the crust: Bake the crust at 325 degrees F for 10 minutes then allow to cool while you make the cheesecake filling. Baking the crust before adding the cheesecake allows it to seal together and cooling the crust before adding the cheesecake prevents it from becoming soggy.
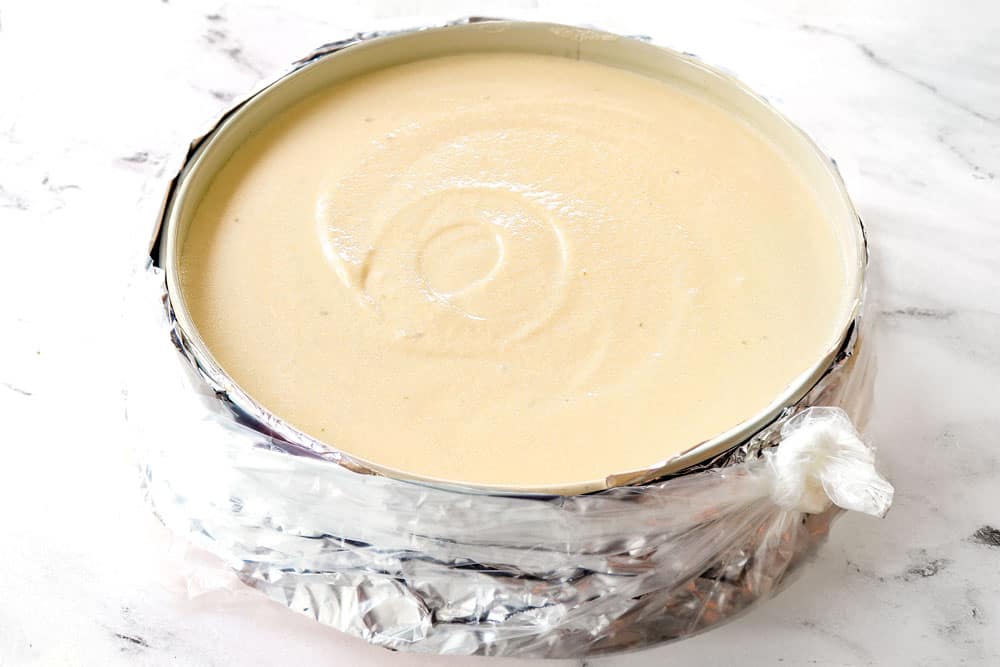
STEP 2: how to MAKE the CHEESECAKE filling
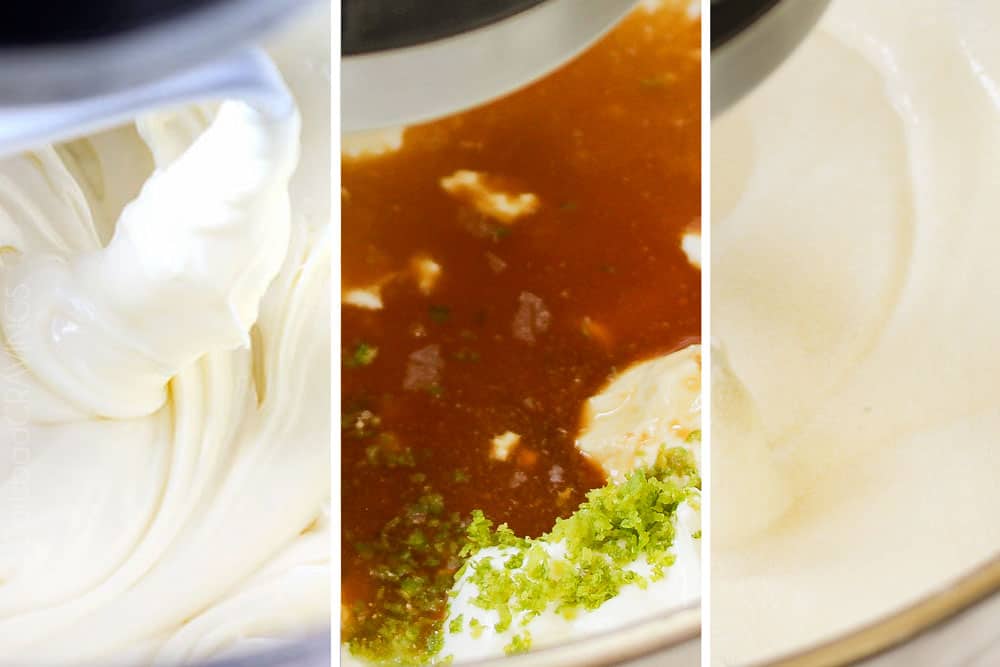
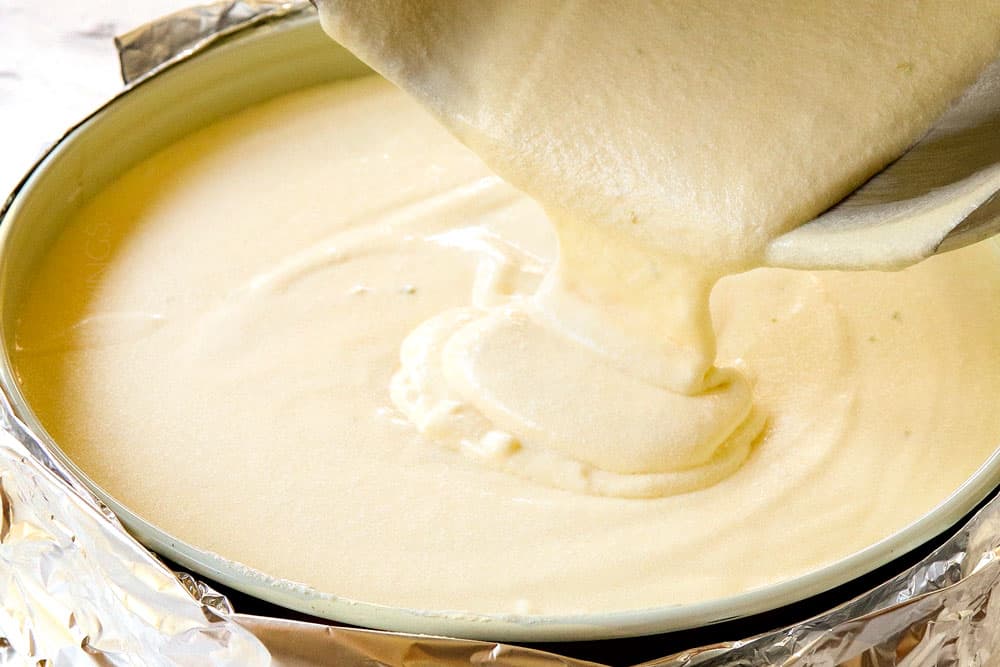
Beat cream cheese and sugar: Making this key lime cheesecake filling is so easy, the mixer literally does all the work! Beat the cream cheese in the bowl of an electric mixer fitted with the paddle attachment for 4 minutes then add the sugar and beat an additional 5 minutes. You don’t want to shortcut the process for the creamiest filling. Add sour cream and key lime juice: Add the sour cream, lime juice, lime zest, vanilla, and beat until blended. Add eggs: Add the eggs one at a time followed by the egg yolk, beating as little as possible because overbeating eggs can cause cracks and the cheesecake to deflate. Assemble the cheesecake: Pour the cheesecake filling onto the cooled crust. Drop pan on counter a few times to get rid of any air bubbles.
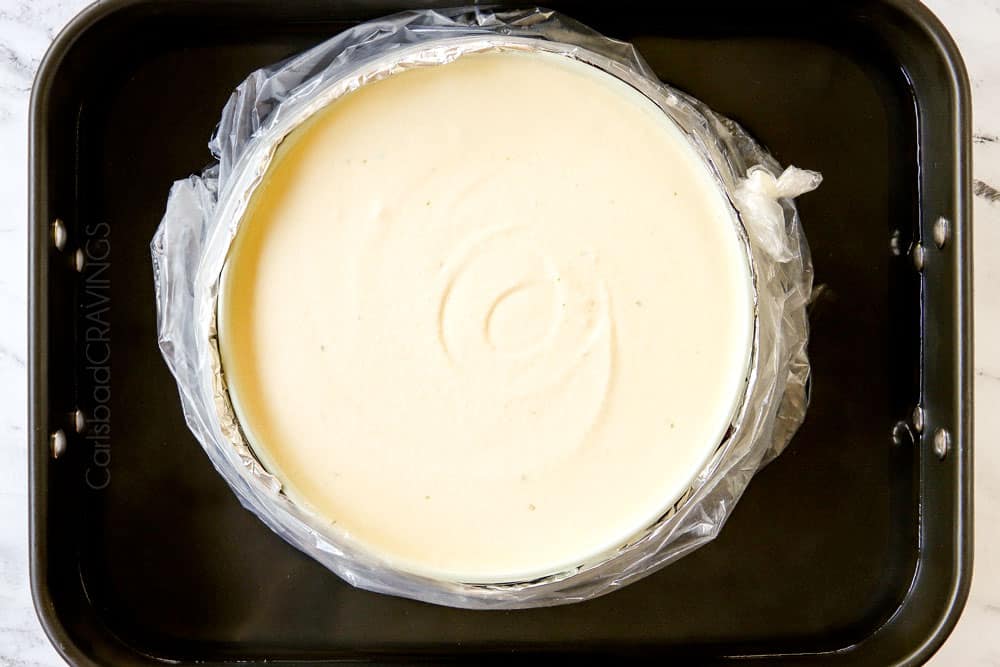
STEP 3: how to make the water bath
Add cheesecake to roasting pan: Place the waterproofed cheesecake in a roasting pan then place the roasting pan in the oven. I like to place the roasting pan in the oven before adding the water bath or else the pan can become heavy and the water can slosh around and threaten your cheesecake while you transfer it. Make water bath: To add the water, you’ll want to use a glass liquid measuring cup or pitcher (something with a spout) to carefully pour in enough boiling water around the cheesecake until it reaches halfway up the side of the springform pan. Make sure to add the water slowly to the corner of the pan so none of it gets on your cheesecake.
STEP 4: how to bake the cheesecake
Bake the cheesecake: Bake the cheesecake at 325 degrees F for 70-85 minutes or until edges are firm and the center 2-3 of the cheesecake is still wobbly. Cooking times can vary, so check at 70 minutes then as needed.
HOW TO KNOW WHEN a CHEESECAKE is done
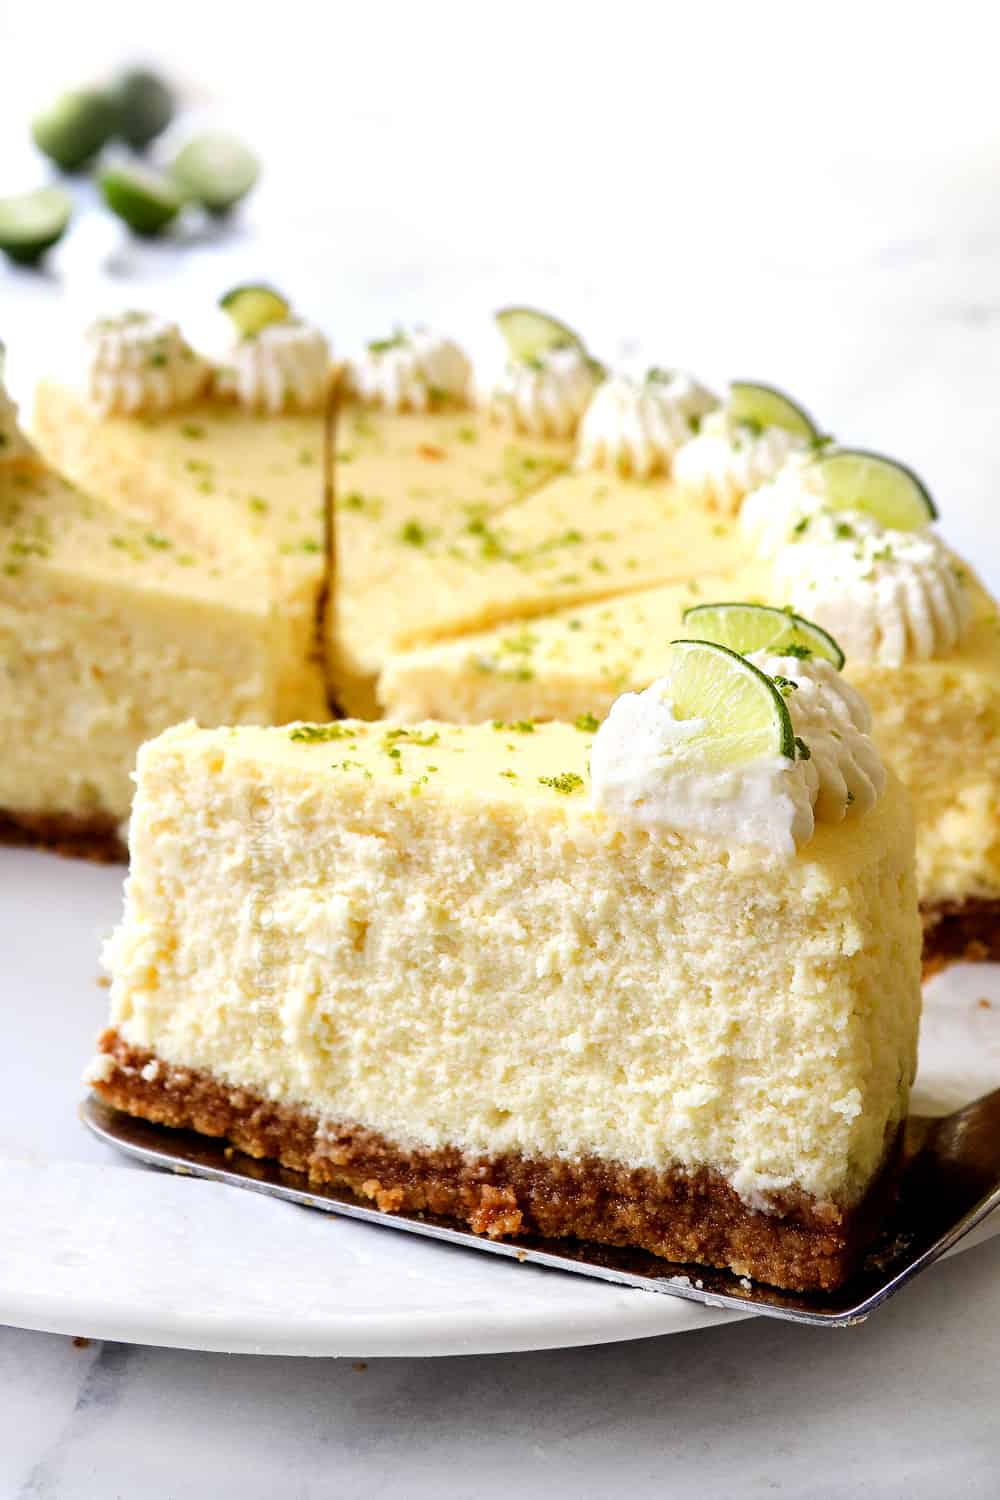
Cheesecake is the creamiest when not overbaked. You don’t want to bake the cheesecake until completely firm in the middle or it will be overcooked by the time it cools, resulting in dry, heavy, far less creamy cheesecake. Instead, bake the cheesecake until the outside is firm and the center of the cheesecake barely jiggles. What does this look like? Gently shake the cheesecake wearing oven mitts so you don’t burn yourself. If the outside of the cheesecake is firm and only a small 2-3-inch circle in the center jiggles slightly, it’s done. If the jiggling circle is larger than a few inches, then bake on. The baking time can vary due to the differences in ovens, baking pans, beating times, etc., so make sure to check the cheesecake 70 minutes then add additional time as needed.
STEP 5: how to cool the cheesecake
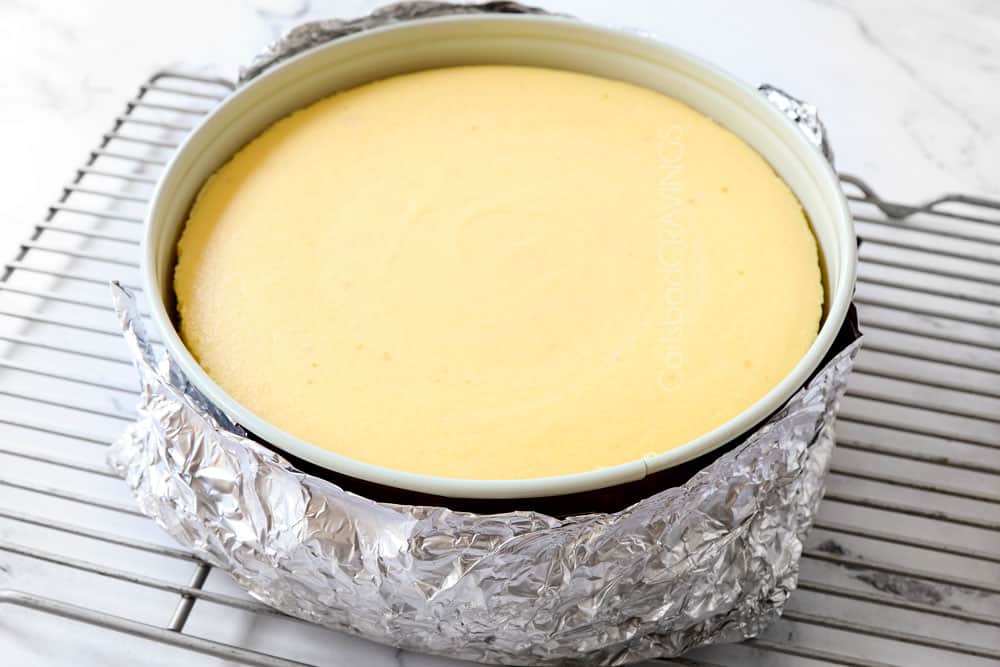
Cool cheesecake in the oven: Turn off your oven and crack open the oven door. Allow cheesecake to cool in the oven for 60 minutes. Cool cheesecake on the counter: Remove the cheesecake from the oven and the water bath and place on a cooling rack on the counter. Loosen cheesecake: Fill a large glass with hot water. Add a knife with a thin blade until hot; alternatively run a knife under hot water until very hot, or hold knife in the hot water bath water. Wipe the knife dry and run the hot knife along the edges of the cheesecake to loosen it from the pan. This helps prevent cracking so the cheesecake doesn’t stick to the sides of the pan as it slightly constricts. Unclamp the springform pan. Cool cheesecake completely: Continue to cool the cheesecake for 2-3 hours on the counter or until the cheesecake is completely cooled. Refrigerate overnight: Cover the cheesecake with foil or transfer to a cake caddy with a lid and chill in the refrigerator overnight, but best if 24 hours.
STEP 6: how to make WHIPPED CREAM
You can make stabilized whipped cream or traditional whipped cream. Making stabilized whipped cream is the same process of traditional whipped cream, just with the easy added steps of dissolving the gelatin in water and microwaving it.
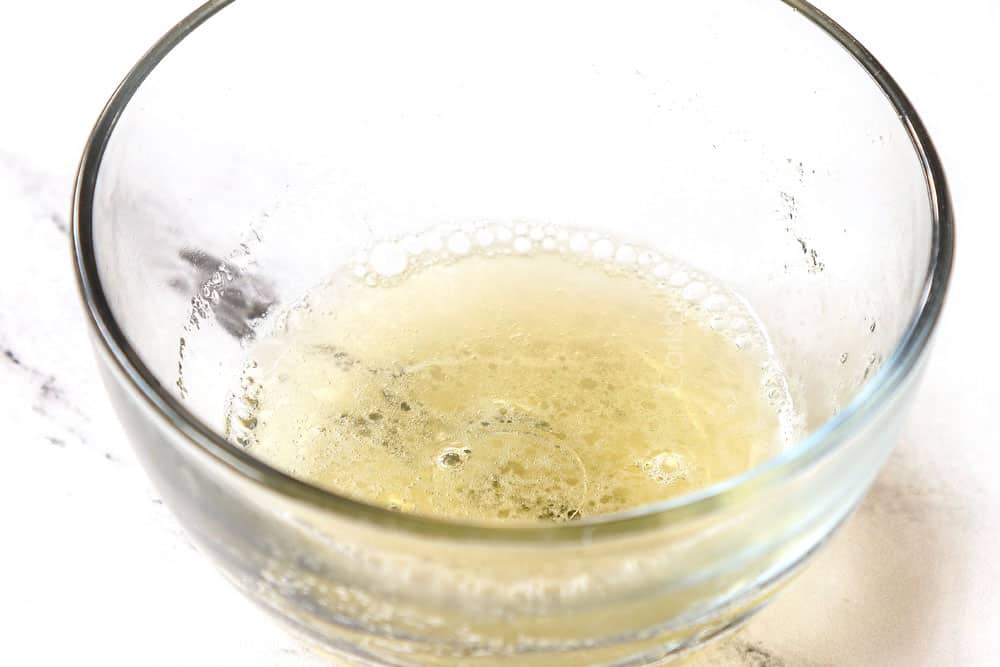
Optional step for stabilized whipped cream: Add unflavored gelatin to a microwave safe bowl then pour the cold water over top; let stand for 5 minutes. Transfer the gelatin mixture to the microwave and microwave for 10 seconds. Stir the mixture, then set aside to cool.
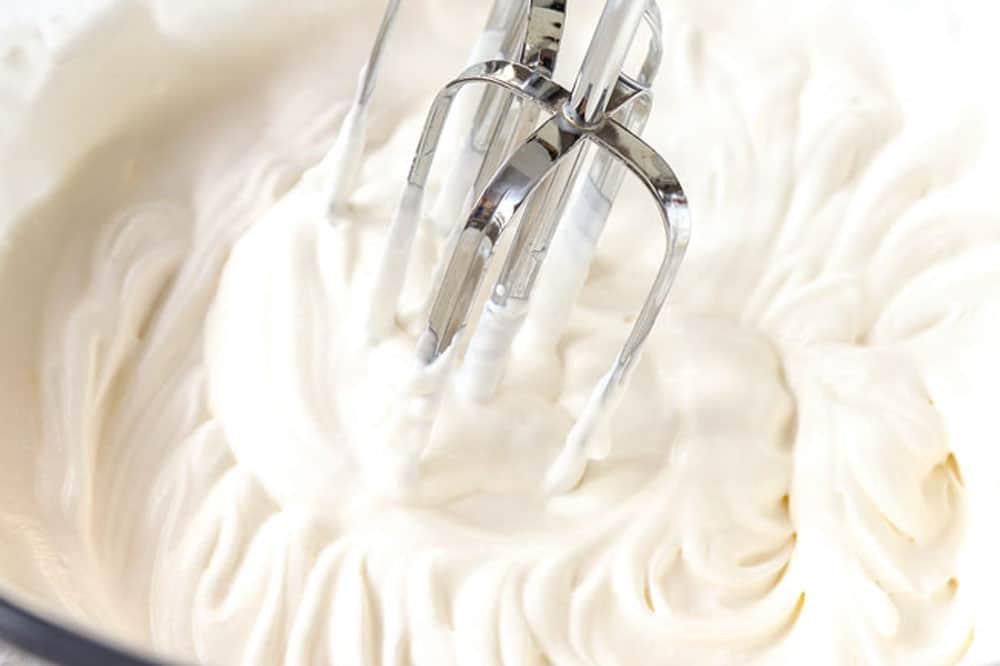
Whip cream to soft peaks: While you’re waiting for the gelatin to cool, you’ll mix heavy cream, sugar and vanilla in a bowl until it thickens and forms soft peaks (the whipped cream folds over when you lift the beaters out of the bowl). Add gelatin: Once you’ve reached the soft peak stage, you’ll slowly pour the cooled gelatin mixture in as you’re mixing the whipped cream and continue to mix until the whipped cream forms stiff peaks (the whipped cream stands straight up and doesn’t fold over when you lift the beaters out of the bowl). Add topping: You can pipe the stabilized whipped cream onto the room temperature key lime cheesecake before you pop it into the fridge or any time after that. The beauty of stabilized whipped cream is it will hold its shape indefinitely. If using regular whipped cream, top just before serving.
STEP 7: how to SLICE CHEESECAKE
Use a hot knife: Using a hot knife is crucial for clean cuts as the hot knife glides right through the cheesecake. Fill a large glass with hot water, then dip the knife in the hot water before each cut. Wipe knife clean with a paper towel after each cut, then repeat. DEVOUR!
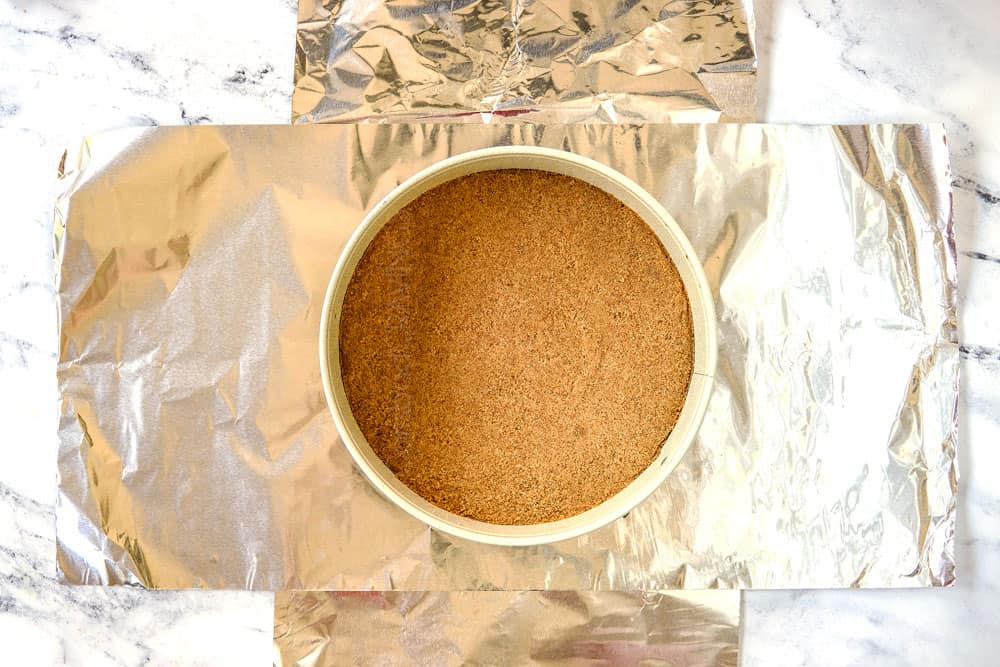
HOW TO WATER PROOF CHEESECAKE so it doesn’t leak!
The springform pan needs to be waterproofed so water from the water bath doesn’t seep through the bottom of the springform pan and soak into the cheesecake. Just surrounding the pan with foil, however, is not foolproof. If you use my two-step waterproofing technique, however, I guarantee you won’t have any leaks! If you combine these two steps, your key lime cheesecake will be 100% leak proof – winning! If you don’t add the liner in step 2, then I suggest 2 more layers of foil around your springform pan.
Tips for making Lime Cheesecake
Here are a few more helpful techniques that ensure the perfect cheesecake every time:
Use a springform pan: A cake pan is not deep enough and won’t allow you to easily remove the cheesecake. Line the pan. Lining the base of the springform pan with parchment paper allows you to easily slide the cheesecake onto a platter, otherwise it’s very hard to transfer. Use a food processor. The easiest way to make graham cracker crumbs is in your food processor – it literally takes seconds! If you don’t have a food processor, you can crush the crackers in a plastic bag with a rolling pin or side of a can. Use fine crumbs. The finer the crumbs, the more cohesive the crust and less crumbly it will be when baked. Press crumbs firmly into pan. Use the bottom of a cup or measuring cup to get the crust layer nice and compact so it doesn’t crumble later. Use soft cream cheese. The cream cheese should be soft enough that you can stick your finger in it. If it is not soft enough, then it will yield lumpy cheesecake (see methods to soften cream cheese above). Beat cream cheese until fluffy. The most important part of making a creamy, smooth key lime cheesecake is to beat the cream cheese and the sugar until light and fluffy with your paddle attachment – about 4-5 minutes each. This can seem like a long time, so set your timer and don’t stop early! Don’t rush the chilling process. Chilling the cheesecake allows the flavors to build and marry. You may serve the key lime cheesecakes as little as 12 hours after chilling, but I suggest allowing it to chill for a full 24 hours for the best flavor – you will be amazed at the difference it makes! Use the stabilized whipped cream. If you want to prep the key lime cheesecake recipe 100% in advance, stabilized whipped cream is the way to go. You can pipe on the whipped cream days ahead of time them just pull out your gorgeous cheesecake when you’re ready to serve. Chill bowl and beaters. It’s best to chill your bowl and beaters for about 15 minutes before making the whipped cream. It’s not essential, but chilling helps your whipped cream thicken more quickly and increases the volume. Chill gelatin. Make sure to let your gelatin cool slightly before mixing it into the whipped cream, you don’t want it to be too hot when you add it to the bowl. On the opposite end of the spectrum, don’t wait to long or the gelatin can harden. If it has hardened, microwave it again for 10 seconds. Don’t overwhip whipped cream. Stop mixing as soon as stiff peaks form because over-whipped cream becomes grainy. If you’ve accidently reached the grainy stage, you can try and salvage the whipped creamy by adding a few tablespoons of fresh cream and gently mixing it in by hand using a wire whisk. If the whipped cream is separated, then unfortunately it can’t be fixed.
HOW DO I KEEP MY CHEESECAKE FROM CRACKING?
If you follow this key lime cheesecake recipe, your cheesecake will not crack. Here are the rules to follow for success:
Use a water bath: As previously mentioned, the hot water insulates the outer edges of the cheesecake, so the edges don’t bake faster than the middle. Room temperature ingredients: Room temperature eggs, sour cream and softened cream cheese allow them to mix more easily which means you’re less likely to overbeat the eggs which causes cracking (more on that below). To quickly bring eggs to room temperature: Fill a bowl with warm water (not hot) and add eggs and let sit 10-20 minutes. Don’t overbeat eggs: Eggs trap air, which can rise up and cause cracks and/or the cheesecake to deflate, so mix the eggs/cheesecake filling as little as possible once they’re added. Grease the pan: Spraying the entire spring form pan with cooking spray ensures the cheesecake doesn’t stick to the sides of the pan which can cause cracks as it constricts while baking. Don’t peak! It is paramount that you don’t open the oven while your cheesecake is cooking before 70 minutes to prevent cracking. Opening the door causes drafts which dramatically lowers the temperature – the culprit of large cracks and a sinking center. Don’t overbake: Overbaking the cheesecake causes the filling to shrink and crack. You want the edges to be firm but the center to wobble slightly when shaken. If there is no wiggle, the cheesecake is overbaked and likely to crack. Cool gradually: Sudden changes in temperature can cause cracks so allow the cheesecake to cool down gradually first in in the oven and then on the counter before placing it in the refrigerator.
Making this Key Lime Pie Cheesecake in advance
You can completely assemble, bake and chill the key lime cheesecake ahead of time or prep different elements of the recipe ahead of time, here’s how:
Crust: Bake, cool then cover with foil 24 hours ahead of filling. No need to refrigerate. Cheesecake: Beat the cheesecake ingredients together, cover and chill for up to 48 hours. Give the cheesecake a whisk before layering onto the cooled crust just before baking. Stabilized whipped cream: Can be whipped and added to a piping bag 1-2 days before using and stored in the refrigerator.
Storing Lime Cheesecake
This key lime cheesecake should be covered and stored in the refrigerator. It is at its prime 24-48 hours after making, but is good for up to 7 days. I like to use a cake container to cover the cheesecake so I can pipe on the whipped cream and cover it without smooshing the topping. If you don’t have a cake container, you can use a large inverted bowl or tent with foil.
HOW TO FREEZE key lime CHEESECAKE
Cool cheesecake completely and refrigerate for at least 8 hours. Place chilled cheesecake on a baking pan and place, uncovered, in the freezer. Freeze until firm. Remove from the freezer then wrap cheesecake in plastic wrap followed by heavy duty aluminum foil and finally in a large heavy duty freezer bag. Freeze for up to 2 months. To thaw, remove key lime cheesecake from the freezer to the refrigerator. Let thaw overnight. Top with whipped cream and serve.
LOOKING FOR MORE EASY CHEESECAKE RECIPES?
Pumpkin Cheesecake Key Lime Cheesecake Sugar Cookie Cups Raspberry Chocolate Cheesecake Eggnog Cranberry Cheesecake German Chocolate Cheesecake Blueberry Cheesecake Strawberry Cheesecake
Tag @CarlsbadCravings and Use #CarlsbadCravngs Leave a Review, I Always Love Hearing From You!