Many of us have been facing a new level of unpredictability this year. For those of us who have kids, it’s hard to keep up with the hustle and bustle of at-home school while preparing a home-cooked dinner that everyone will enjoy. So, I’ve set out to instill some control with Japanese-style meal prep. This meal-prepping strategy has saved my life and been incredibly helpful, so I can’t wait to share my tips and tricks with you!
Why Japanese-Style Meal Prep?
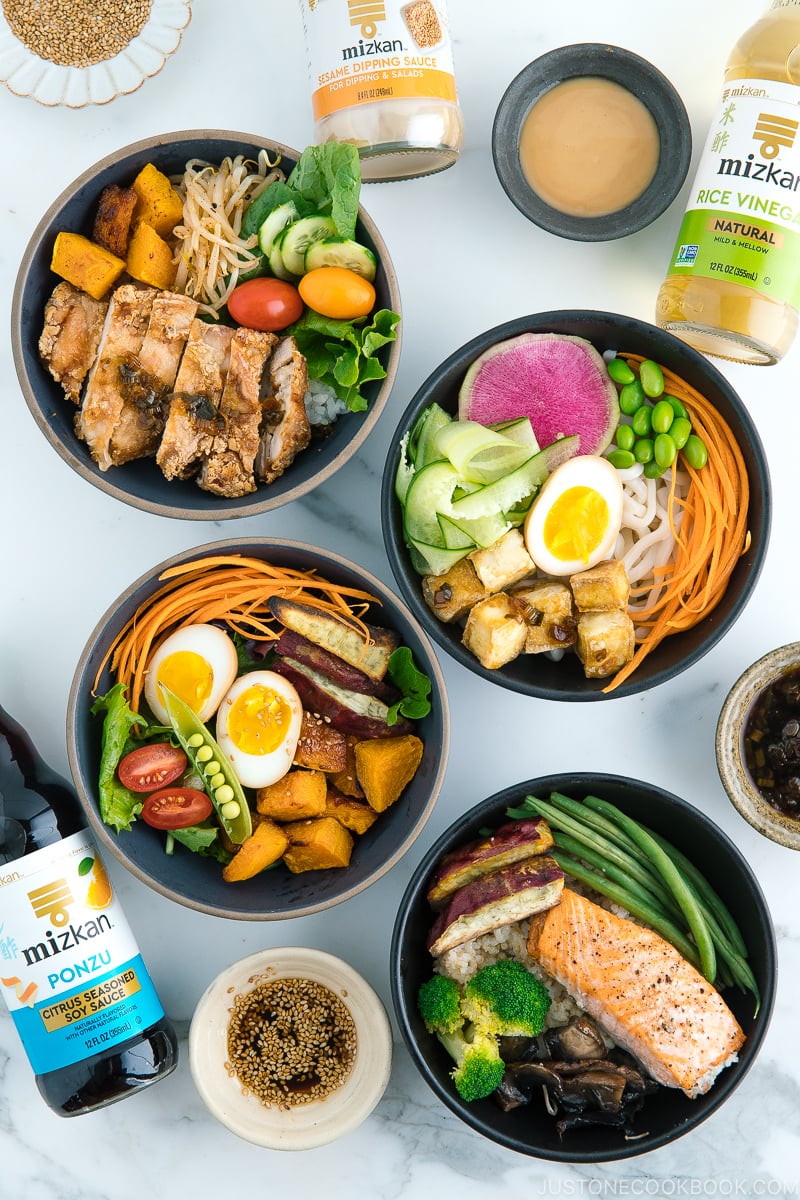
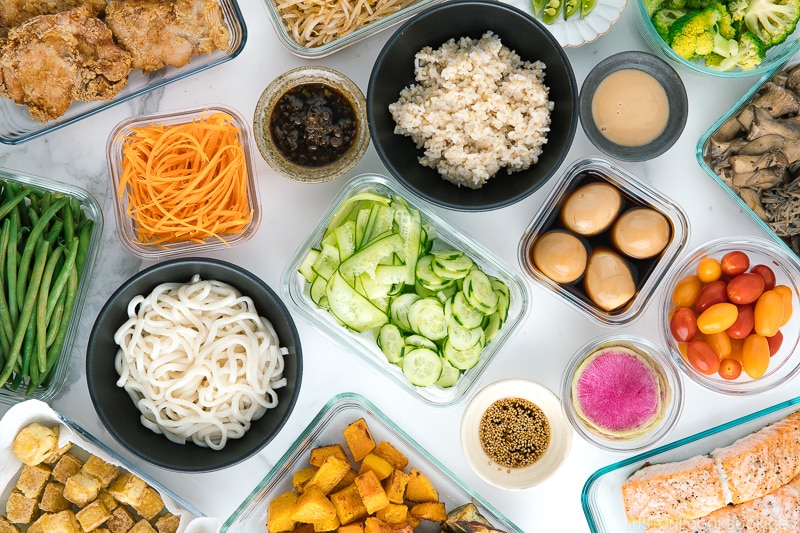
Meal prepping is the process of making food in advance and packing it into containers. When you meal prep, you set yourself up for an easier week ahead. The Japanese-Style Meal Prep, or Tsukurioki (作り置き) or Jobisai (常備菜) as we call it, is slightly different from the typical meal prep; you still prep/cook ahead of time, but you keep each ingredient and dish in separate containers. For dinner later that week, you can pick and choose from the made-ahead dishes and put them together into a meal! That’s where my DIY Bowls come in. All you need to do is assemble your own DIY bowls with the ingredients you have already prepared. The best part about it? Your kids can pitch in by adding toppings to their own meals. It’s a customizable experience the whole family will love.
Why You’ll Love Meal Prep DIY Bowls
Construct your bowl based on what you feel like eating that day. Great for students/working professionals who don’t want to cook after a long day at school/work, even if virtual. Ideal for family members with different dietary needs. Making a different bowl every day is refreshing and fun. Nobody needs to eat the same food every day. Keep the seasonings on the food simple and minimal, so you can enjoy different sauces to go with the food. No more “What should I cook for dinner?”
Up Your DIY Bowl Game with These Sauces
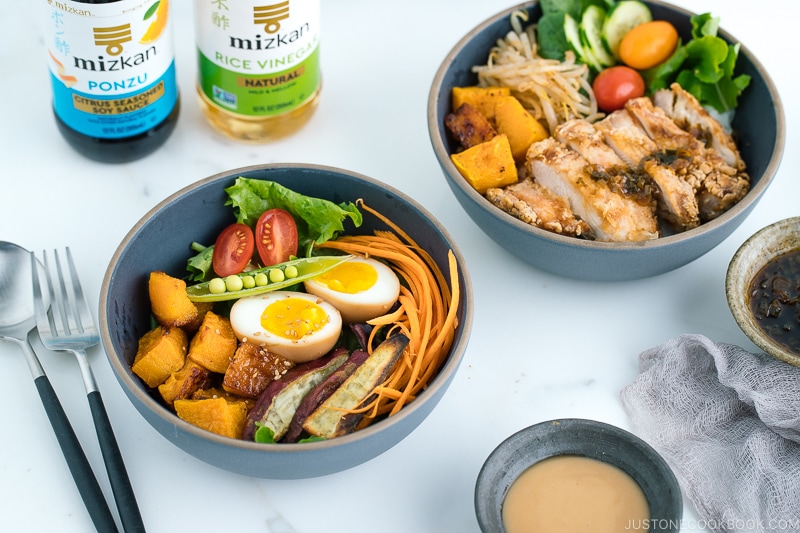
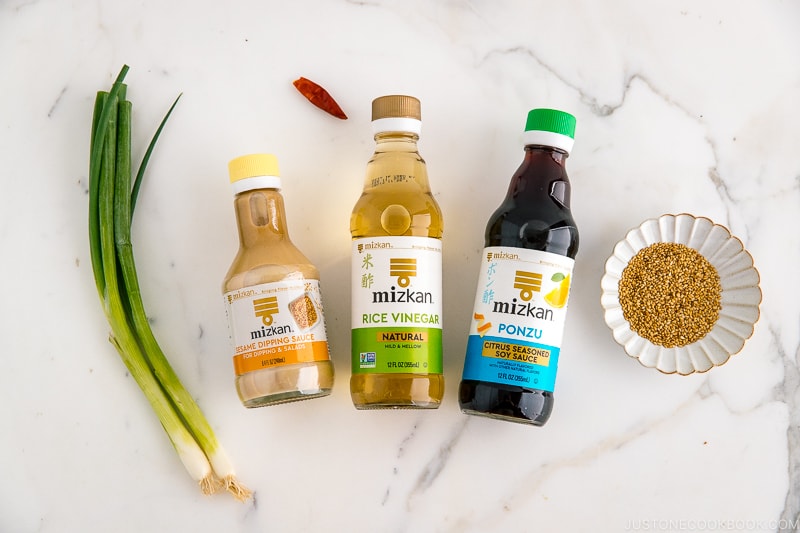
Because we keep the components of the bowl as simple as possible, you’ll want to have several sauces to elevate your meal. Today I’ll share three of my favorite sauces: Sweet and Tangy Scallion Soy Sauce, Ponzu Sesame Sauce, and Mizkan Sesame Dipping Sauce.
Whenever I make vinegar-based sauces for Japanese dishes, I exclusively use Mizkan Natural Rice Vinegar and Mizkan Ponzu Citrus Seasoned Soy Sauce. Using Mizkan Vinegars and Sauces while cooking at home is a simple way to integrate Japanese tradition, culture, and flavor into any family mealtime. Genuinely crafted with real organic ingredients, the rice vinegar has a mild tang, refreshing aroma, and the right amount of acidity, and it does not overpower the dish. It is the perfect accent to any meal and makes it easy to create authentic recipes at home. If you wish to replicate the uniquely delicious flavor of Japanese cooking, I cannot emphasize the importance of getting quality rice vinegar. It is one of the 6 must-have Japanese condiments after all! Whether you’re looking to bring the flavor of Japan to your table with a modern recipe, like this Meal Prep DIY Bowl, or try your hand at a more traditional meal, I always recommend Mizkan.
How to Meal Prep DIY Bowls
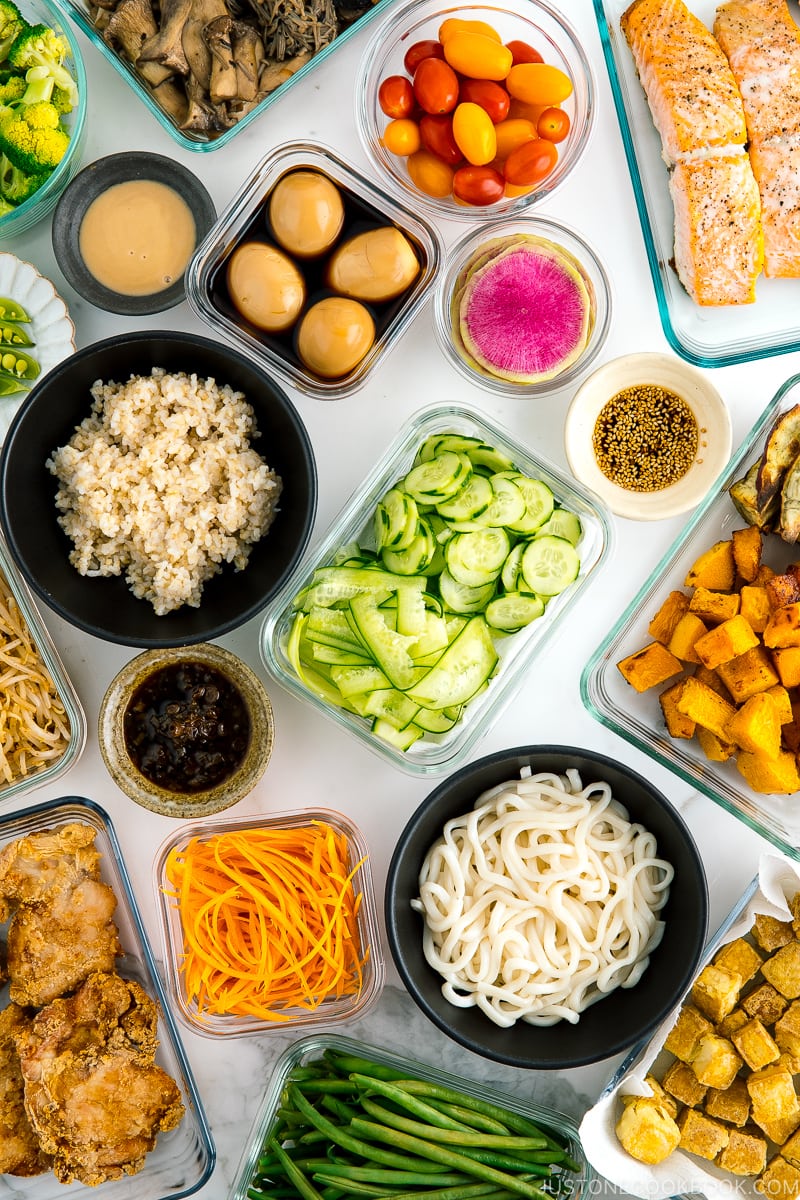
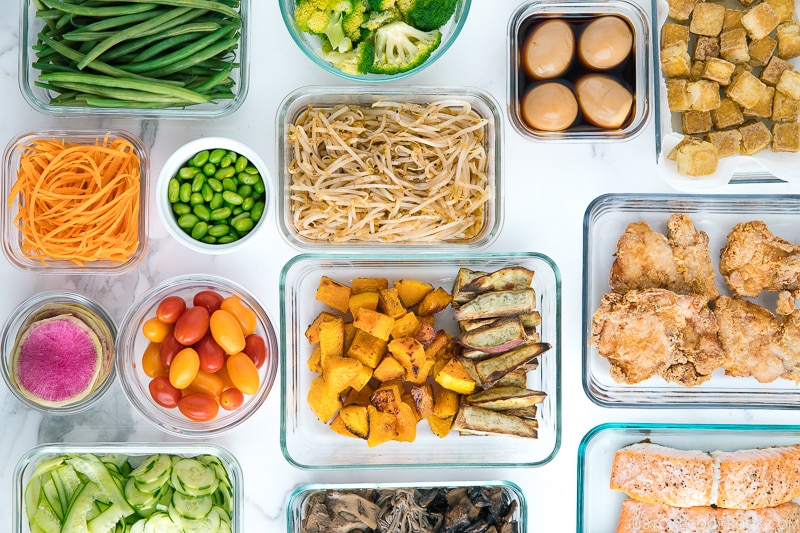
Step 1: Choose Your Customizable Foods
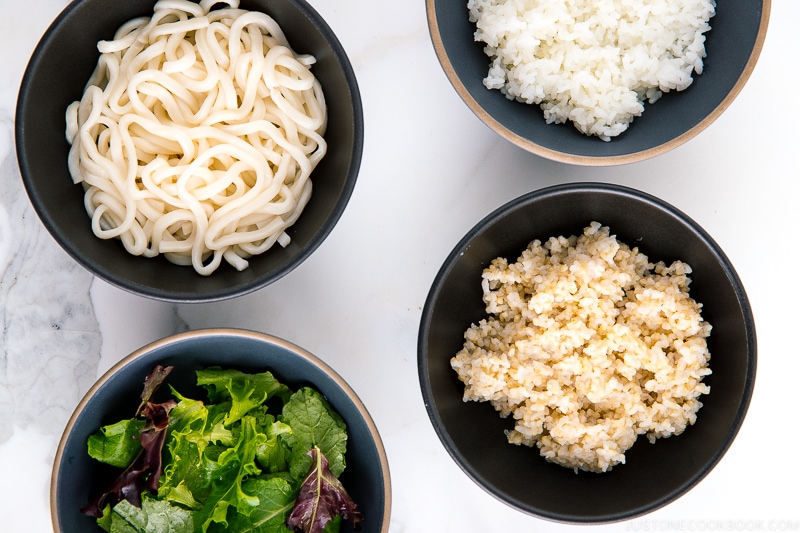
① PICK CARBS (Base)
What I made:
Brown Rice Leafy Greens [no-carb] Udon noodles White Rice
Alternative Options:
Cauliflower rice [low carb] Lentils Pasta Potatoes Quinoa Soba Noodles Sweet potatoes Wild rice
Tip: Carbs go at the bottom of the bowl. If you’re not sure, start with rice or something you’re comfortable making with your eyes closed.
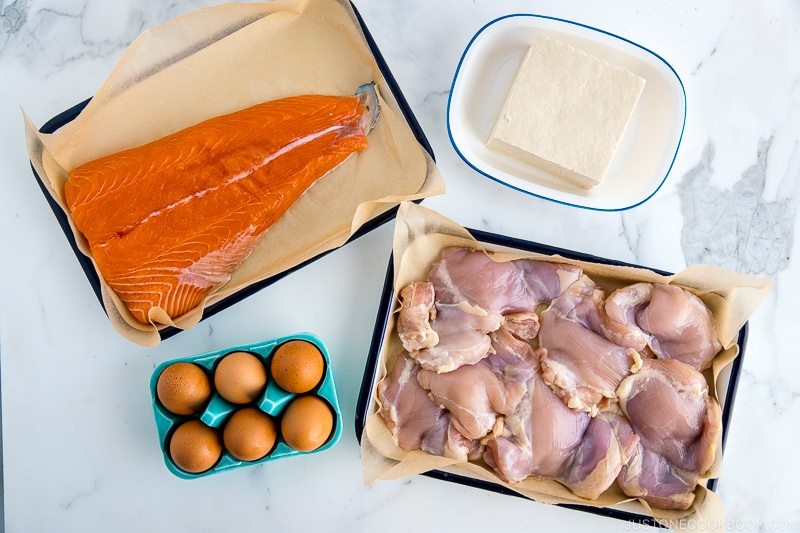
② PICK PROTEINS (Topping 1)
What I Made:
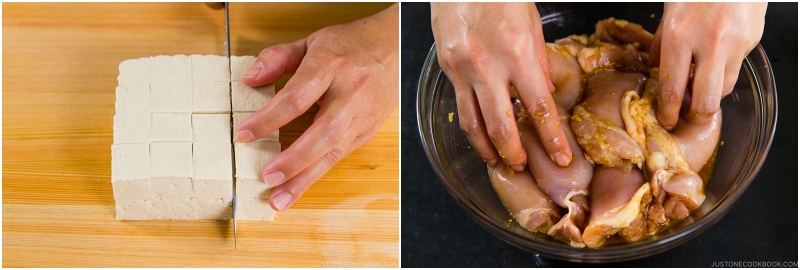
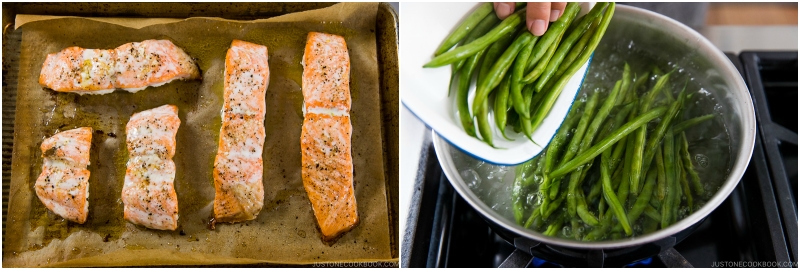
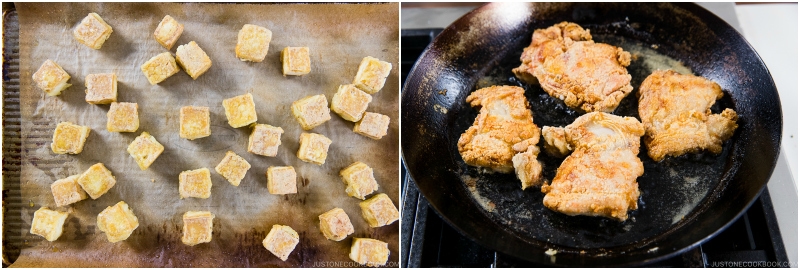
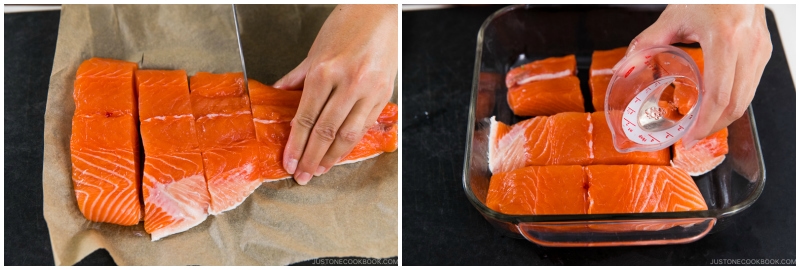
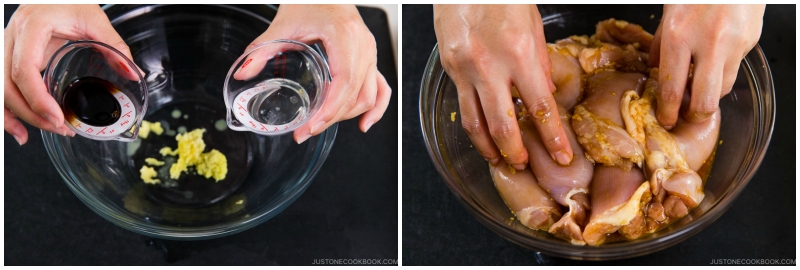
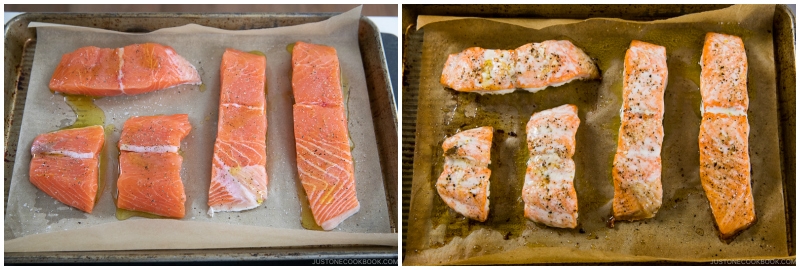
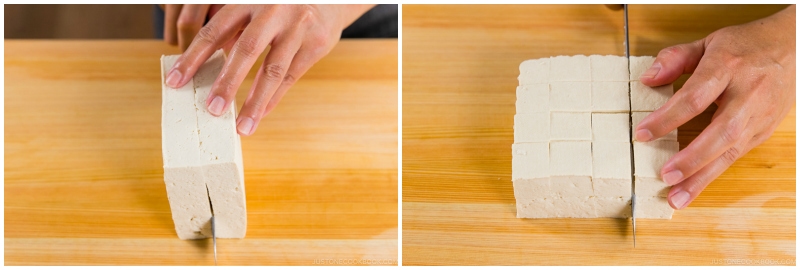
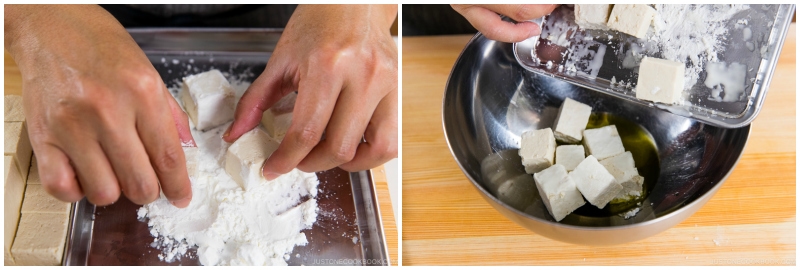
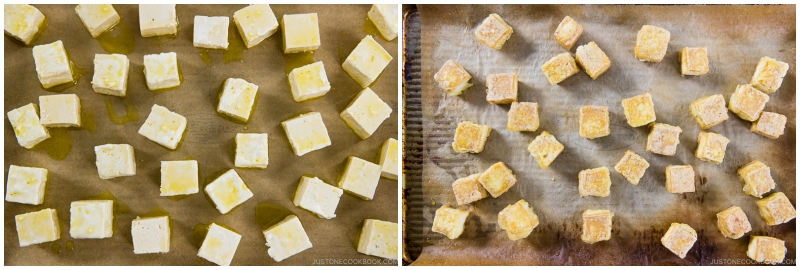
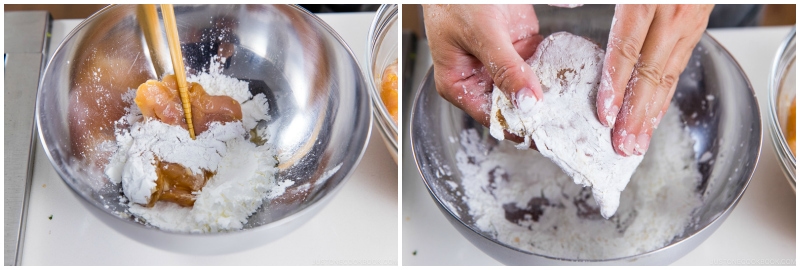
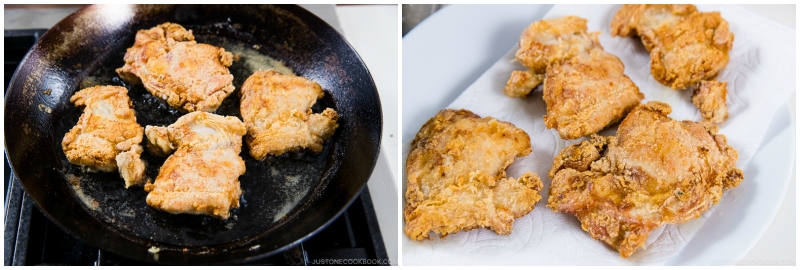
Chicken Egg – hard/soft-boiled, onsen tamago, ramen egg Salmon Tofu
Alternative Options:
Beef Pork Shrimp Tempeh
Tip: The protein is easily swappable.
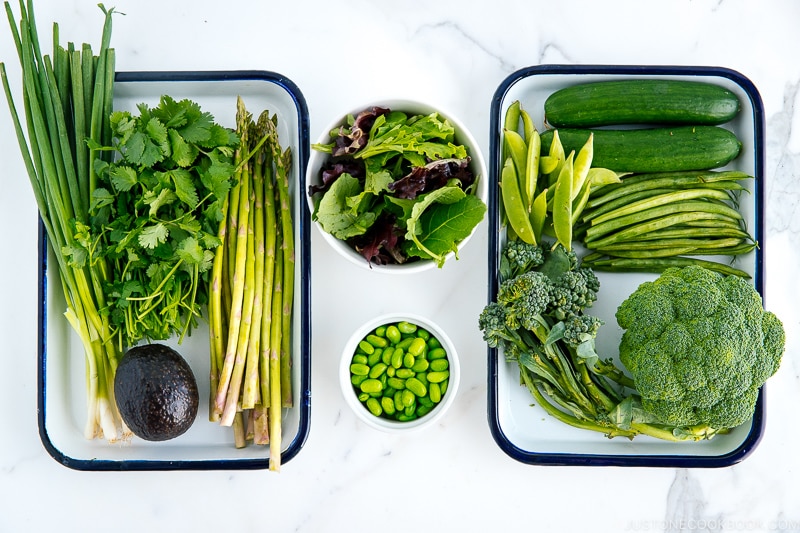
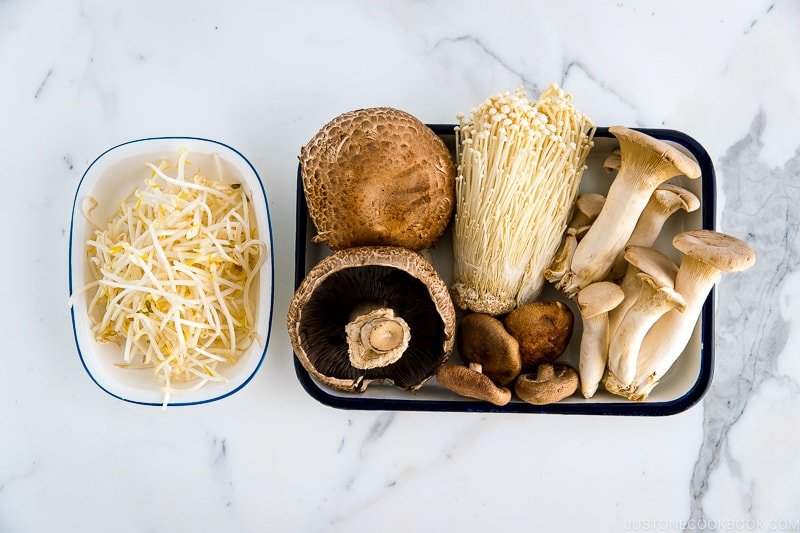
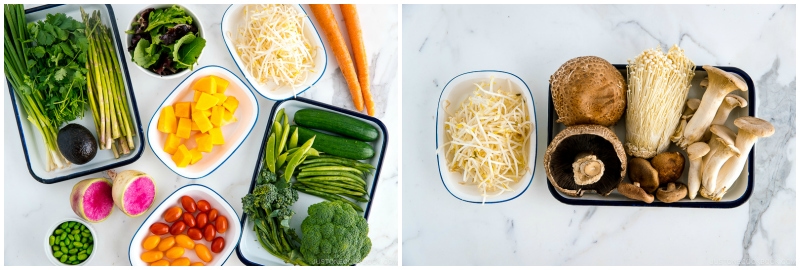
③ PICK VEGETABLES & MUSHROOMS (Topping 2)
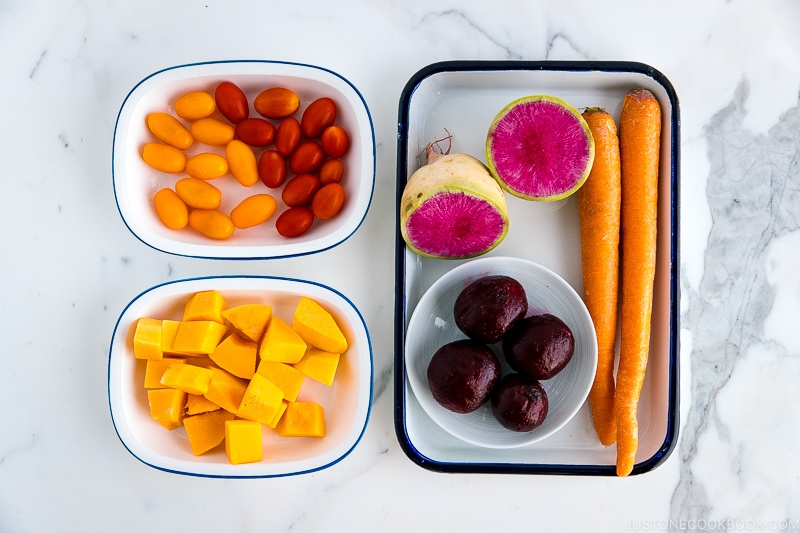
Red/Orange/Yellow What I Made:
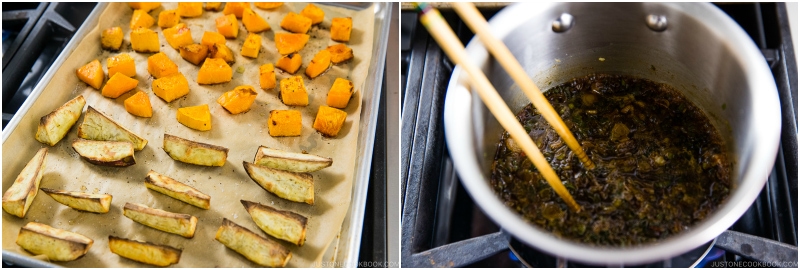
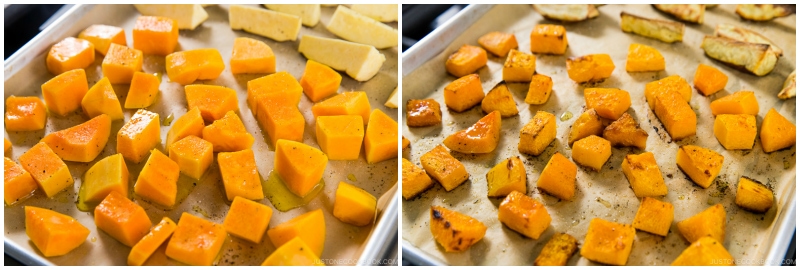
Butternut squash [cooked] – cubes, roasted Carrot [raw/cooked] – julienned or rounds, blanched/sauteed/roasted Japanese Sweet Potatoes – boiled/roasted Tomatoes/Cherry tomatoes [raw] – wedges (Watermelon) radish [raw] – thinly-sliced
Alternative Options:
Beets [cooked] – sliced, boiled/roasted Bell pepper [raw/cooked] – thin strips, roasted/stir-fried Corn [cooked] – boiled/roasted Kabocha squash [cooked] – thin slices, pan-fried/roasted
Green What I Made:
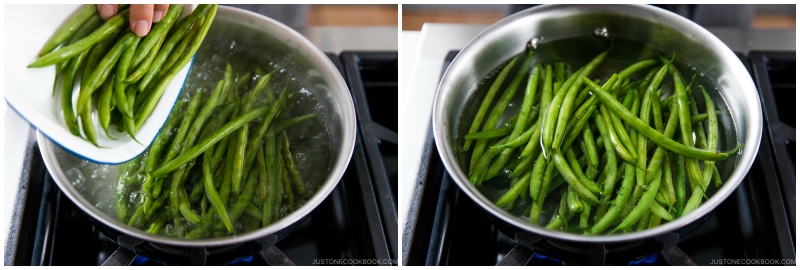
Broccoli florettes [raw/cooked] – blanched/roasted/stir-fried Cucumber [raw] – thinly sliced Edamame [cooked] – shucked Green beans [cooked] – blanched, roasted/sauteed Leafy greens [raw] – shredded/hand-torn Snap/snow peas [raw/cooked] – blanched/sauteed/stir-fried
Alternative Options:
Asparagus [cooked] – sliced, roasted/sauteed/stir-fried Avocado [raw] – cubed/sliced (Baby) spinach [raw/cooked] – cut, blanched/sauteed/stir-fried Bell pepper [raw/cooked] – thin strips, roasted/stir-fried Bok choy [raw/cooked] – halved/quartered, blanched/stir-fried Broccolini [cooked] – stir-fried/roasted Brussel sprout [cooked] – stir-fried/roasted Cabbage (red, regular, napa) [raw/cooked] – shredded, stir-fried Chard [cooked] – stir-fried/roasted Cilantro – destemmed Green onion – sliced Kale [raw/cooked] – chopped, roasted/sauteed Microgreens [raw] – hand-torn Zucchini [cooked] – thin strips, roasted/pan-fried
Brown/Black/White What I Made:
Bean sprout [cooked] – blanched/sauteed
Alternative Options:
Mushrooms (button, cremini, enoki, king oyster, portobello, shiitake, shimeji) [raw/cooked] – sliced, roasted/sauteed
Tip: This is where you get to play with colors. The key is to balance the colors and textures so you won’t end up with mostly one color/texture.
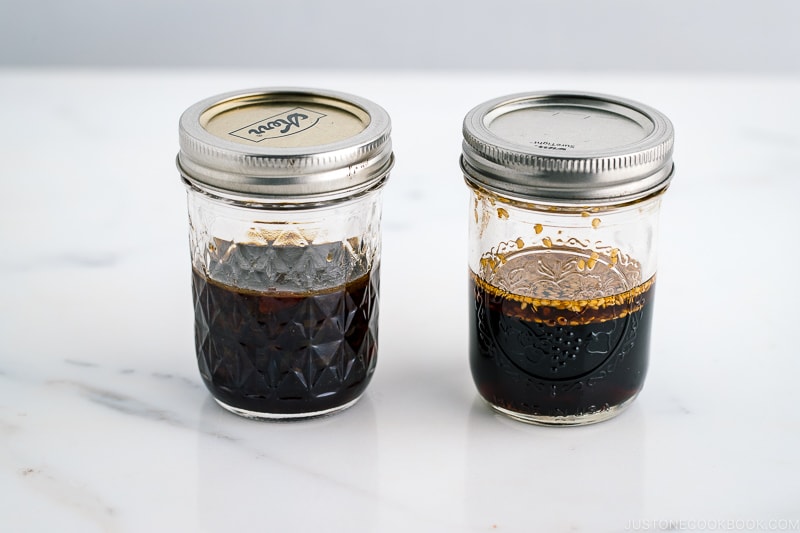
④ PICK SAUCE (Topping 3)
What I Made/Used:
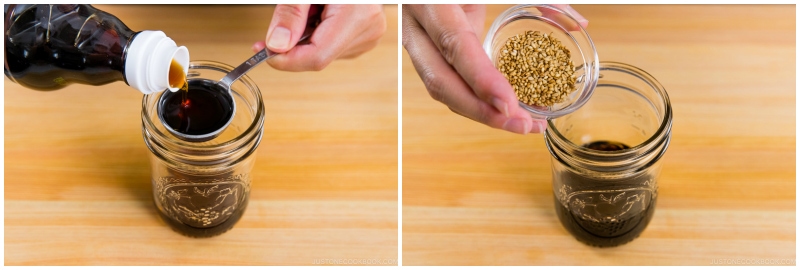
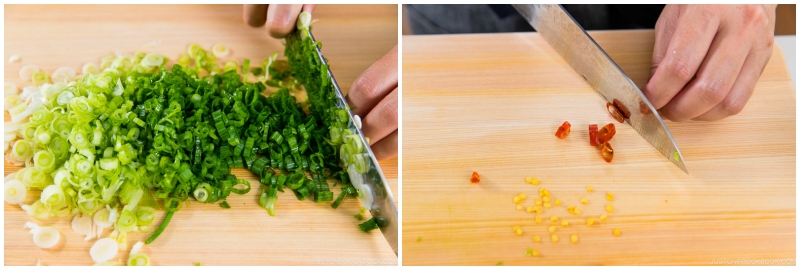
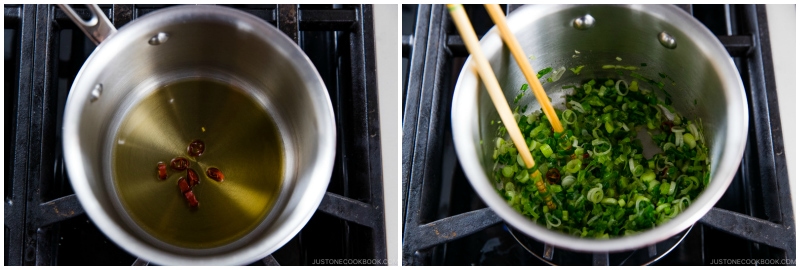
Mizkan Sesame Dipping Sauce – great for vegetables Ponzu Sesame Sauce (recipe below) – great for vegetables Sweet and Tangy Scallion Soy Sauce (recipe below) – great for proteins
Alternative Options:
All-purpose Miso Sauce – great for proteins Leek and Miso Sauce (Negi Miso) – great for proteins Sambal oelek, sriracha sauce, or any chili sauce – for spicing up Tartar Sauce – great for seafood or veggies
Tip: Don’t dress up your bowls with sauce yet! Make sure to store the sauce separately until you’re ready to eat!
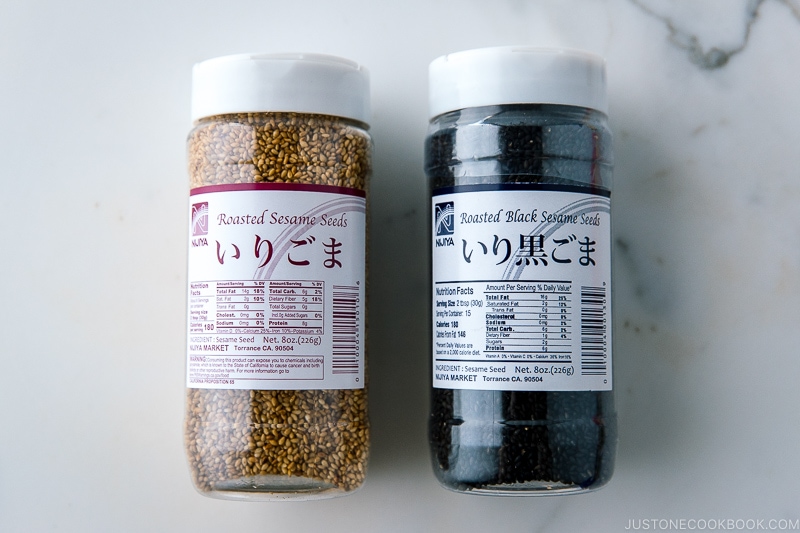
⑤ PICK GARNISH (Topping 4)
What I Used:
Roasted sesame seeds
Alternative Options:
Furikake rice seasonings Green onions (chopped) Kimchi Nori seaweed Pickles (Tsukemono)
Tip: Keep it simple!
Step 2: Start Meal Prepping!
① Prep (Wash, Cut, and Marinate)
Preheat the oven (for the next step). Marinate the proteins. Wash and cut all the vegetables.
② Bake #1 (shorter cooking time) + Blanch
Start baking food that takes a shorter cooking time (10-15 minutes) Meanwhile, blanch any vegetables that require cooking.
③ Bake #2 (longer cooking time) + Pan Fry
Start baking food that takes a longer cooking time (30-45 minutes). Meanwhile, pan-fry vegetables and proteins that require cooking.
④ Bake #3 (if any) + Make Sauce
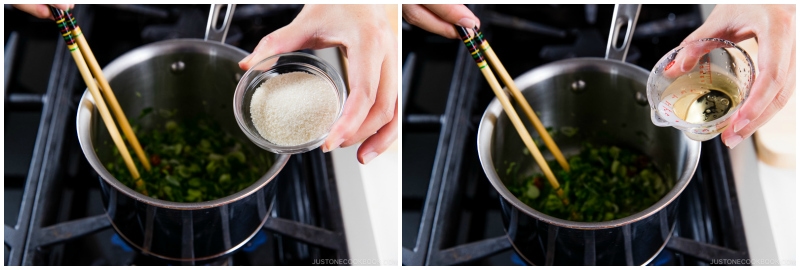
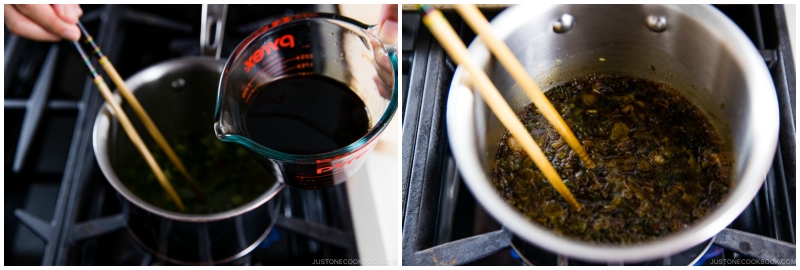
If you have more food to bake, do so. Meanwhile, make/prepare the sauce.
⑤ Pack each dish into containers
Start packing the food once it’s cool. Label and refrigerate.
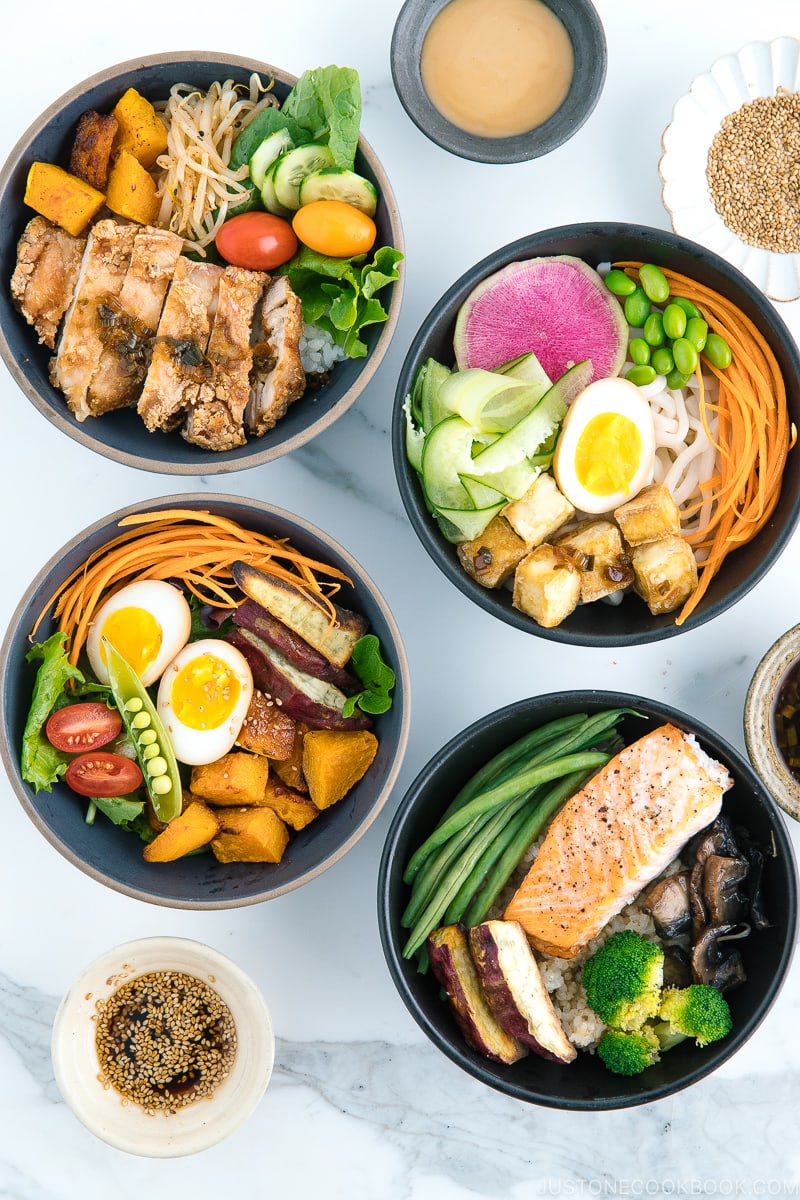
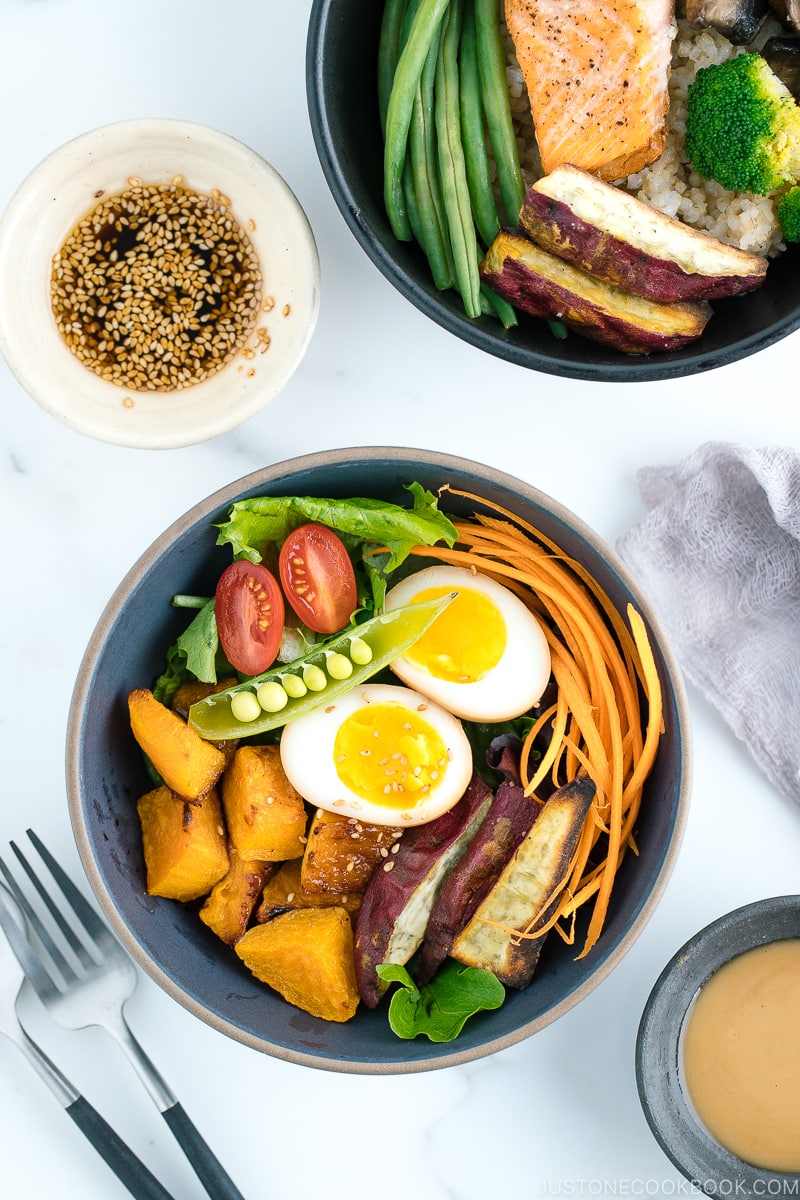
Step 3: Create Your Own Bowls
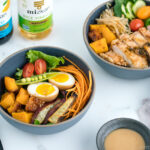
My Bowl
① Leafy greens [no carb] ② Ramen egg ③ Julienned carrot, roasted butternut squash, roasted Japanese sweet potato, tomatoes, snap pea ④ Roasted sesame seeds ⑤ Mizkan Sesame Dipping Sauce
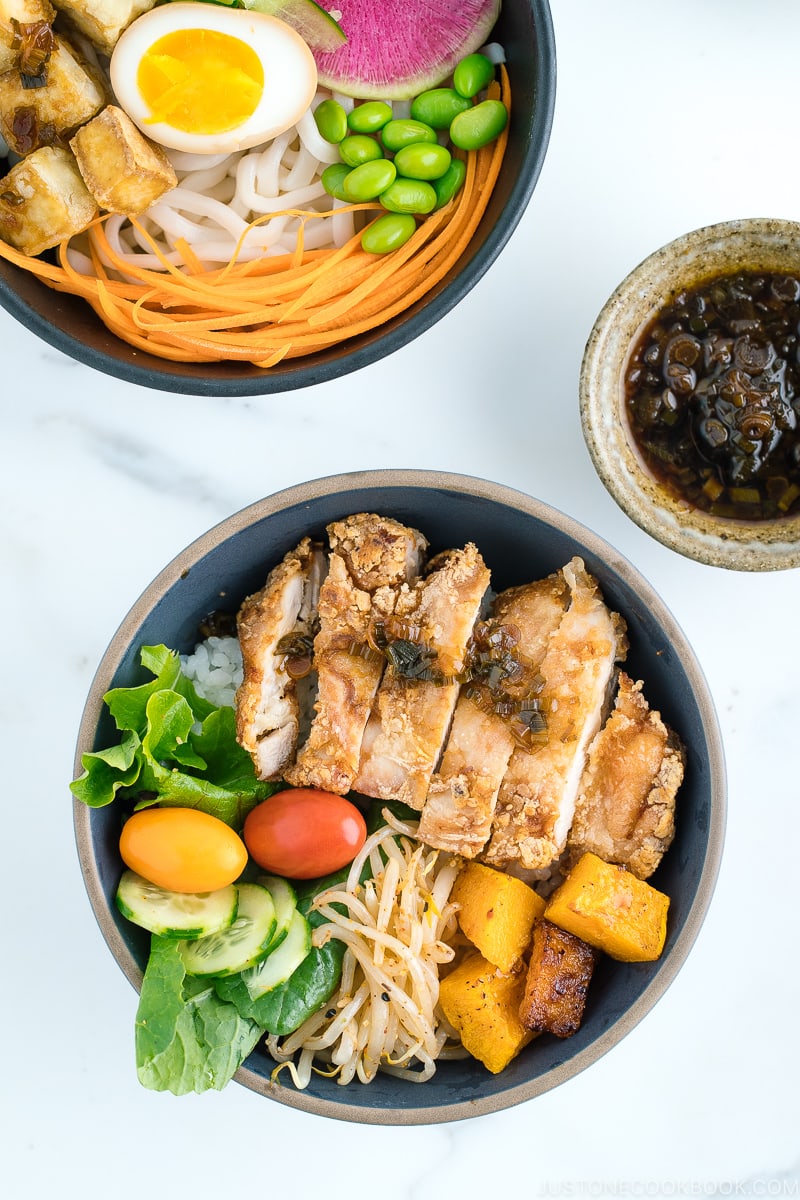
Kid-Friendly Bowl
① White rice ② Pan-fried chicken ③ Leafy greens, sliced cucumber, tomatoes, Spicy Bean Sprout Salad, roasted butternut squash ④ No garnish ⑤ Sweet and Tangy Scallion Soy Sauce
As you can see, these DIY Bowls are filled with wholesome, nutrient-rich foods, and I no longer have to stress over what to make my family for dinner. I hope you have found these tips helpful and enjoy incorporating Japanese meal prepping into your own meal-prep strategy. Any questions or feedback? Leave me your note in the comment box below! Wish to learn more about Japanese cooking? Sign up for our free newsletter to receive cooking tips & recipe updates! And stay in touch with me on Facebook, Pinterest, YouTube, and Instagram.