Sticky and chewy Mochi (餅) is irresistible. Whether it’s Mochi Ice Cream, Strawberry Daifuku Mochi, or mochi enjoyed during traditional Japanese New Year, these elastic wonders of glutinous rice cakes have captured the hearts of people worldwide. In the US, you can even find the mainstream mochi creations at major grocery stores like Trader’s Joe and Whole Foods. Today I’ll show you how to make fresh homemade mochi with a rice cooker and a stand mixer. It is a fairly easy affair, but I do want to warn you – mochi is super sticky and the process can be a handful. Don’t let that stop you though because there is nothing like eating freshly pounded mochi! They are smooth, springy, and tactile. A nostalgic reminder of my childhood and all the happy memories in Japan.
What is Mochi?
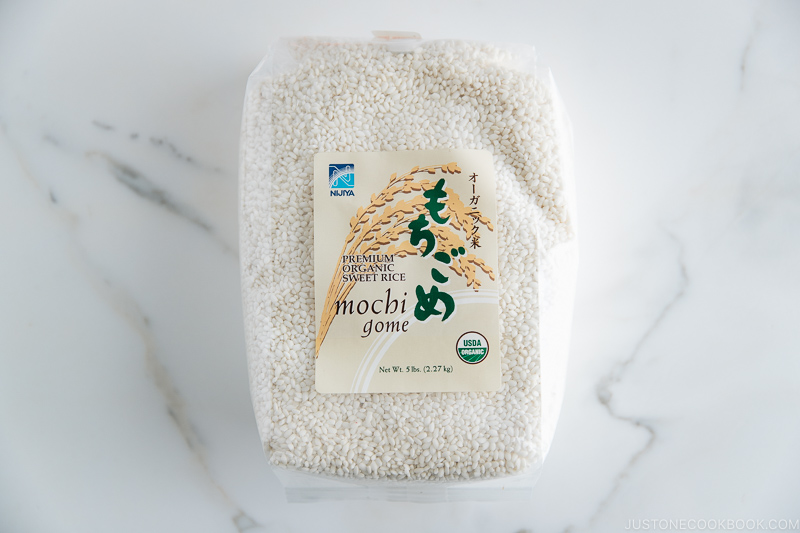
A fun fact: Mochi (餅, もち) is often pronounced as [MO-chi] in English, but we actually pronounce it [mo-CHI] in Japanese. Mochi is a Japanese rice cake made of mochigome (糯米), a short-grain glutinous rice*. It’s naturally white, sticky, elastic, and chewy. It tastes like rice without filling or coating, but mochi is all about the texture. There is no other food that has this unique texture similar to mochi. Outside of Japan, mochi seems to be associated with desserts like mochi ice cream and mochi stuffed with a sweet filling. However, when the Japanese hear the word “mochi”, it usually implies the plain mochi that can be used for both savory and sweets. Think of it this way: if steamed rice is one form of rice, then mochi is another form of rice. *It’s sometimes called “sweet rice” although they both mean the same thing. I’d just call “glutinous rice” in this post.
How Mochi is Made
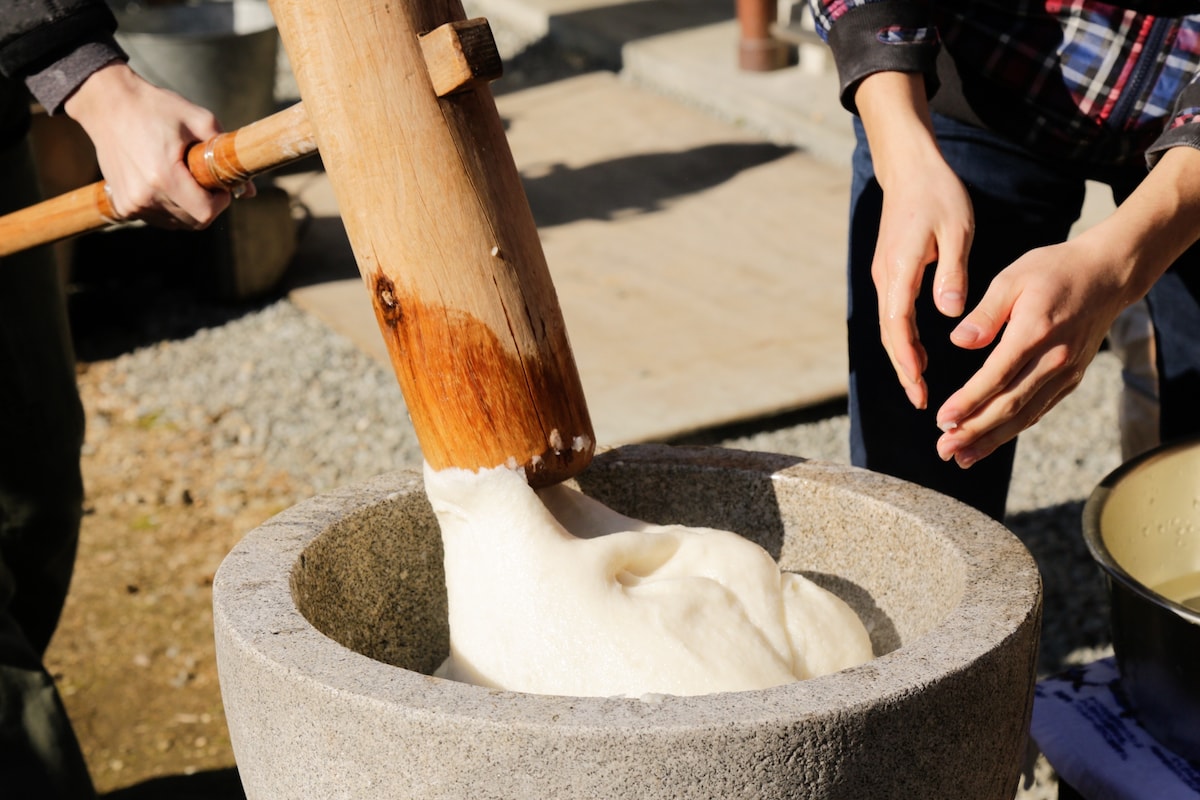
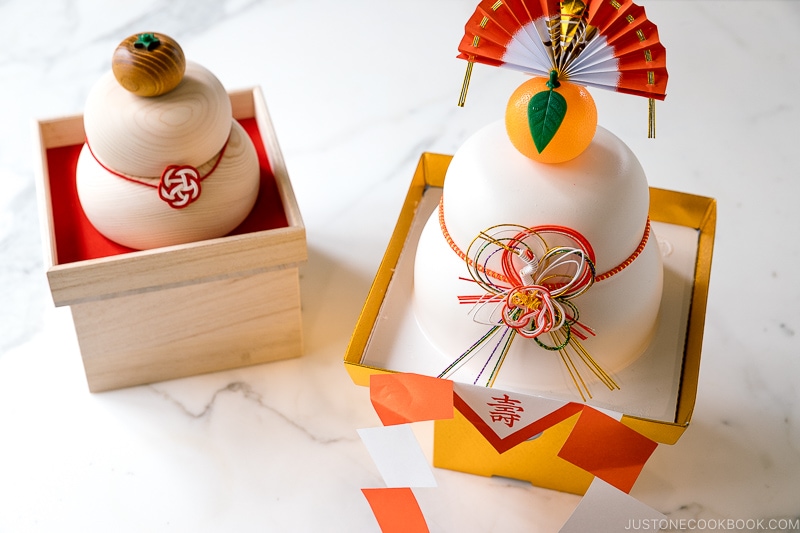
Traditionally, glutinous rice is first steamed, then transferred into a usu (臼), a large Japanese stamp mill, and pounded with a pestle called kine (杵). This mochi-pounding event is called mochitsuki (餅つき). The glutinous rice is pounded repeatedly until smooth, sticky, and elastic. Some households own a bread machine with a “mochi making” function, which can cook and pound the glutinous rice (Isn’t it genius?). Some people even own a mochi-pounding machine. Outside the big cities, people still make mochi the traditional way using the family’s heirloom usu and kine. Mochitsuki is a family event that they continue on. After the mochi is pounded, it is transferred to a working station where you shape it into round mochi balls or make big round pieces used for a decoration called kagami mochi (鏡餅) during the Japanese New Year. Making mochi is a big part of Japanese New Year preparation. Today we will make fresh mochi with a rice cooker and a stand mixer!
Keep in Mind:
How to Make Mochi with a Stand Mixer (3 Steps)
Note: Instead of using mochiko (glutinous rice flour), we will cook glutinous rice to make the dough in this recipe so it yields the freshest taste.
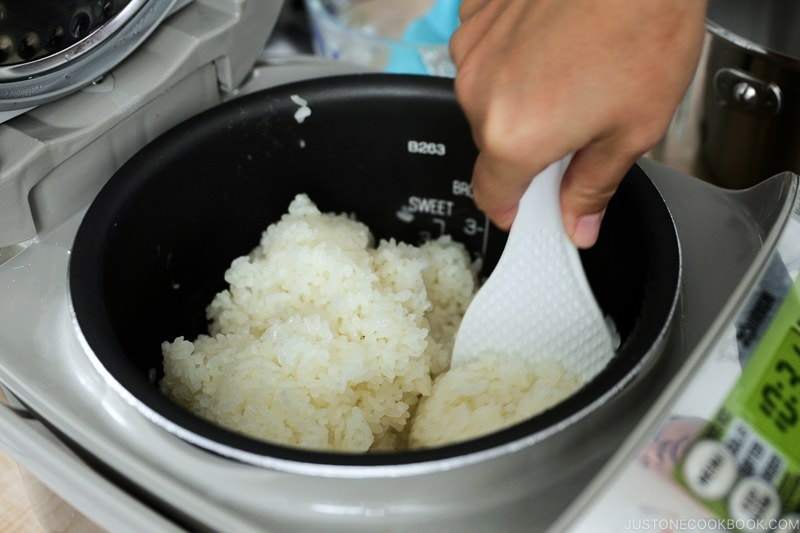
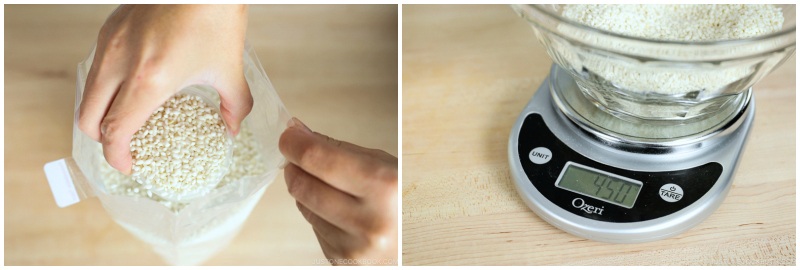
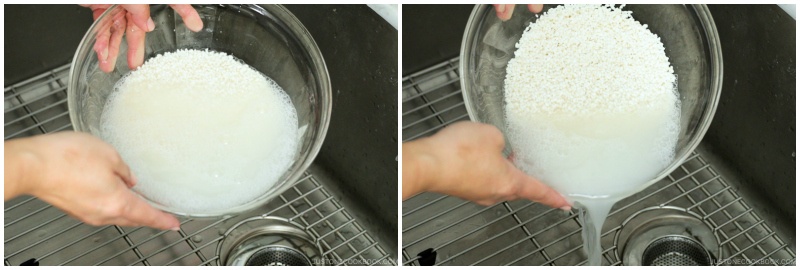
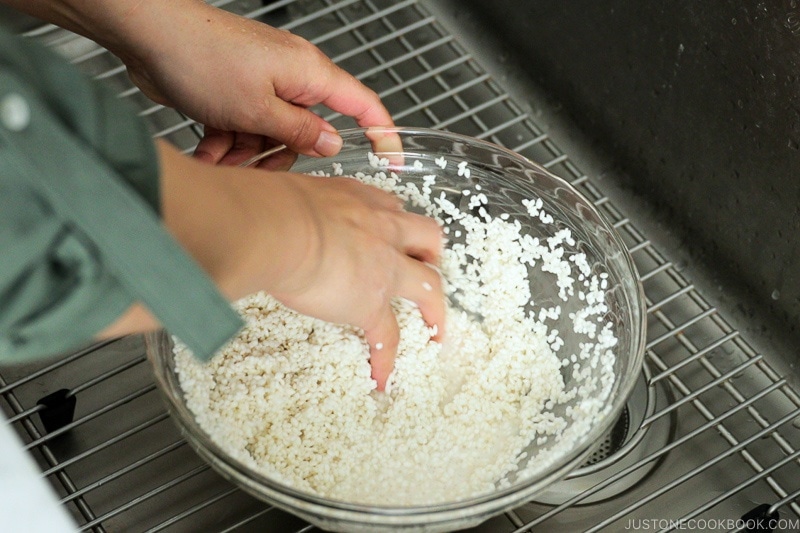
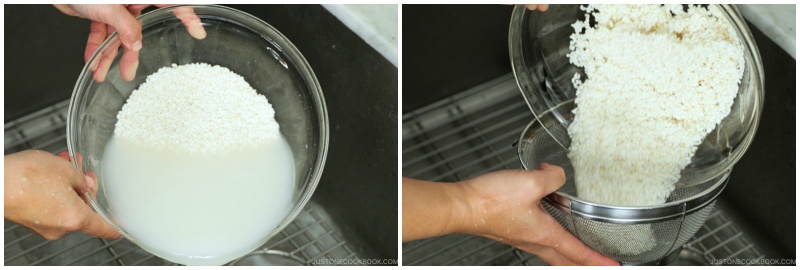
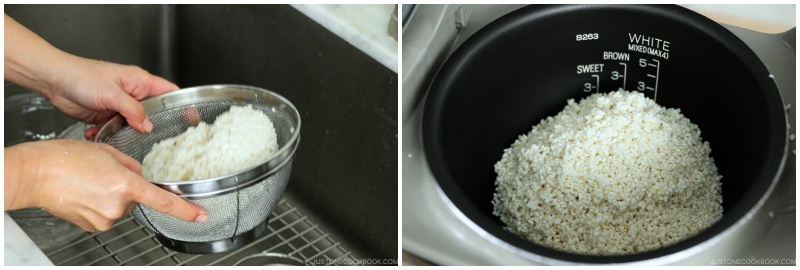
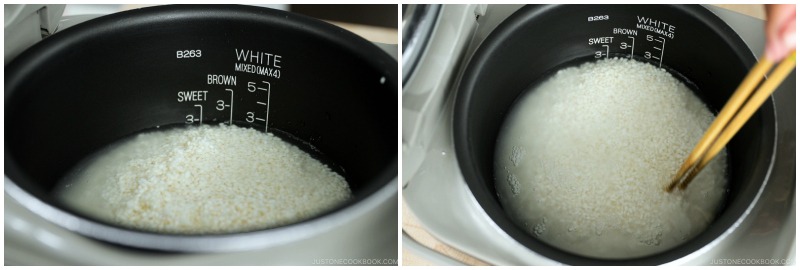
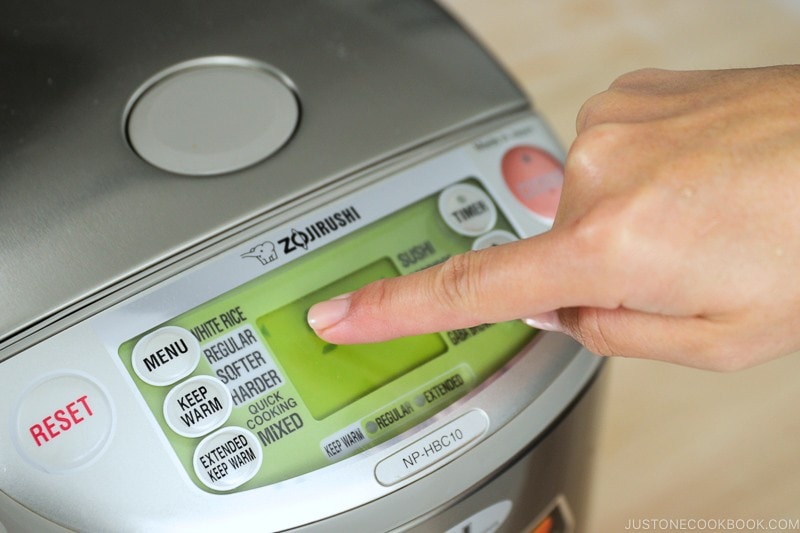
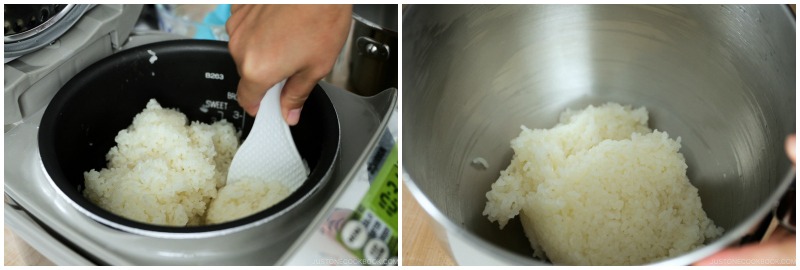
Step 1: Cook Glutinous Rice
I decided to use a rice cooker method since it’s a standard electric appliance if you cook Japanese or Asian food frequently. Rice Cooker: You do not need to soak the glutinous rice in water prior to cooking. Just rinse and cook the glutinous rice just like you would with regular steamed rice. Steamer: Traditionally, glutinous rice is steamed in a steamer because it’s considered the best way. You would rinse and soak the rinsed glutinous rice in water overnight, put the rice in cheesecloth, place it inside the steamer, and steam for 30 minutes. Instant Pot: You can use your Instant Pot if you have one. Soak the glutinous rice for 1 hour after rinsing, high-pressure cook for 5 minutes, and natural release for 15 minutes. Pot on Stove: Rinse the glutinous rice, soak for 10 minutes, then put the rice and water in the pot. Start with high heat, and once boiling, mix the rice once and put the lid on. Turn the heat down to the lowest setting and cook for 8-10 minutes. Remove from the heat and let it steam for 10-15 minutes.
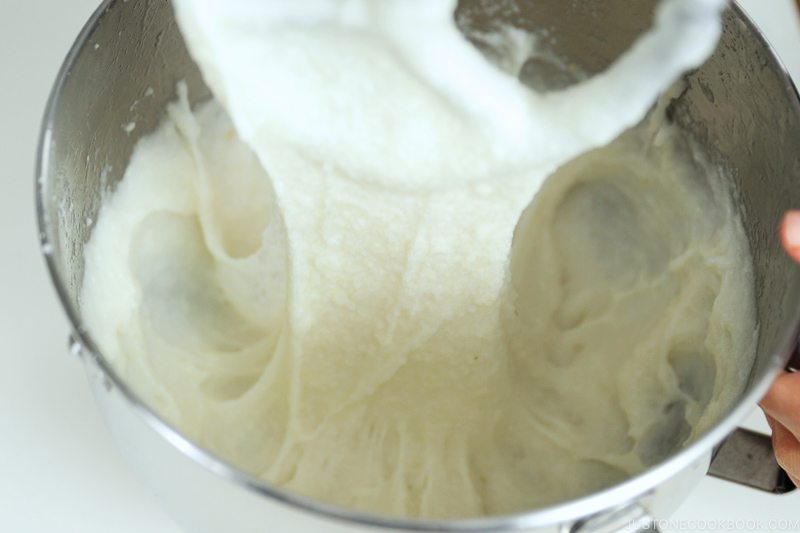
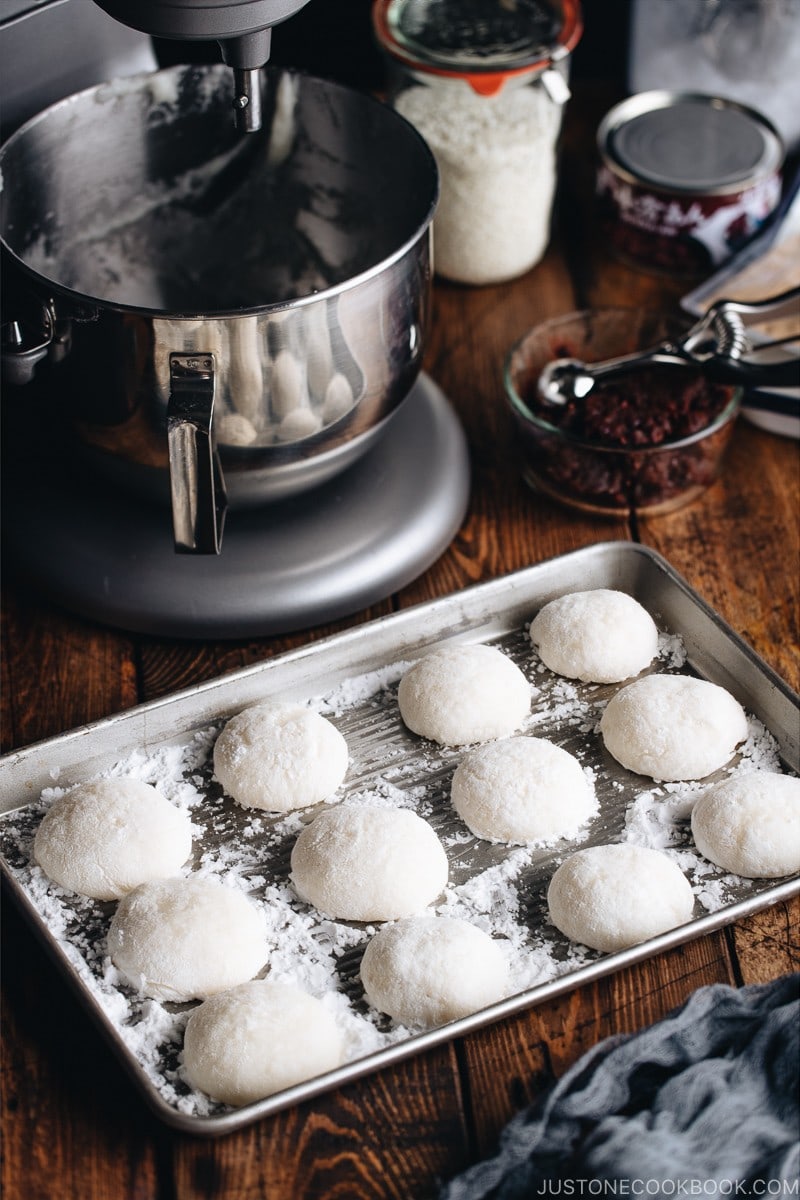
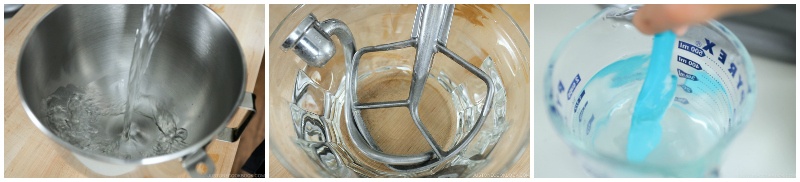
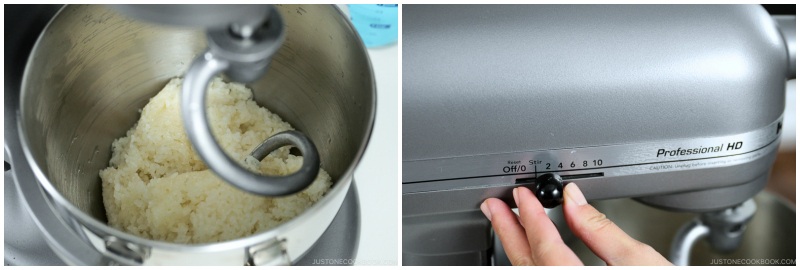
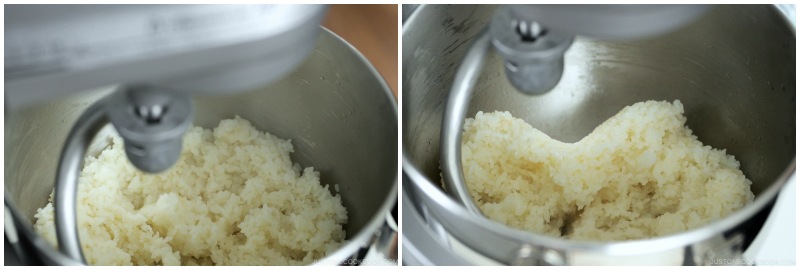
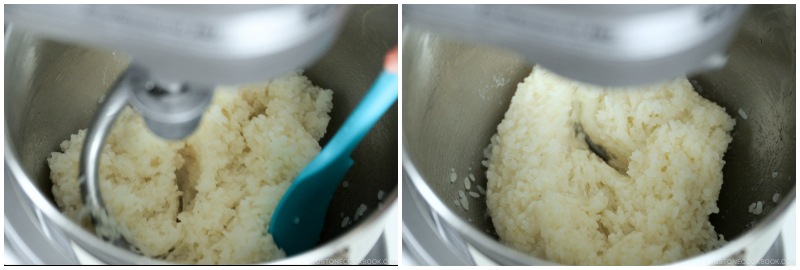
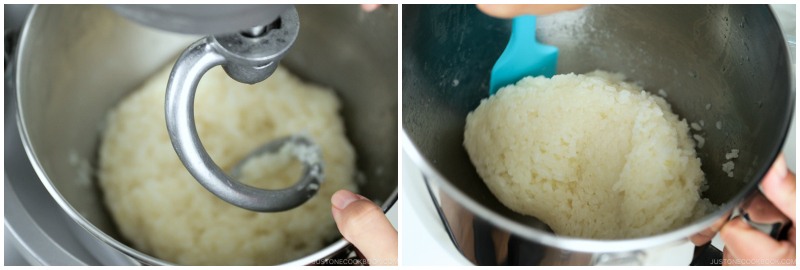
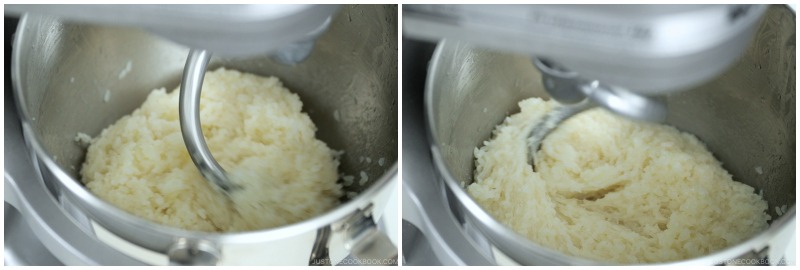
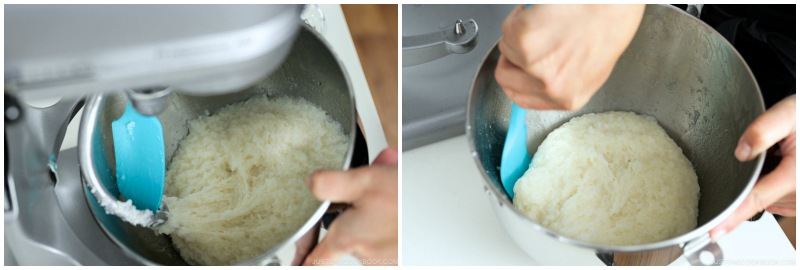
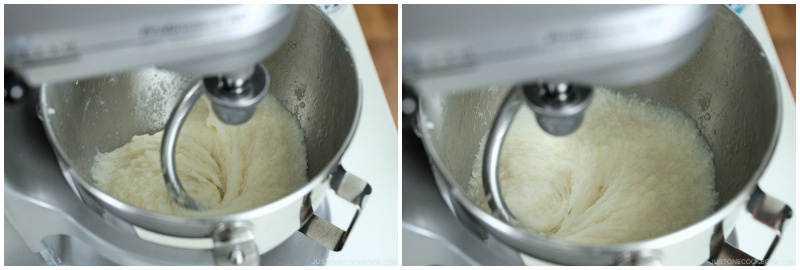
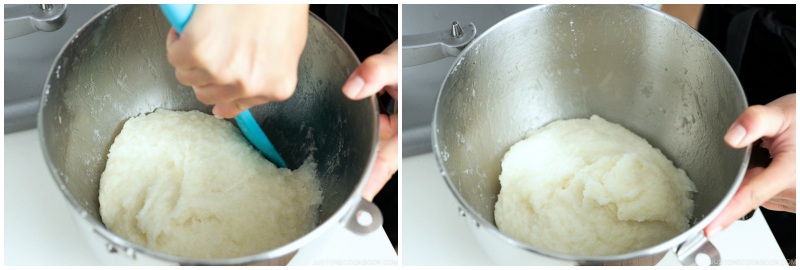
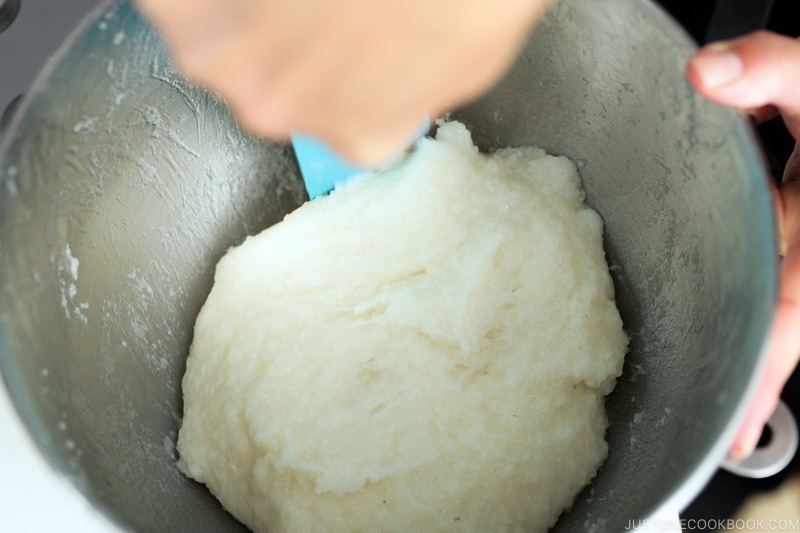
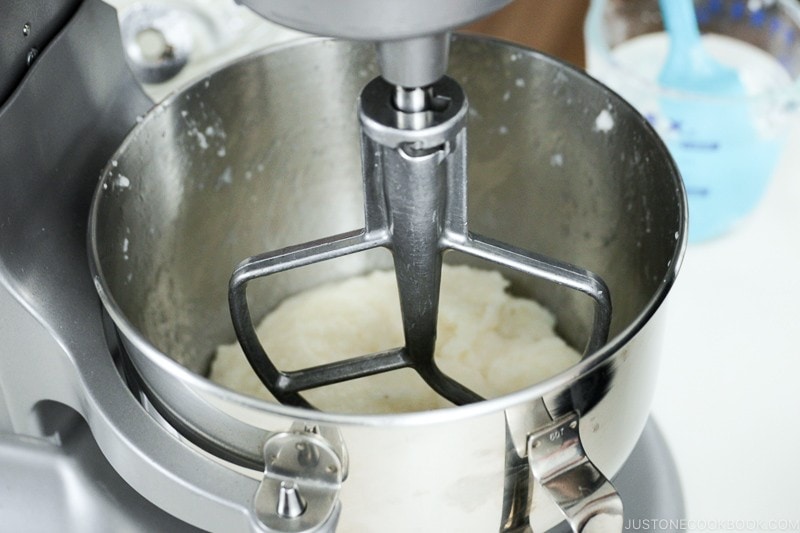
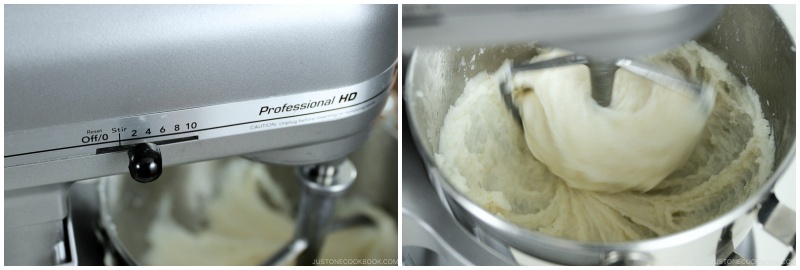
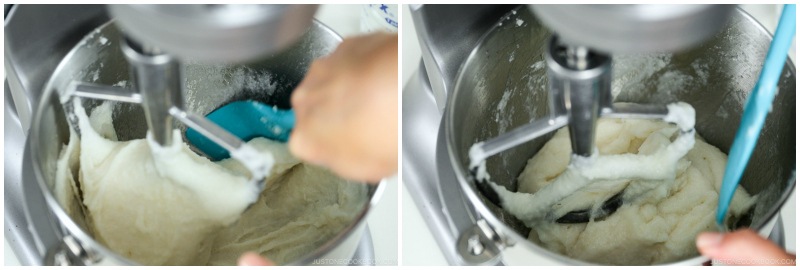
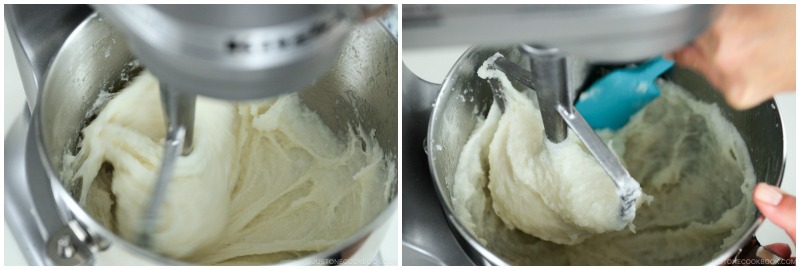
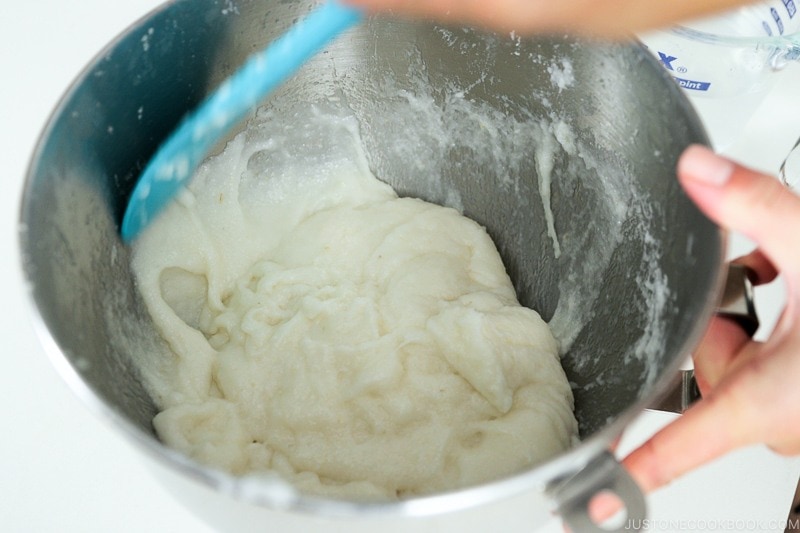
Step 2: “Knead” and “Pound” Using a Stand Mixer
At this step, you will need a few things:
A KitchenAid® stand mixer – Professional series (This is the only appliance that I’ve tried making mochi successfully many times) A timer (your smartphone would do) Hot water ready for use Silicone spatula (A flexible silicone spatula is easy to scrape down the mochi in the stand mixer) A 2-cup measuring cup for soaking the spatula
This stand mixer process involves 2 stages:
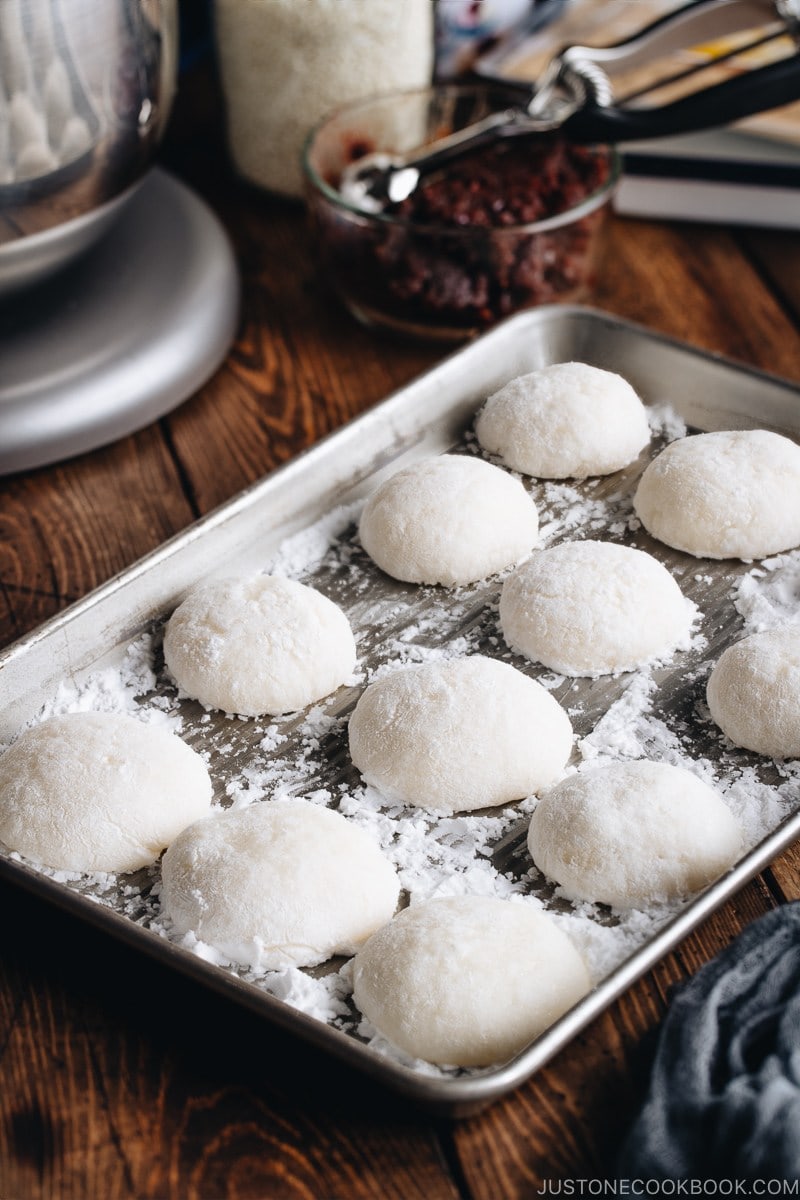
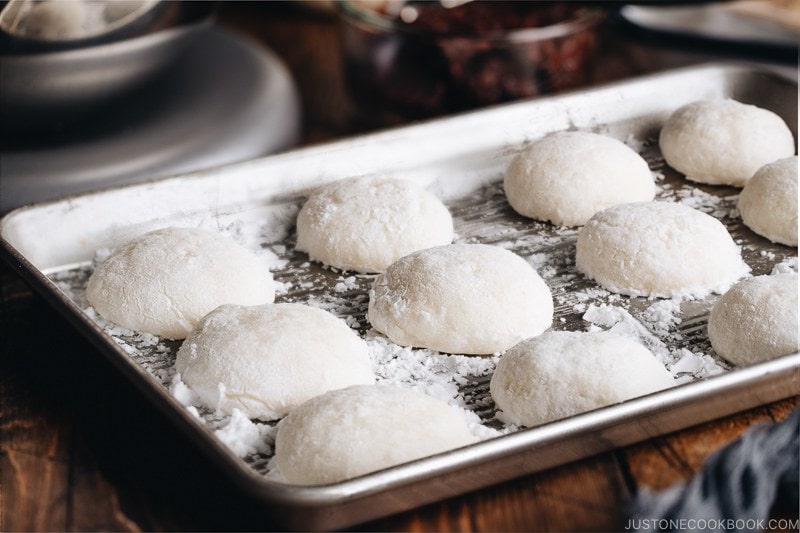
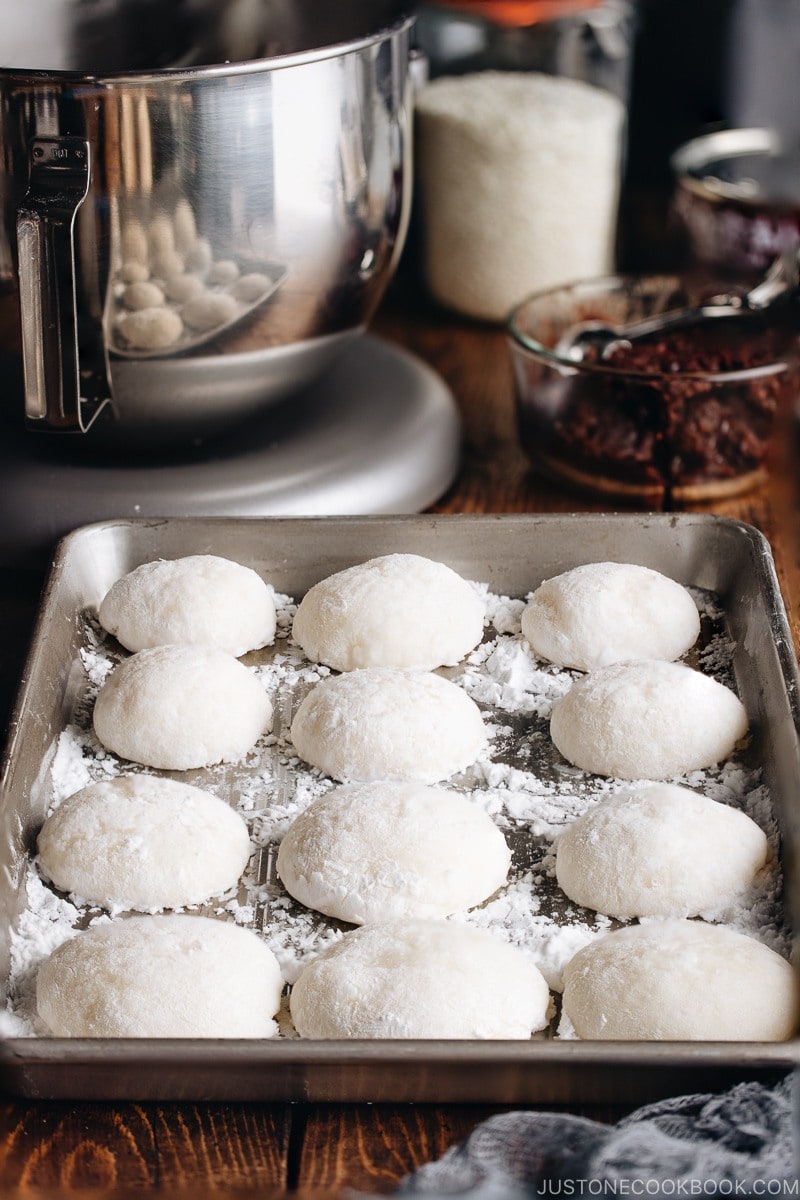
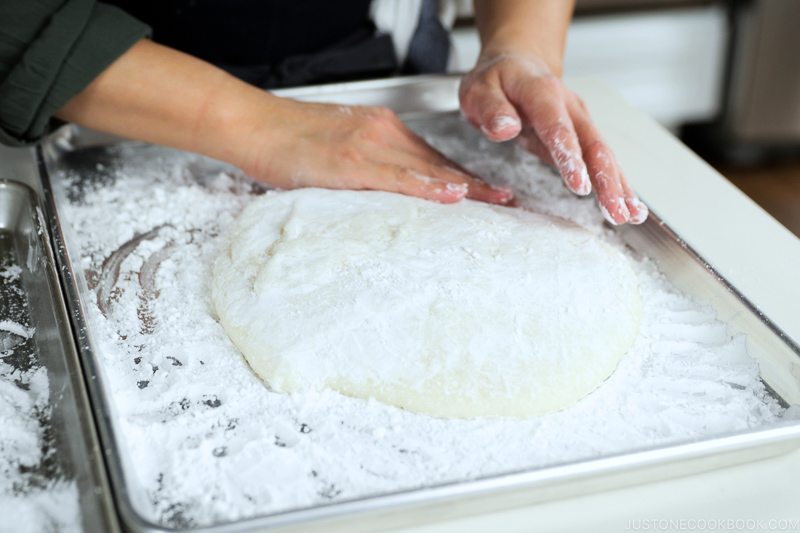
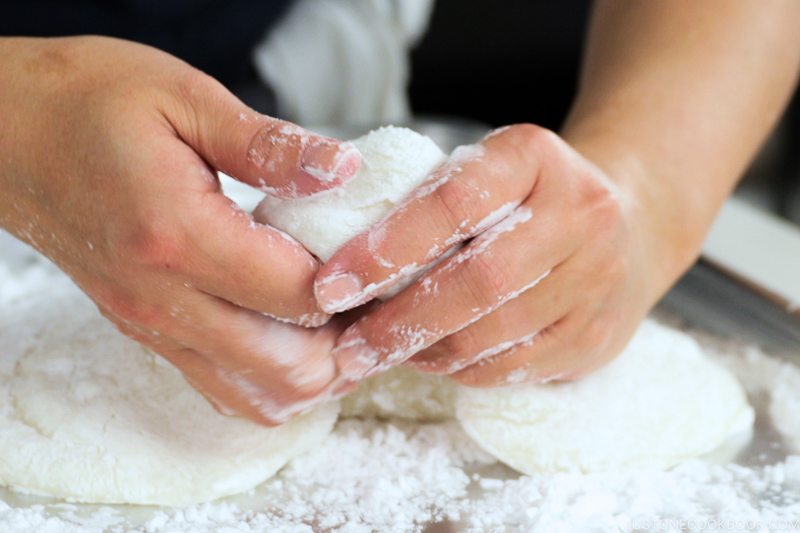
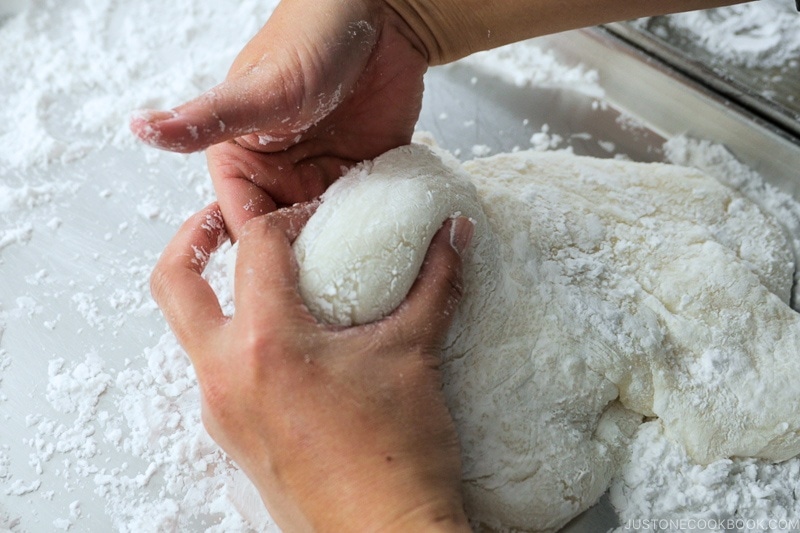
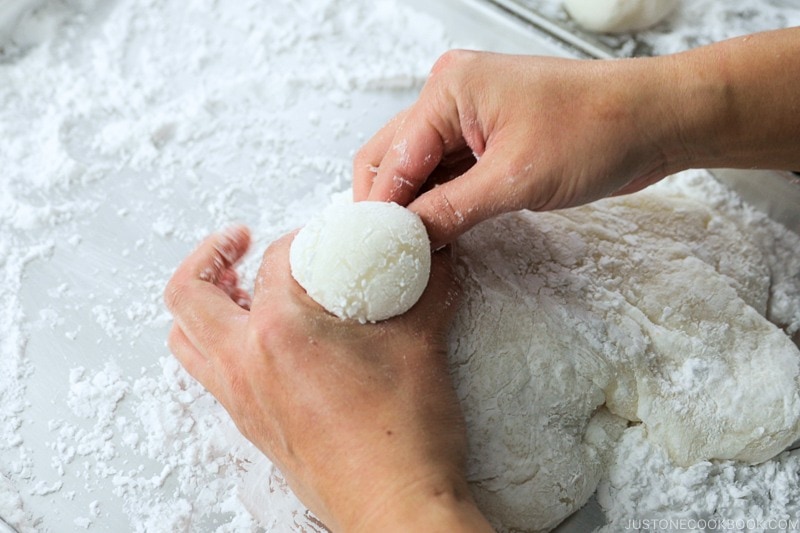
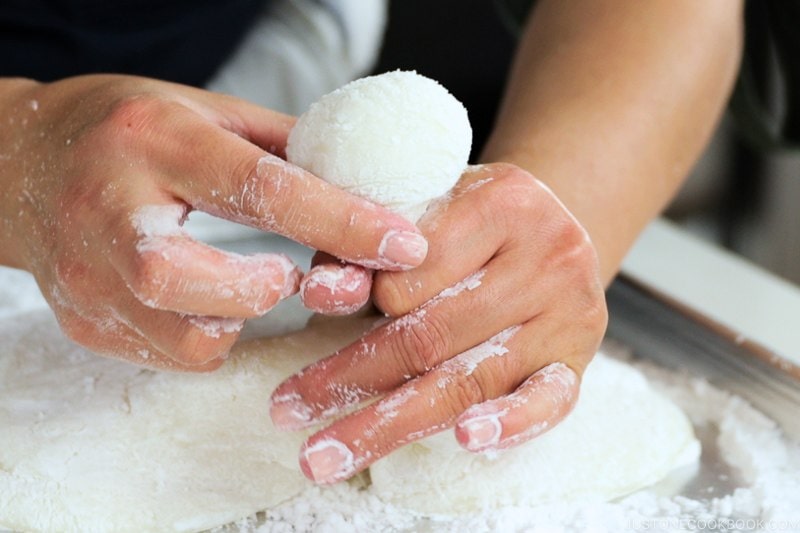
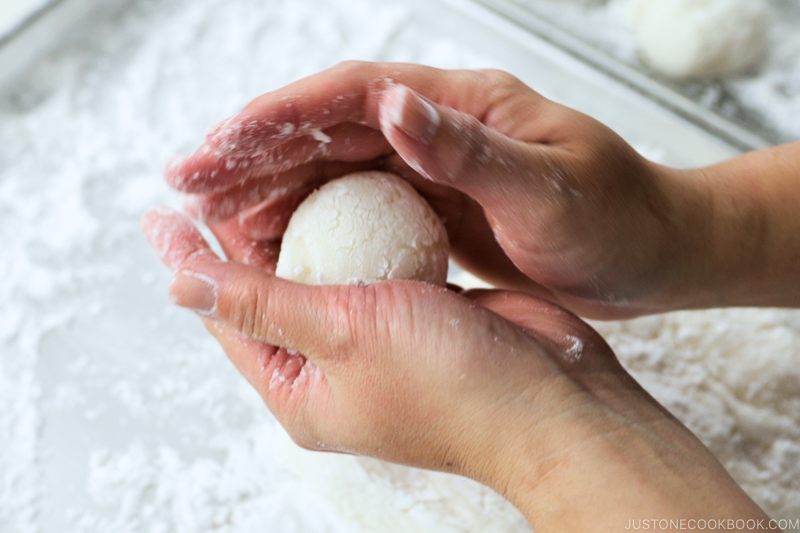
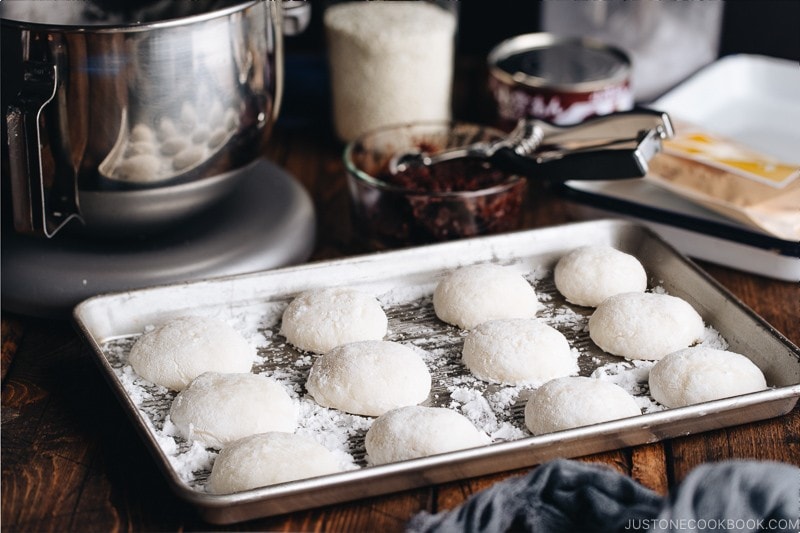
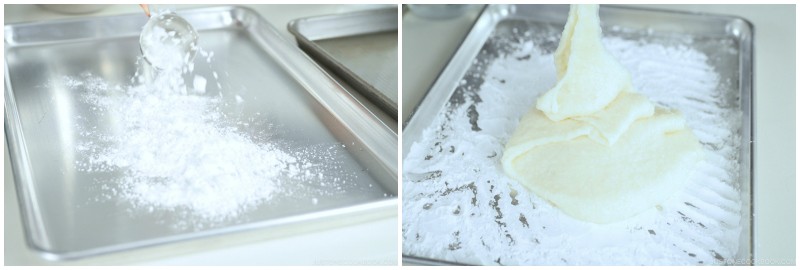
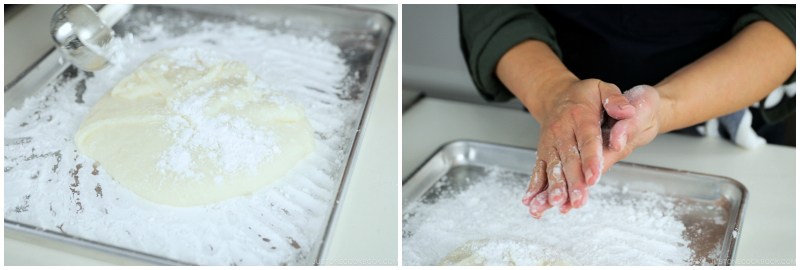
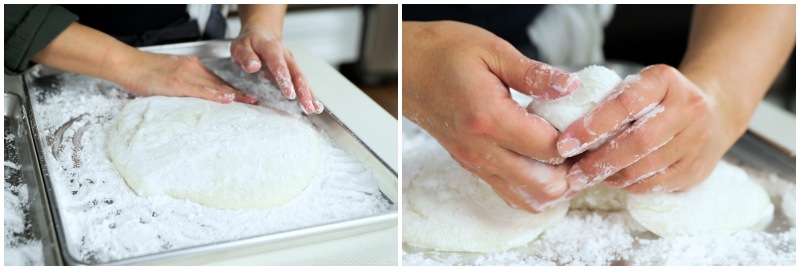
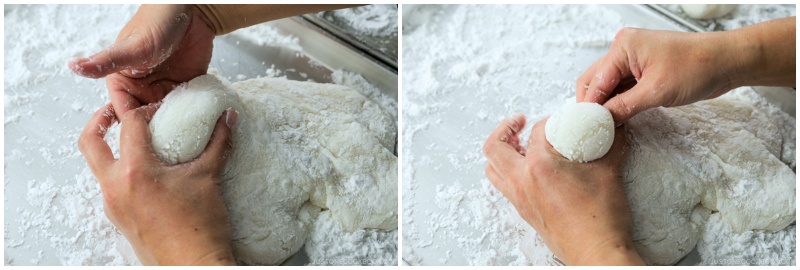
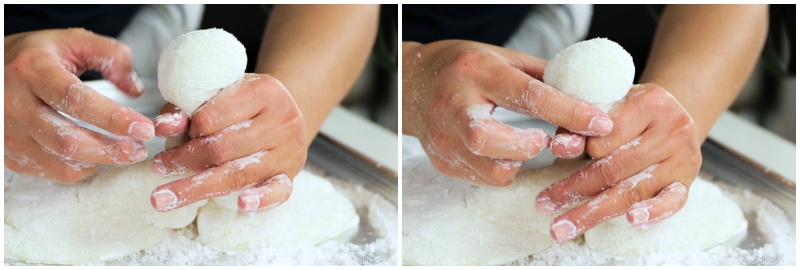
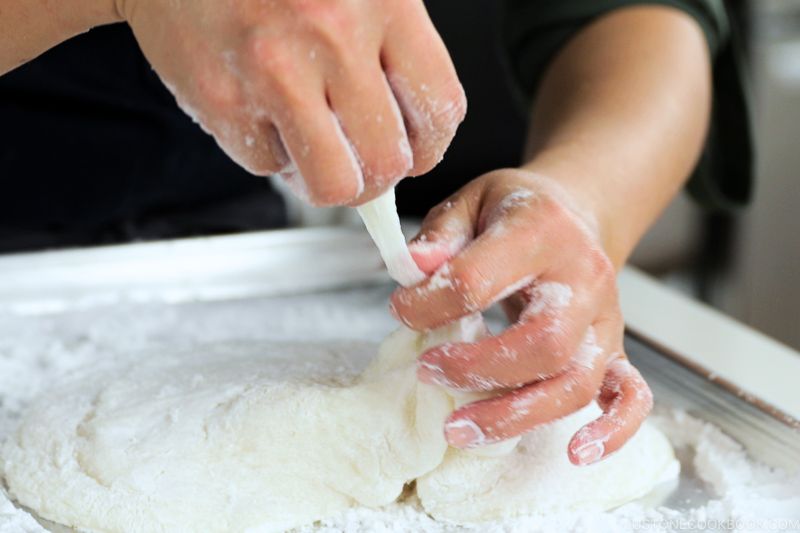
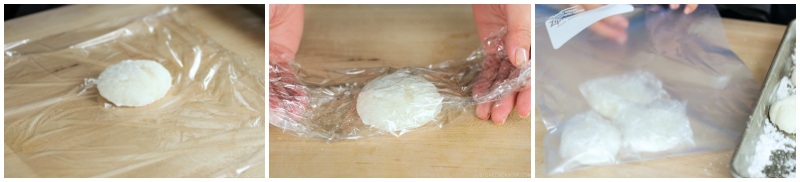
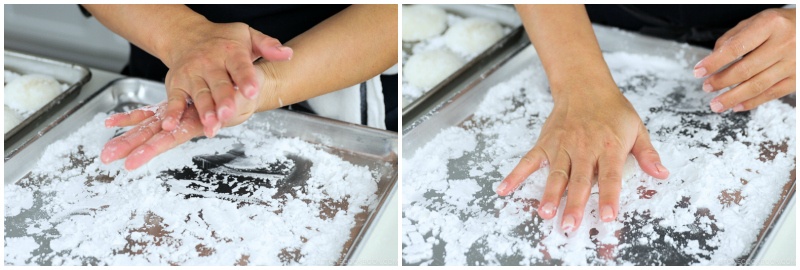
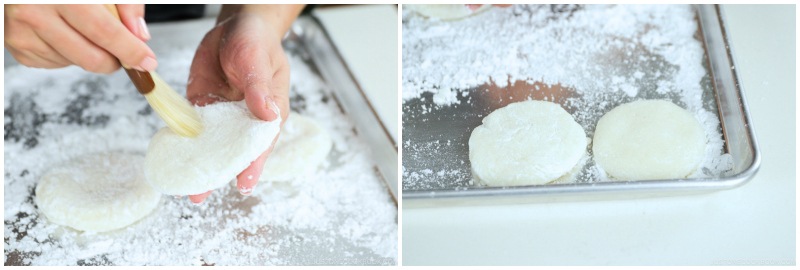
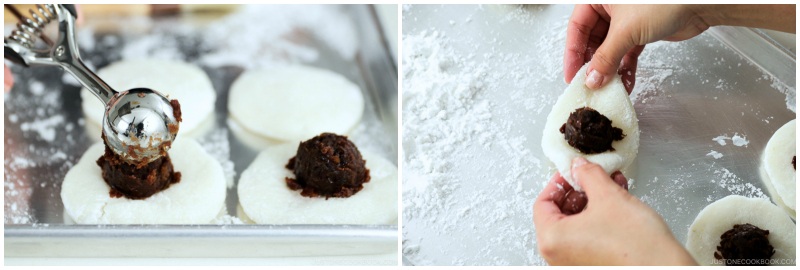
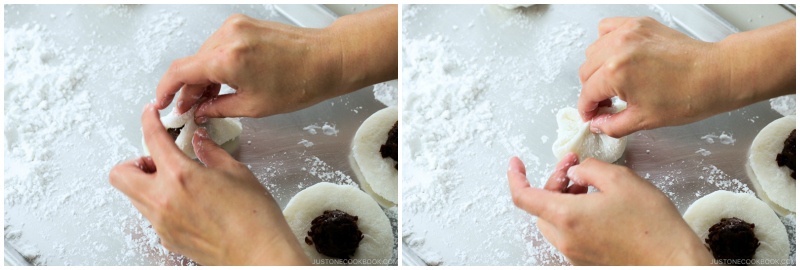
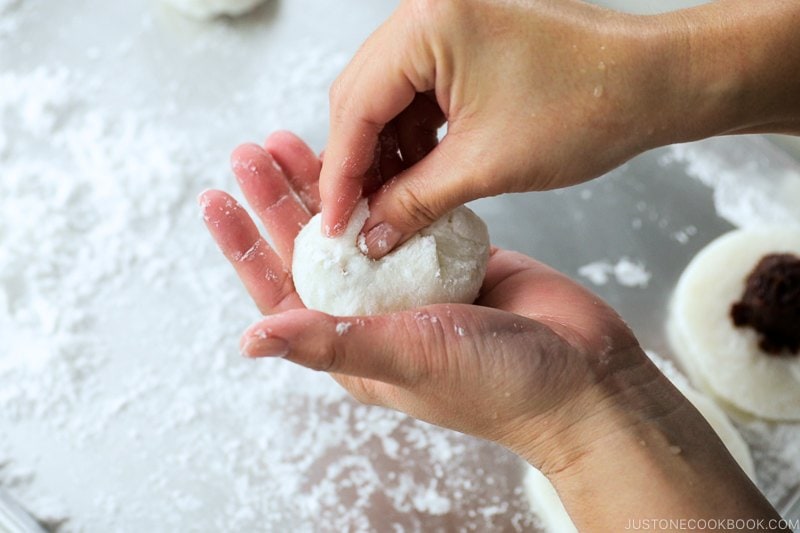
Step 3: Shaping Mochi Balls
Here’s what you’re going to do: When pinching, do not pull the mochi because the sticky surface would appear and your hands would get messy. Instead, use a pinch & twist motion to cut the mochi with two “C” fingers and right hand. Make sure your hands are dry and well-dusted with potato starch. REMINDER:
Handle the areas dusted by starch only and make sure your hands are dry and well-dusted. Do not to “pull” the mochi, which creates a fresh sticky surface. If you see any sticky surface appearing on mochi, lightly dust a thin layer of starch and brush the excess away. Too much starch would be troublesome when you stuff the filling and close the mochi.
*Please watch my video. Sometimes it’s easier to see in action than reading my instructions.
5 Ways to Enjoy Homemade Mochi
There are so many ways to enjoy fresh homemade mochi. Here are some common ways to enjoy it.
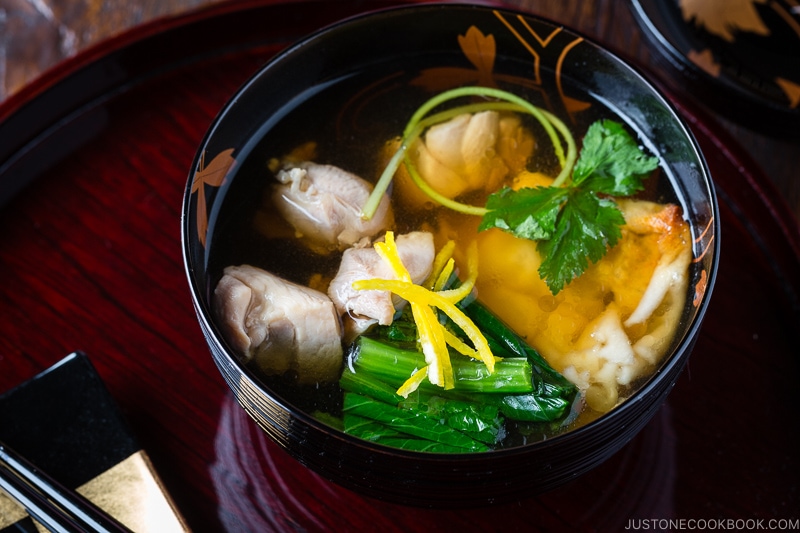
1. Put mochi in a soup
Kanto (Tokyo)-style Ozoni (New Year Soup) Kansai (Osaka)-style Ozoni (New Year Soup) Zenzai/Oshiruko (Red Bean Soup)
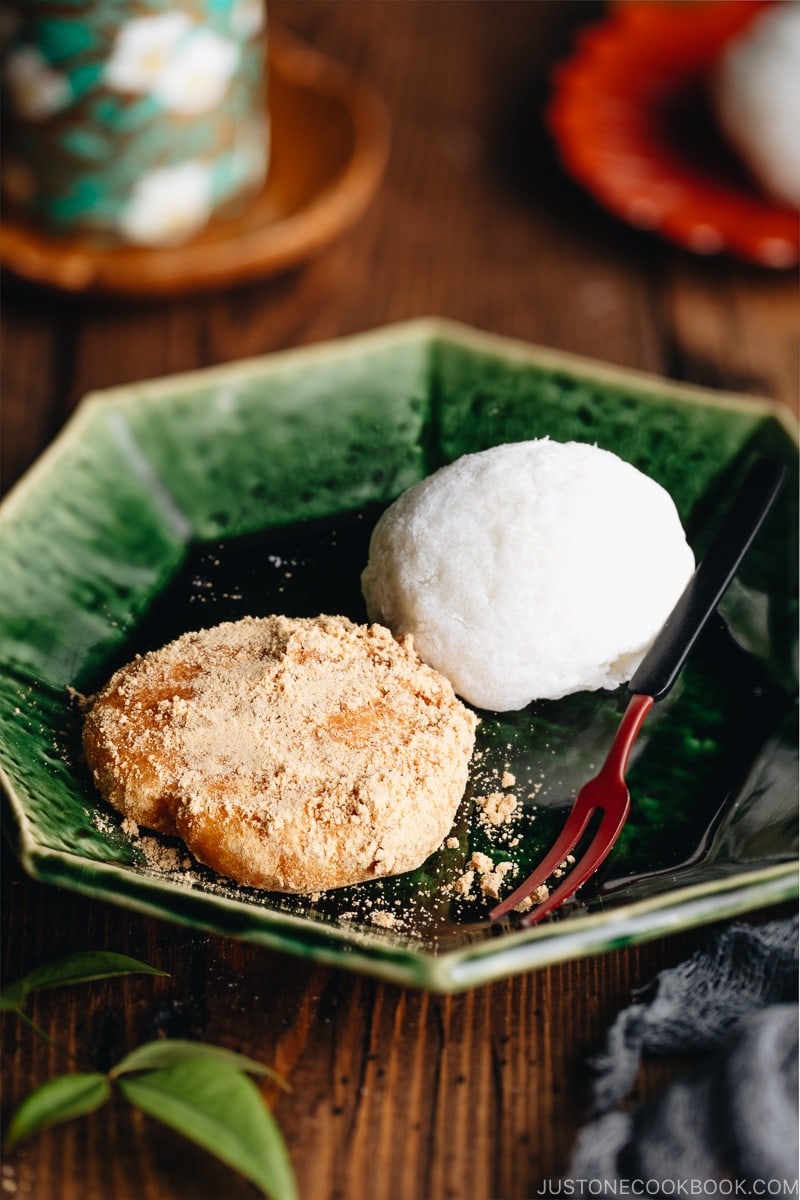
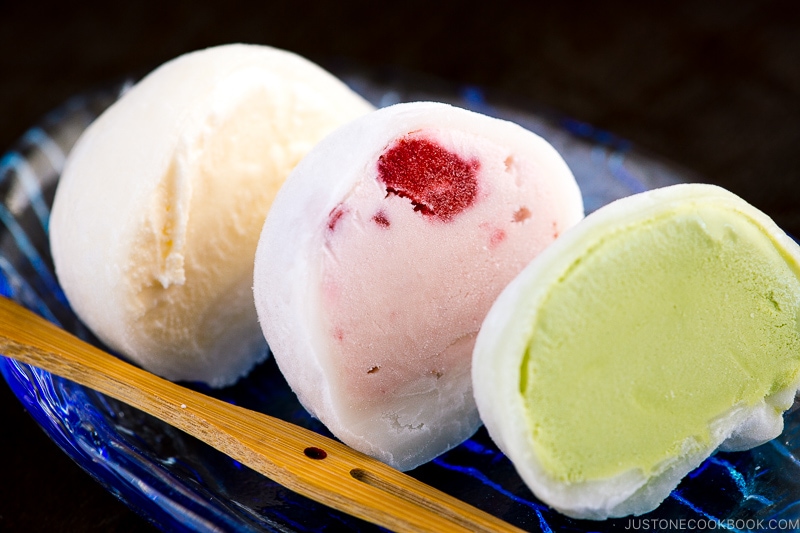
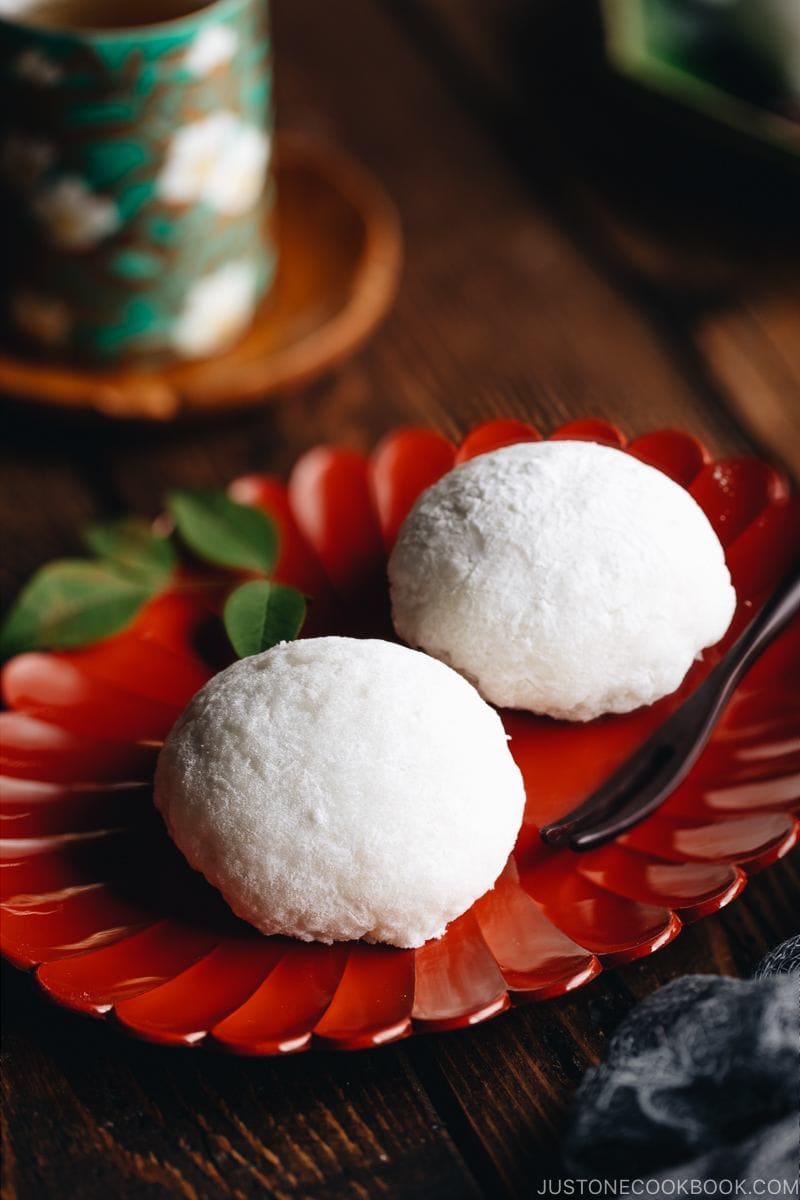
2. Stuff mochi with a sweet filling
Anko (Red bean paste) – See the recipe below Make the best mochi ice cream with flavors like matcha, strawberry, chocolate, and mango.
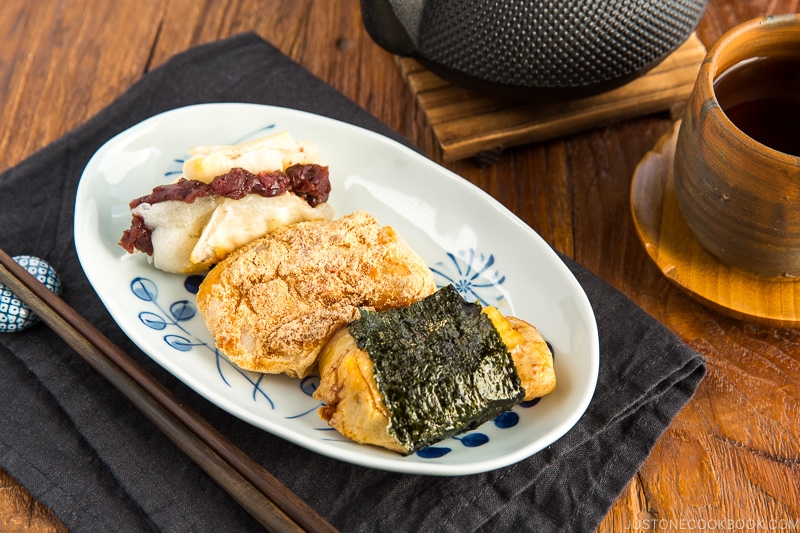
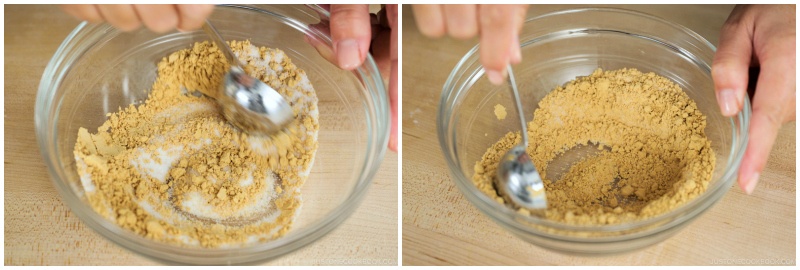
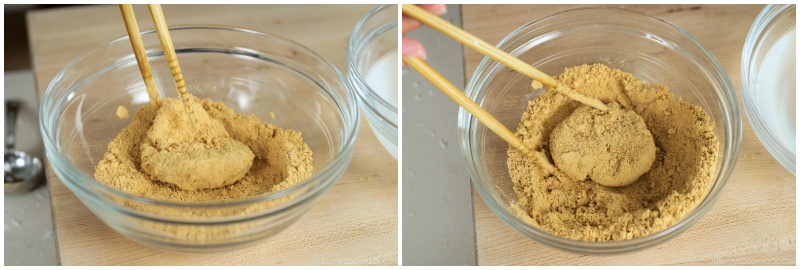
3. Coat mochi with a sweet/savory sauce
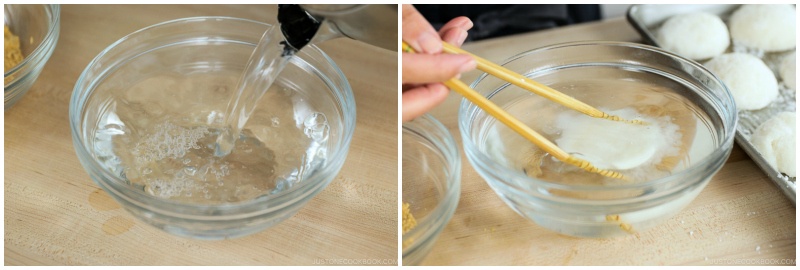
Kinako (soybean flour) + sugar – See the recipe below Soy sauce + sugar Anko (sweet red bean paste) – Pressure Cooker Anko or Stovetop Anko
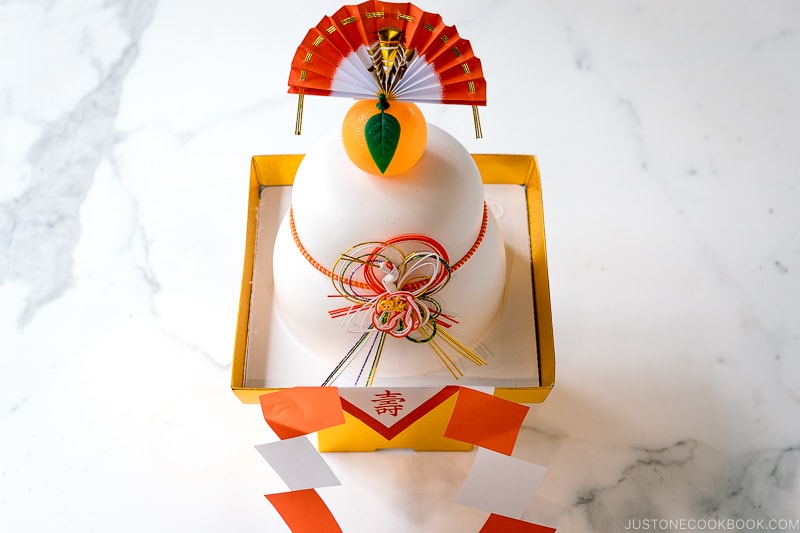
4. Make mochi into Japanese New Year decoration
Kagami Mochi (decorate until 1/15)
5. Make mochi into rice crackers
Make it flat and air dry until completely dry. Then toast the mochi on both sides in the oven. Brush with soy sauce and air dry. See my Rice Cracker (Kaki Mochi) recipe.
1. Can I use other types of rice?
No, for this recipe, I only tried with Japanese short-grain glutinous rice (sweet rice) or what we call, mochigome (もち米). I had never tried other types of rice such as long-grain glutinous rice, therefore I would not know how much water you need to cook the rice, how long it takes to knead/beat, etc.
2. Can I make a bigger batch?
To be honest, I am not so sure because I don’t think my Kitchen Aid stand mixer would be able to knead more mochi inside the bowl. With 3 rice cooker cups of glutinous rice, it was working hard, and I wouldn’t feel comfortable doing even a bigger batch. So I would suggest making a few batches.
3. How can I keep mochi softer for a long time?
The answer is sugar. If you plan to make sweet mochi such as daifuku mochi, then you should add sugar. I researched, and it recommends using 50-100 grams of sugar for 100 grams of cooked glutinous rice. You will need to add sugar while you’re kneading the mochi. Start with 50 grams and increase the amount as you like. The more sugar you added, the longer the mochi stays soft.
4. Can I freeze the mochi? How long does it last?
Yes, you can freeze the mochi! For the best quality, eat it within a month, but mochi can be kept in the freezer for 6 months if you store them well.
5. Does it taste like freshly pounded mochi made with the traditional method using usu and kine?
I wish! The stand mixer cannot do a real “pounding” motion and the mochi is not 100% made in the same way. However, if my choice was between store-bought mochi vs. homemade mochi, I would choose to make fresh mochi in my stand mixer. It is actually amazing! The mochi’s texture is 95% close to the ones made traditionally. I just wish that it yields a real smooth and silky surface. That said, the difference is not obvious. Ready to make some mochi from scratch? Time to gather your kids or mochi-loving friends for this sticky, fun and auspicious activity!
Other Mochi Recipe
Matcha Green Tea Mochi – This recipe uses glutinous rice flour and matcha powder, and it’s perfectly chewy with a hint of earthy sweetness. Wish to learn more about Japanese cooking? Sign up for our free newsletter to receive cooking tips & recipe updates! And stay in touch with me on Facebook, Pinterest, YouTube, and Instagram. Editor’s Note: This post was originally published on December 19, 2018. It’s been re-published with more information on December 23, 2023.