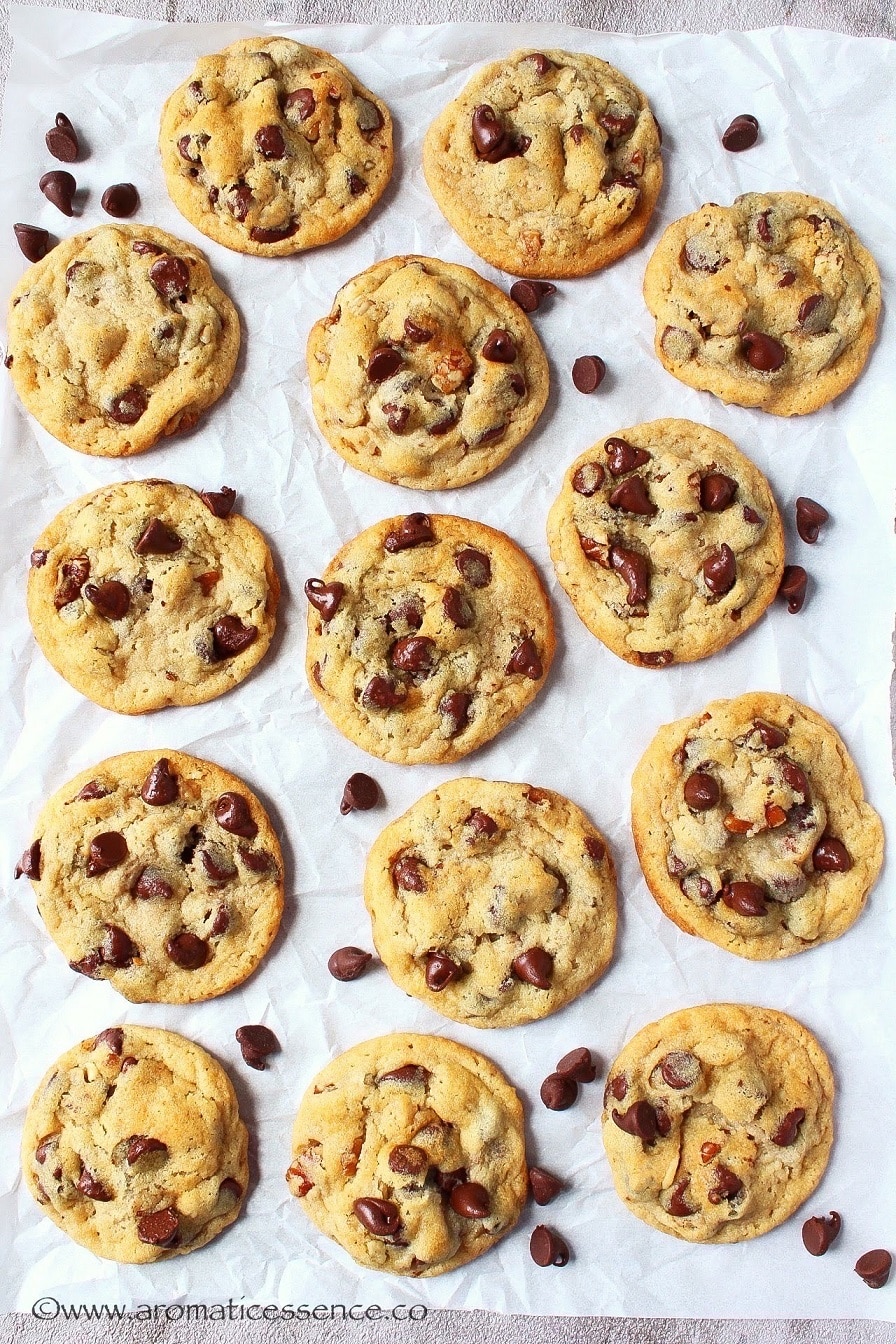
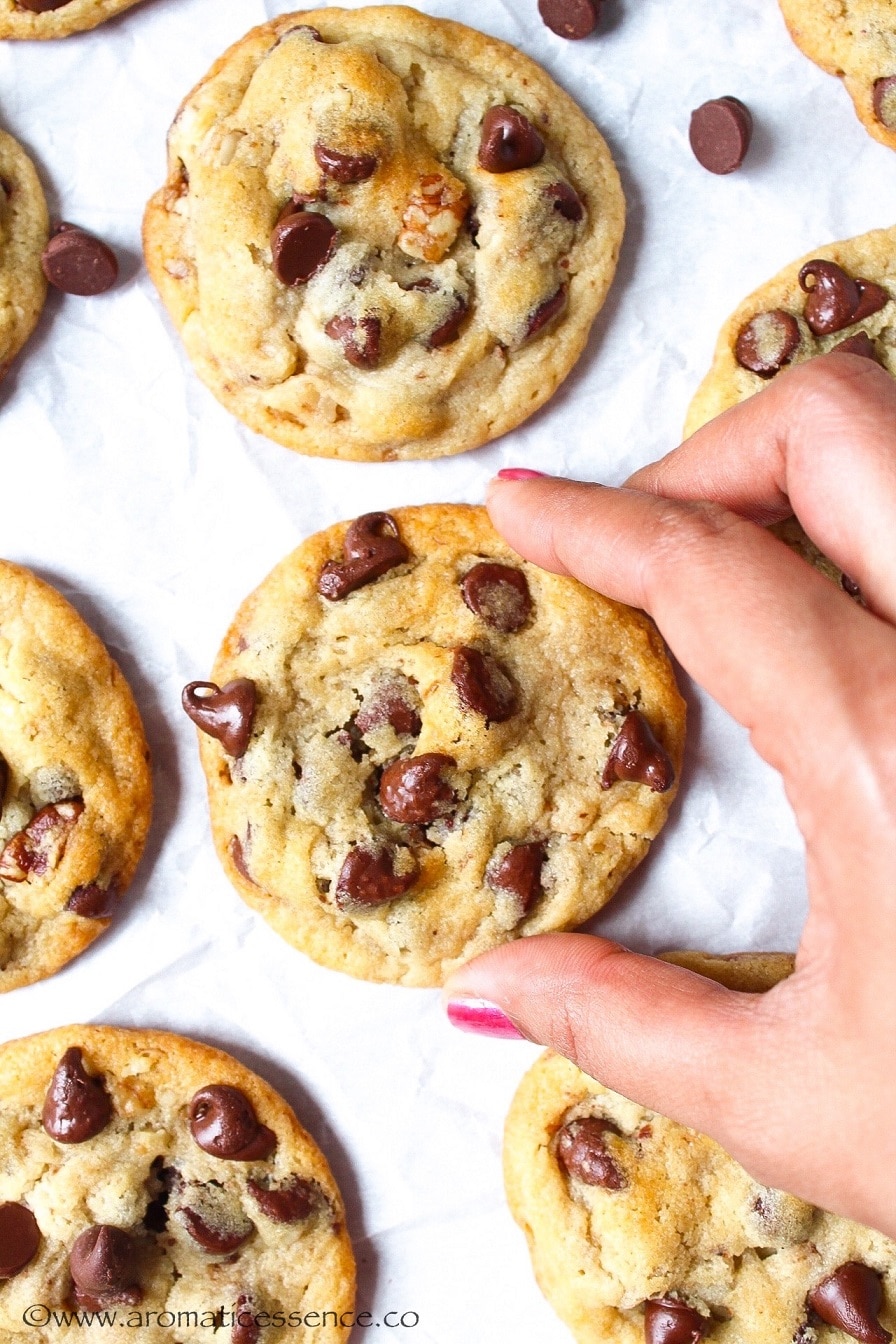
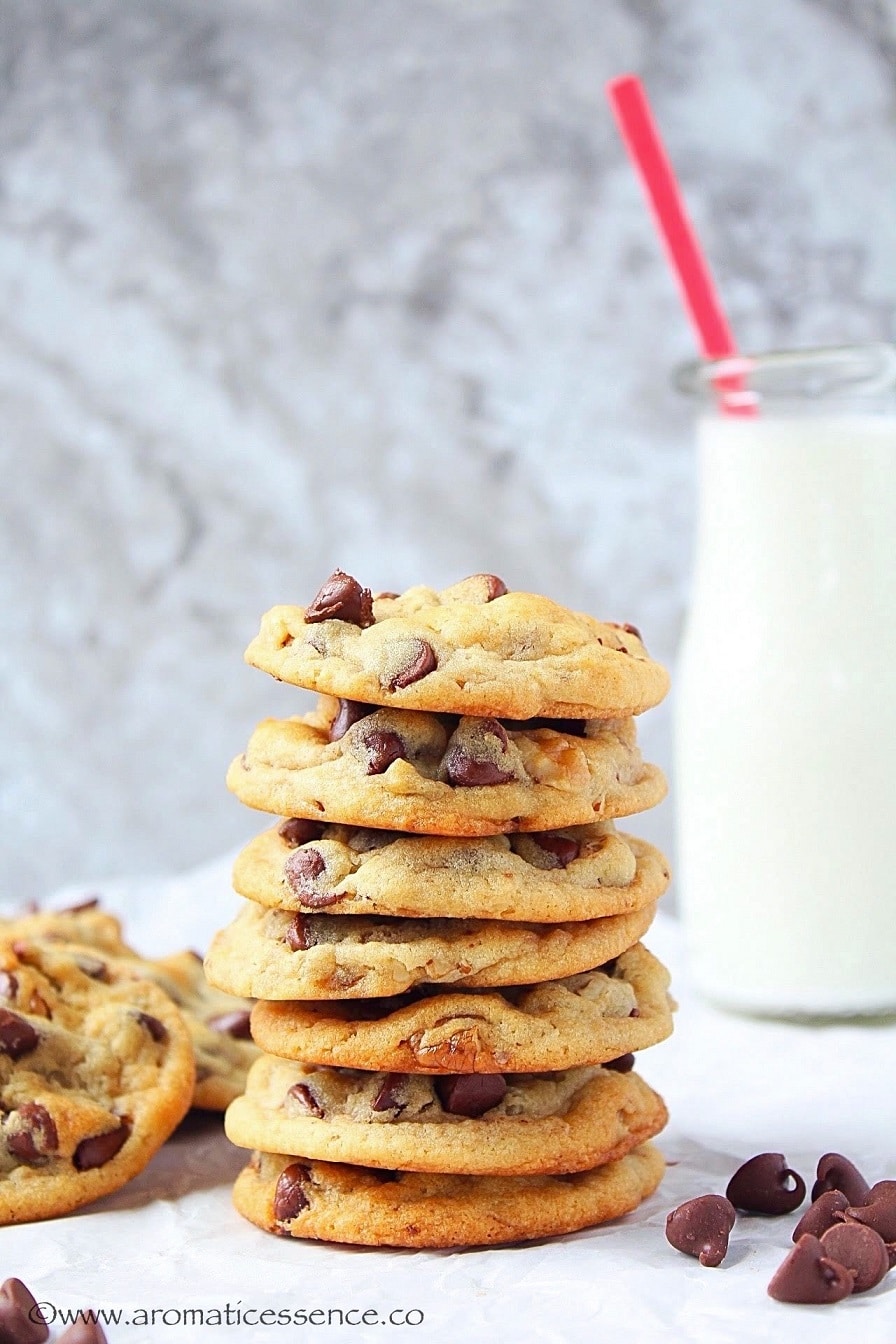
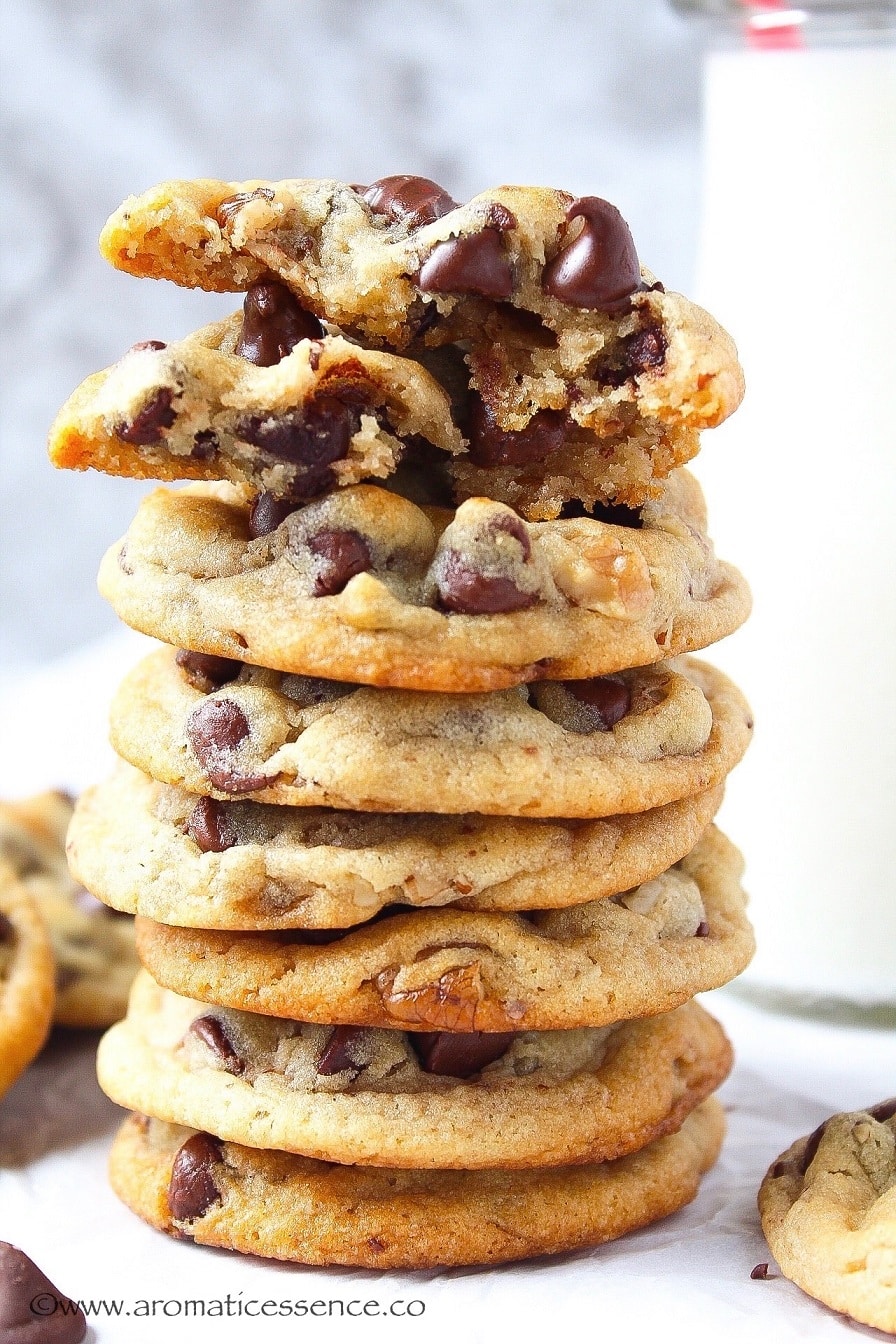
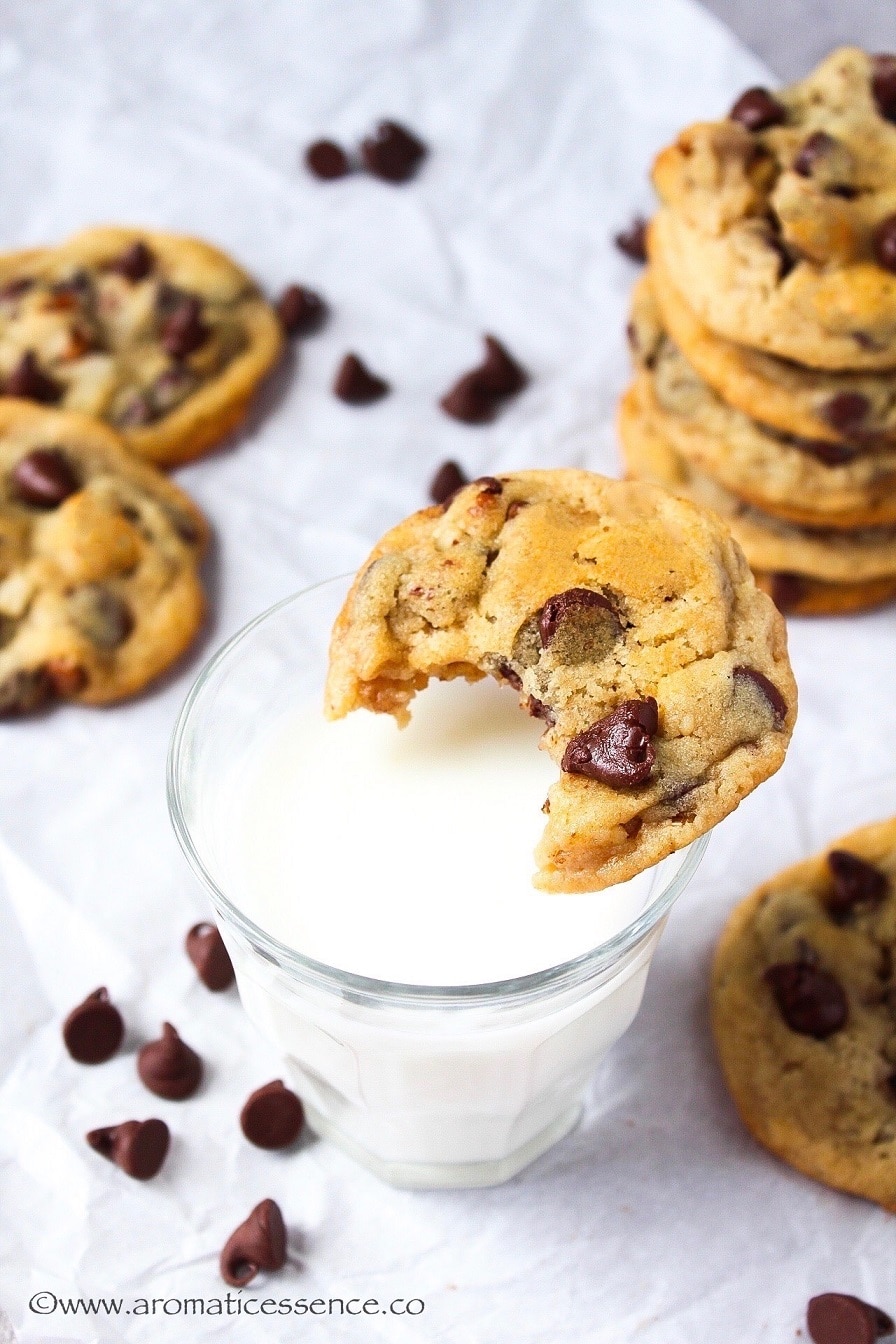
I remember trying a chocolate chip cookie for the first time when I moved to the US. It was so decadent and rich, that I was totally hooked on to it, well, thanks to my sweet tooth. Until then, the cookies I’ve had in India were the crispy, crunchy, and crumbly kinds. Not that I have any complaints, I’d happily finish a pack of glucose biscuits or Bourbon biscuits with a cuppa chai. Today, I want to share these quick and easy eggless chocolate chip cookies with you guys! I’ve been experimenting with an eggless version for quite some time now and I’m happy to share this with you. The recipe for eggless chocolate chip cookies is adapted from Nestle’s Toll House chocolate chip cookies. I love that recipe because it is a pretty simple, no-fuss, classic chocolate chip cookie recipe that doesn’t call for any fancy ingredients. I’ve modified it a bit by swapping the eggs and playing around with the sugar quantities because I wanted a chewier cookie. And, I also chilled the dough for a day, because that chilling time definitely gives the cookies an extra flavor boost, thanks to all the chemistry happening between the ingredients during the resting time. I’ve made a lot of batches of chocolate chip cookies with eggs. And to think that this eggless version is just as good is really saying something. We do not miss the eggs in these cookies, just as we don’t miss them in this eggless banana bread or eggless French toast recipe.
Ingredients needed for this egg-free version
Flour Unsalted batter Sugars (white and brown) Yogurt Vanilla extract Baking soda Salt And loads of chocolate chips or if you feeling fancy and gourmet-ish, use a good quality slab of chocolate and cut it into chunks
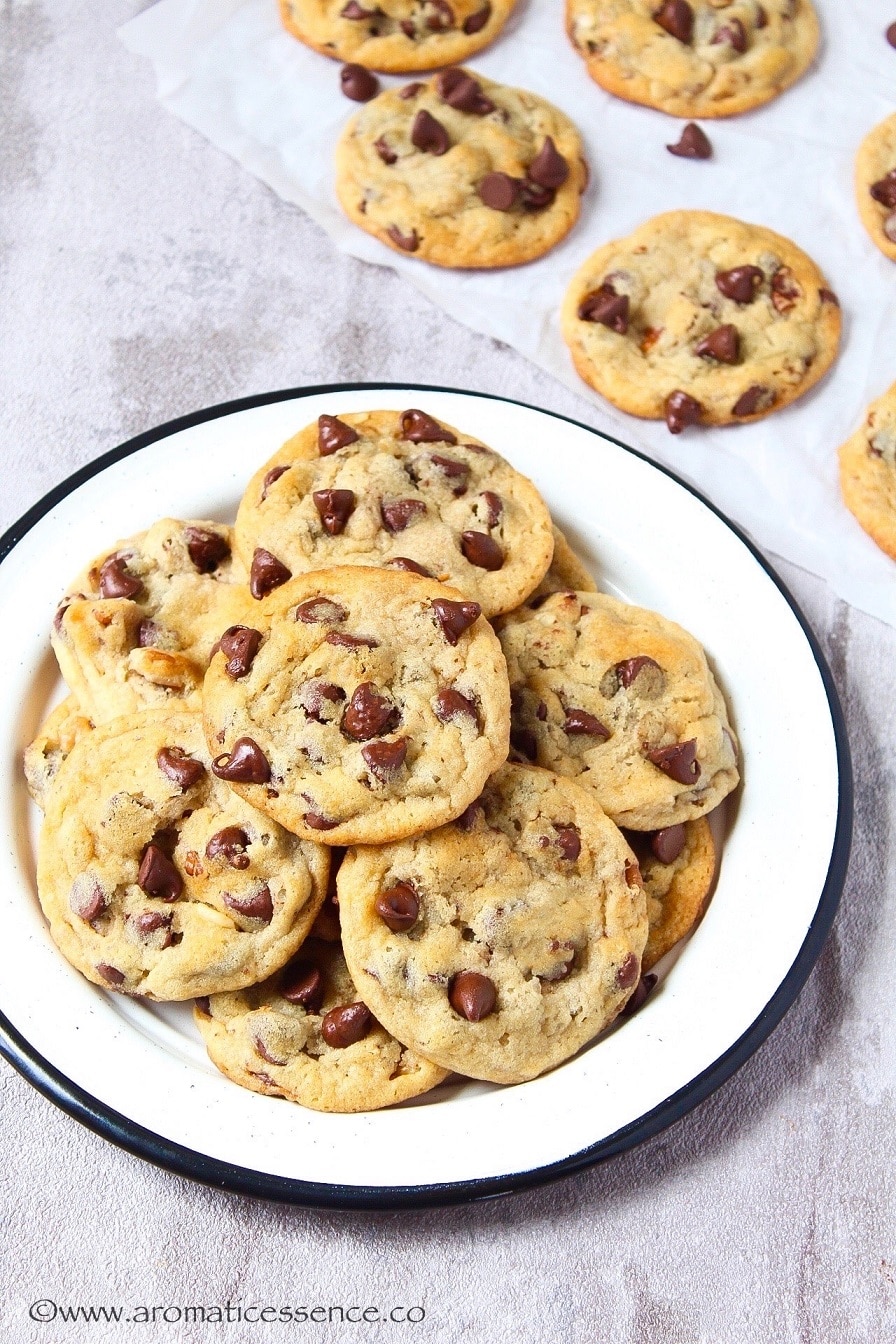
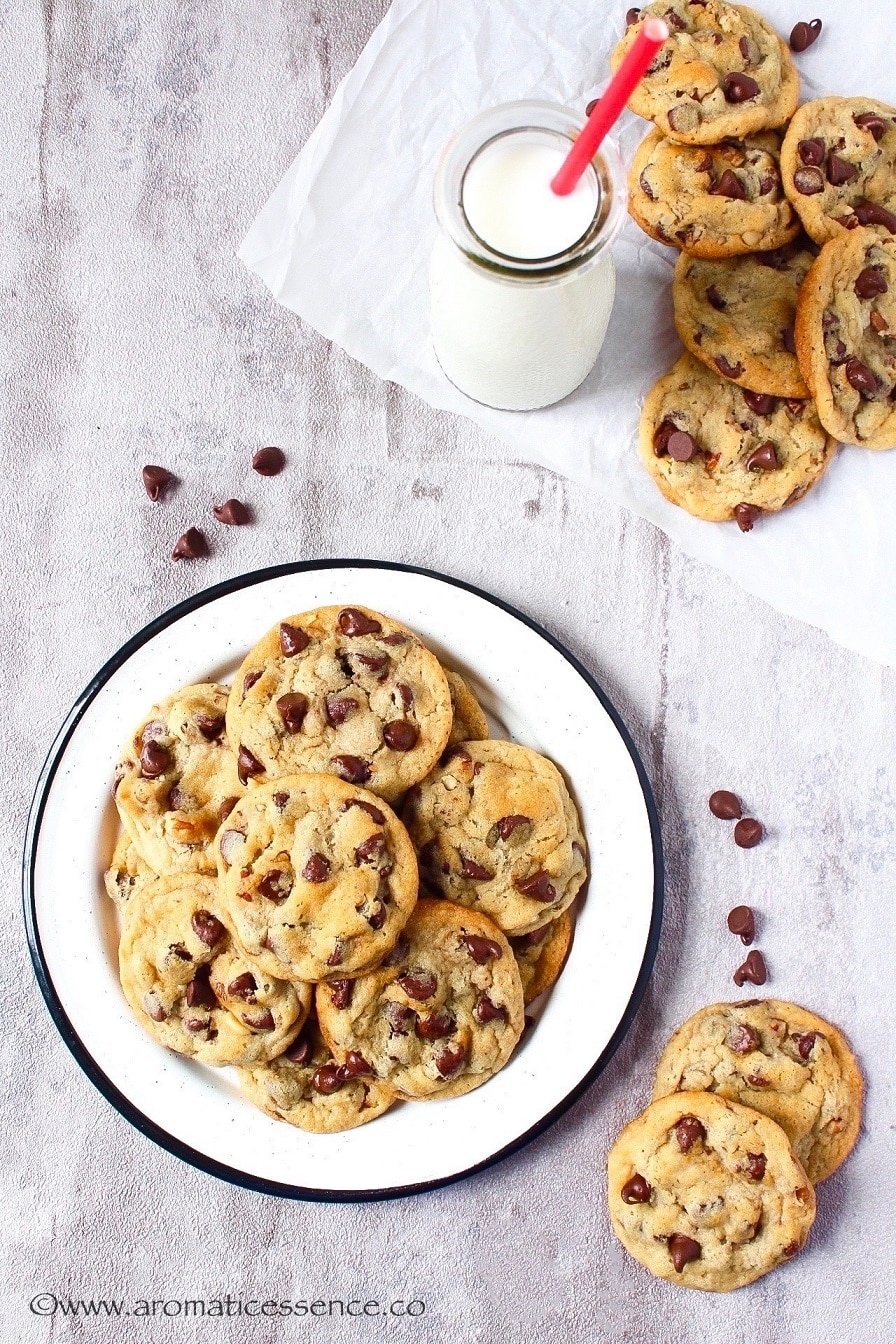
These are the best eggless chocolate chip cookies I’ve ever made, and they never last past 2 days in my house. This is not a very big batch, but you could easily double it, bake half, and freeze the remaining cookie dough to satisfy those out-of-the-blue dessert cravings 😀 And I take it from your feedback that you guys love the outcome of these eggless bakes made with yogurt too! So trust me when I say you will love these eggless chocolate chip cookies 🙂
How to make chewy eggless chocolate chip cookies from scratch – Step-by-step instructions
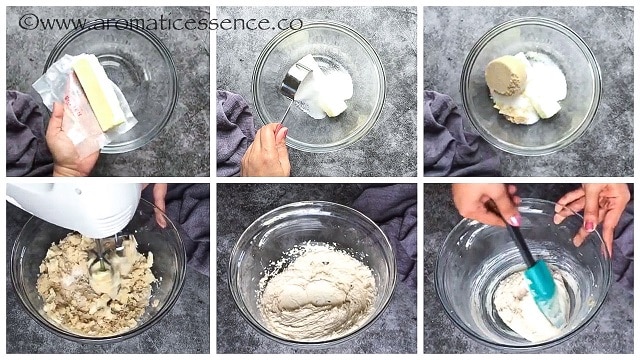
Step 1: Cream butter and sugars
In a large bowl, add 1/2 cup unsalted butter, 1/4 cup granulated sugar and 1/2 cup packed light or dark brown sugar. Beat on medium speed until light and fluffy, about 3-5 minutes, stopping to scrape down the sides of the bowl periodically.
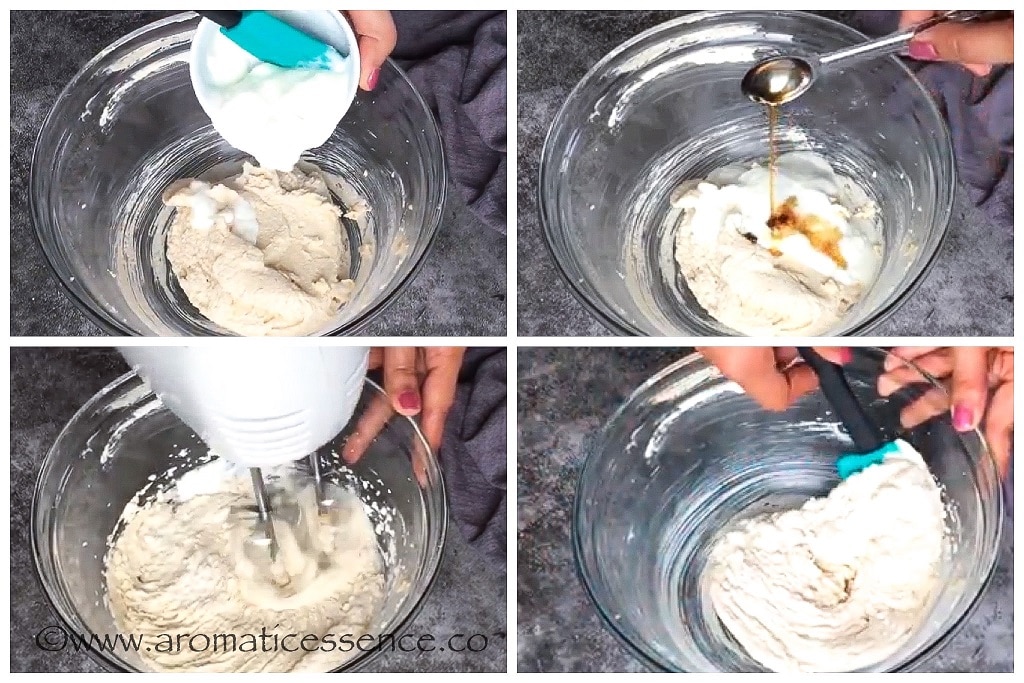
Step 2: Add yogurt and vanilla extract
Add 1/4 cup yogurt and 1 teaspoon of pure vanilla extract, beat on medium speed until well combined.
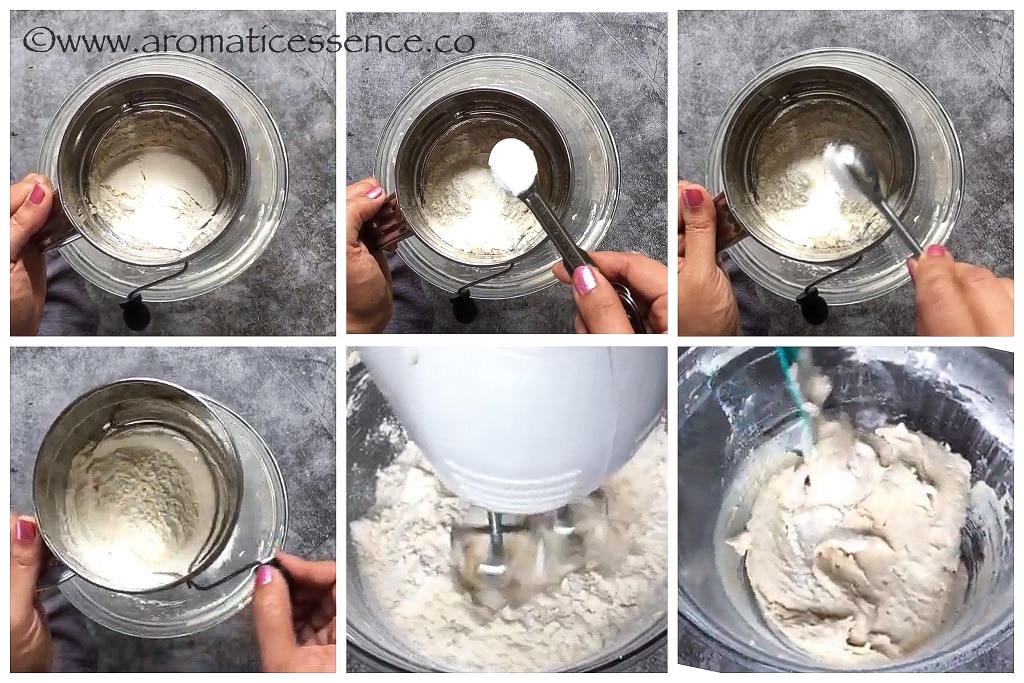
Step 3: Add dry ingredients
Using a sifter or fine-mesh sieve, sift 1 and 1/4 cup all-purpose flour along with 1/2 teaspoon of baking soda and 1/4 teaspoon of kosher salt. Mix on the lowest speed just until combined and no more flour pockets are visible. Avoid over-mixing. You can whisk the dry ingredients in a separate bowl and then add them to the mixture.
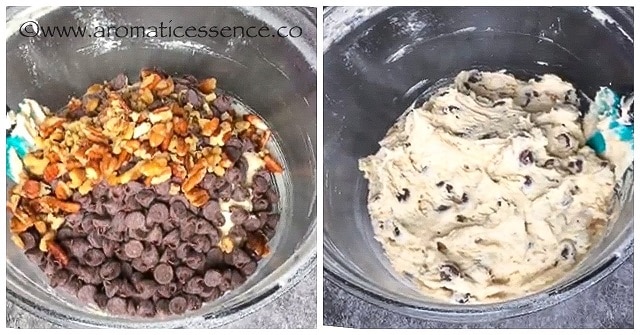
Step 4: Add chocolate chips and chopped nuts
Add 1 cup of chocolate chips or chunks and 1/2 cup of chopped pecans (optional) and fold in gently.
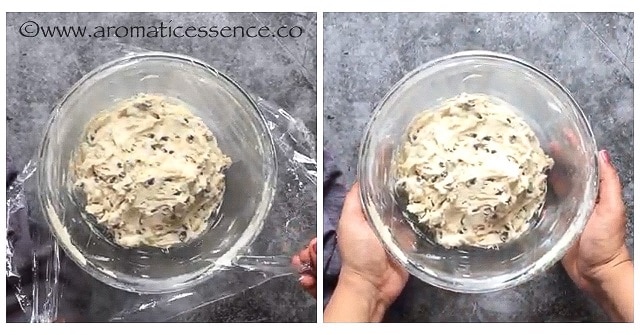
Step 5: Refrigerate the cookie dough
You can go about refrigerating the cookie dough in 2 ways;
Cover the bowl: Cover the bowl with a cling wrap and refrigerate for a minimum of 2 hours to 24-48 hours for best results. You may refrigerate the dough for a maximum of 5 days.
Scoop the dough balls and refrigerate: Using a cookie scoop, drop spoonfuls of cookie dough on a rimmed baking tray lined with parchment paper and refrigerate for 2 to 24-48 hours. Remember to cover the baking tray containing the cookie dough balls with plastic wrap to prevent the dough from drying out and absorbing odors.
Step 6: Bake
Preheat the oven at 375° F for 10 minutes. If you chilled the dough in the bowl:
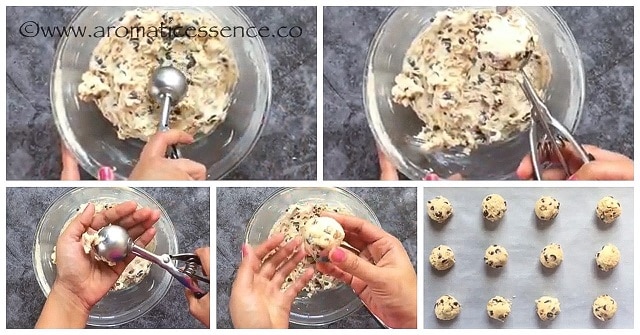
Remove the bowl from the refrigerator and let it sit on the counter for 10-15 minutes, the dough will be hard but will soften a bit which will make it easy to scoop the dough. Scoop the cookie dough using a cookie scoop, and roll it between your palms to form a ball. The rolling is optional, if you want round cookies, or else simply scoop it straightway onto the parchment-lined baking tray or cookie sheet. Top each cookie dough with more chocolate chips and bake at 375° F on the middle rack for 9-11 minutes (or a few minutes longer depending upon the size of the dough ball) until the edges turn golden brown and the centers remain soft. While the first batch is baking, scoop up the rest of the dough, roll them into balls, and place them on another baking tray lined with parchment paper, cover with plastic wrap, and refrigerate while the first batch bakes. This will help firm up the dough balls which may soften during the scooping and shaping process. When the first batch is done baking and cooling, transfer the dough balls onto the baking tray (make sure it’s not hot) and bake. If you have more than one baking tray or sheet, you can prep the second batch about 2-3 minutes before the first batch is done.
If you chilled individual balls of cookie dough:
When ready to bake, transfer the dough balls to a baking tray lined with parchment paper or silicon mat, leaving enough space between each ball of dough and bake. You can let it sit on the counter for 10 minutes to soften a bit or flatten them slightly so that they don’t stay dome-shaped. Follow the baking instructions as mentioned above. When the first batch is done, continue baking with the leftover batch of dough balls in the refrigerator.
Step 7: Cool
Leave the cookies on the baking tray for 2 minutes, then transfer to a wire rack and let them cool completely.
Frequently asked questions
You may also enjoy these eggless cookie recipes
Thumbprint cookies Linzer cookies Shortbread cookies Bourbon biscuits Coconut cookies Digestive biscuits Slice-and-bake chocolate cookies Nankhatai (Indian shortbread cookies)
★ Have you made this recipe? I would love to hear from you! Please be sure to rate this recipe along with your feedback in the comment section below. Do subscribe to our free weekly newsletters and follow us on Facebook, Pinterest & Instagram for the latest recipes. If you make this recipe, do share a photo and tag @aromatic_essence77 on Instagram! Freeze: You can freeze cookie dough for up to 3 months. If you are unsure of finishing off the batch of cookies, you can bake half of it and freeze the remaining half of the cookie dough following either of the methods;
- Freezing the whole chunk of dough: Transfer the dough to an airtight container, label, and freeze. Or transfer the cookie dough to a cling wrap, flatten it out and shape it into a square or circular disc. Cover it well ensuring there is no air gap. Place it in the freezer for up to 3 months. Thaw in the refrigerator for a few hours, then scoop or slice pieces of dough and follow the baking steps under instructions.
- Shape the dough into a log and freeze: Shape the cookie dough into a log as you would with slice-and-bake cookies. Wrap it tightly with cling wrap or parchment paper, place it in a freezer-safe bag, label, and freeze. When you are ready to bake, defrost the log for 10-15 minutes on the counter or about 3-4 hours in the refrigerator. Then slice and bake!
- Freeze cookie dough balls: You also have an option of freezing individual cookie dough balls. To do that you would follow the same instructions under point 2 of step 5, but you would freeze it for 1-2 hours until the dough is rock solid. Place all the frozen dough balls in a resealable freezer-safe bag or an airtight container. This is a super handy option when you want to eat just one or two cookies, remove the required number of dough balls, pop them on a baking tray, and bake, adding an additional 1-2 minutes to the total baking time. There is no need to thaw the dough ball, but you could leave it on the counter for 10-15 minutes if you want to. Measure the flour correctly: If using a measuring cup to measure the flour, remember to fluff the flour in the container and then spoon it into your measuring cup till it overflows, then level it off the excess with the back of a butter knife. This way you avoid packing excess flour which could make your cookies dry and dense. Softened butter: Recipes usually state to use softened butter for baking. So how do you know if your butter is at the right temperature? Test by pressing the butter with your finger, and applying a little pressure. If it leaves an indentation, it is perfect to be used in the recipe. If you finger sides through the butter with zero resistance, it is over-softened. It takes about 30-45 minutes for the butter to soften up. Test the freshness of baking soda: You can test if your baking soda is fresh by placing about a teaspoon of baking soda in a bowl, add a splash of vinegar over it. If it fizzes, it is fresh and if there’s no activity, it has expired and will not work in the recipe. Do not cream the butter and sugars too much: Avoid overbeating the butter and sugars. We do need those air pockets to leaven the cookies but we also don’t need an excess amount of air which will cause the cookies to rise quickly and collapse after baking. 3-5 minutes is more than enough for the entire creaming process. Avoid over-mixing the dry ingredients with the creamed mixture: Once you add the dry ingredients to the creamed mixture, avoid over-mixing. Always mix until you see no more flour pockets. Over-mixing results in the formation of gluten strands in the dough which only gives rise to a batch of tough and dense cookies! Refrigerate the cookie dough: Doing so enhances the flavor of the cookie. But most importantly, it helps prevent the cookies from spreading too much yielding a thicker and chewy cookie. When you chill the cookies, the fat i.e. butter solidifies and melts slowly as soon as the cookie dough hits the oven. If you don’t chill the dough the cookies will definitely spread and might be fragile enough to fall apart. Leave enough space between each ball of cookie dough: Unlike slice-and-bake cookies, these chocolate chip cookies spread to an extent on baking. So, remember to keep enough distance between each scoop of cookie dough on the baking tray. If you are baking these eggless chocolate chip cookies for the first time and really have no clue about this part, test a trial batch placing one ball of cookie dough and check how much it spreads on baking. You can then adjust accordingly. Avoid overbaking: Keep an eye on the cookies while they are baking. Pull them out of the oven when the edges begin to turn golden brown, the centers will look under-baked and that is what you want. The cookies will continue to bake as they cool. For that soft, chewy, and gooey center, avoid overbaking!
You used less flour You added more butter The dough was warm You over beat the butter and sugar mixture You used a hot baking tray
The dough is too cold You used more flour You used baking powder instead of baking soda
Troubleshoot: Let the dough sit at room temperature for 10-15 minutes before baking. If you already put cold dough in the oven, flatten the cookies with a fork halfway through baking. If you want to skip using yogurt, you can add a flax egg. To make a flax egg, add 3 tablespoons of warm water to 1 tablespoon of ground flaxseed meal in a bowl and leave it aside for 15 minutes. It will turn gelatinous and can be used instead of the yogurt in this recipe. You can even swap the yogurt with 3 tablespoons of applesauce instead.