Sweet and tangy lemon desserts are a celebration of spring and summer and the perfect dessert to bring to gatherings. When you’re in need of a fresh sunshine citrus dessert, look no further than this lemon curd, lemon cheesecake bars, lemon blueberry cake and lemon pound cake.
Pin this recipe to save for later
how to make lemon curd video
What is Lemon Curd?
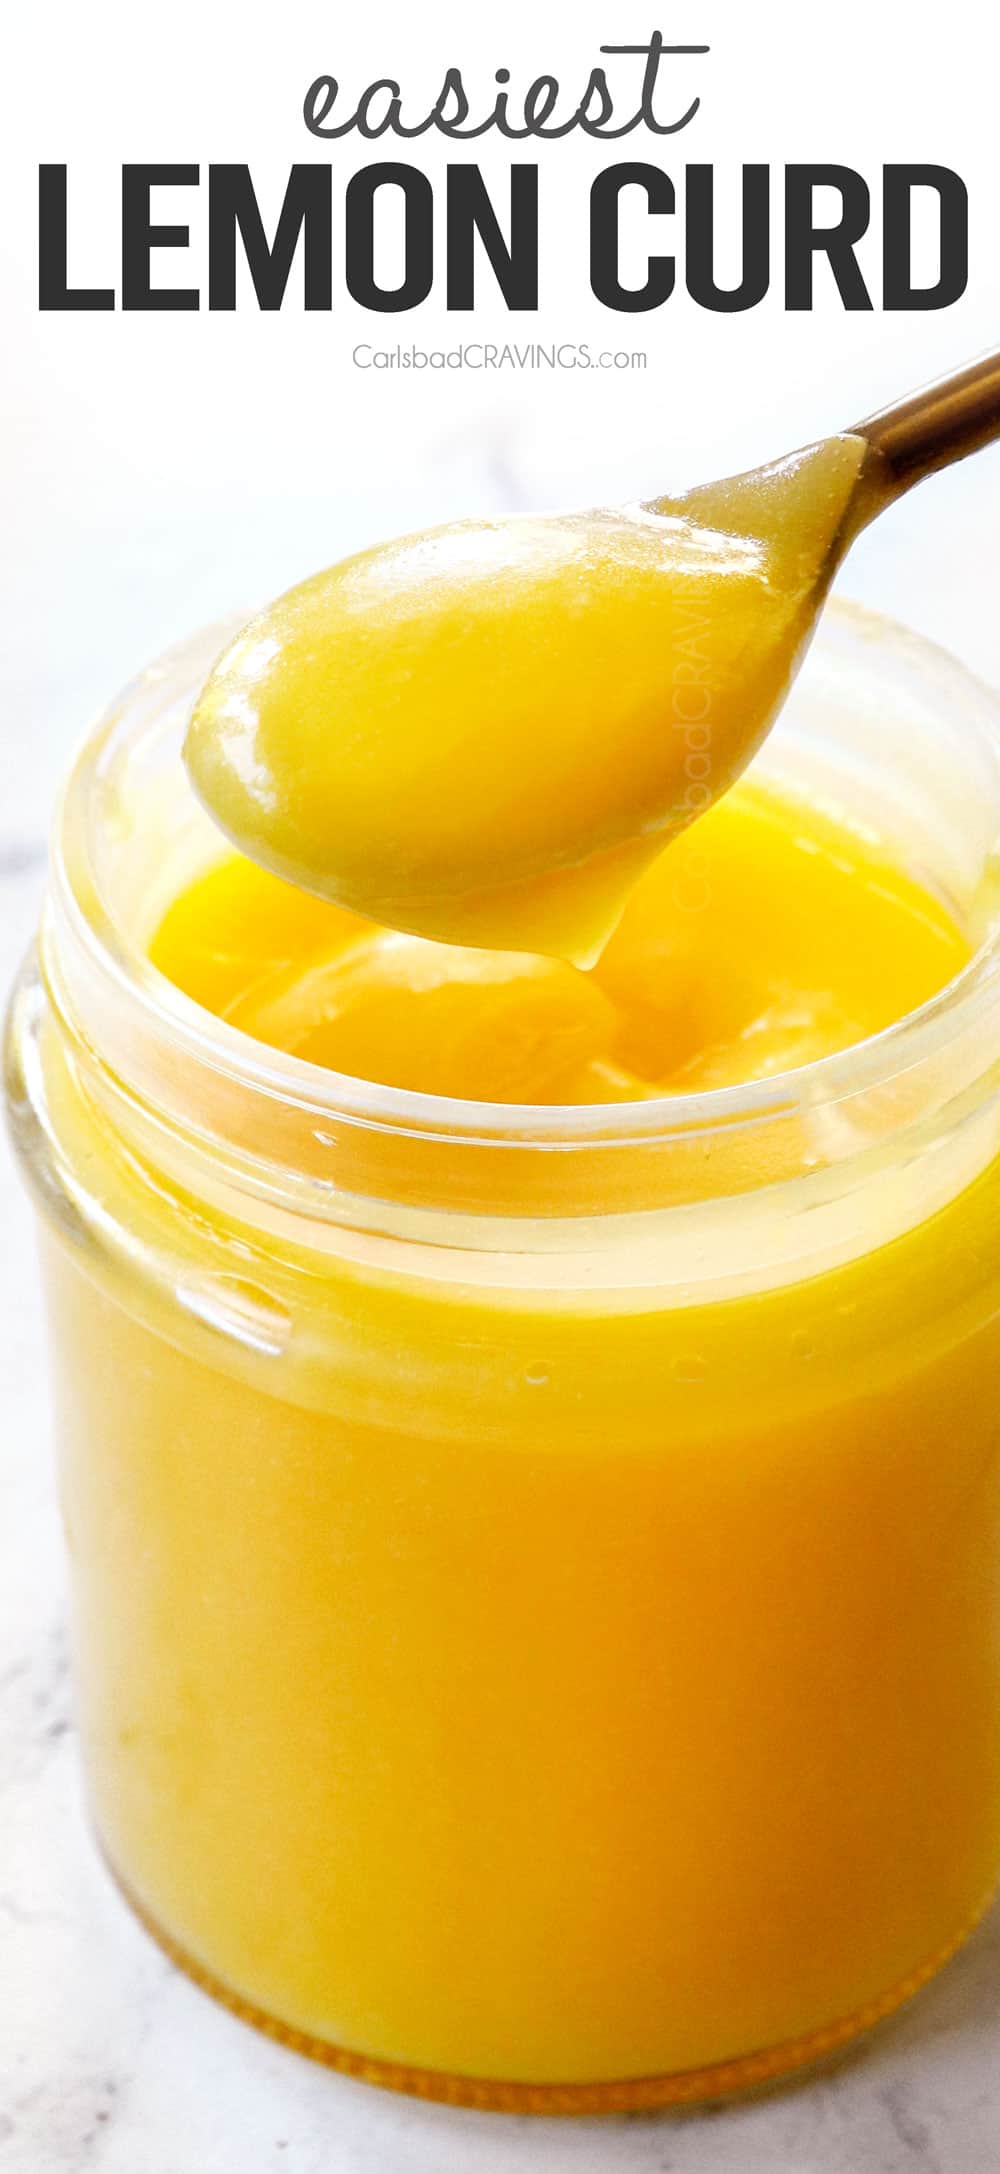
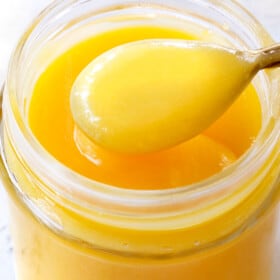
Lemon curd is a rich, smooth and creamy, vibrant sweet-tart lemony topping or spread made with eggs, lemon juice and zest, sugar, and butter cooked over the stove. It was originally served as a spread primarily at tea time on foods such scones, toast, biscuits and muffins, or as a filling for cakes, small pastries and tarts, but it’s incredibly versatile. It’s also fabulous for layered cakes, cookies, crepes, yogurt, ice cream, pancakes, – and my personal favorite, swirled into cottage cheese.
Why do they call it lemon curd?
Today, Lemon Curd is not a curd at all – but it used to be! It is believed to have originated in England in the 1800’s. One of its earliest mentions is found in 1844 in The Lady’s Own Cookery Book by Lady Charlotte Campbell Bury. The recipe was made by adding lemon juice to cream to separate the curds from the whey through a cheesecloth – creating actual lemon curd. Today, Lemon Curd is made over the stove with the addition of eggs and butter which impart a rich flavor and velvety custard-like texture that is not curd-like at all.
What’s in LEMON CURD?
Making homemade Lemon Curd is easy with this recipe! It’s, thick and lusciously creamy, wonderfully buttery with an intense sweet-tart lemon flavor. You will need 7 ingredients for this recipe: eggs, fresh lemons, sugar, butter, cornstarch, vanilla and salt. Each ingredient serves a critical role for thickening and flavoring, so please don’t skip any! Let’s take a closer look at each ingredient (recipe measurements in the recipe card at the bottom of the post): Baked goods: Use Lemon Curd in place of jam on toast, English muffins, croissants, muffins, biscuits and scones.Breakfast items: Slather the curd in between a stack of pancakes, inside crepes, on waffles, French toast, stuffed French toast, or French toast casserole.Cakes and pastries: Layer it in between cake (like Lemon Blueberry Cake), a lemon berry trifle, inside lemon cupcakes, donuts or pastries, or as a topping for pound cake, angel food cake, bread pudding or pavlova.Pies and tarts: Use it as a filling for tarts and pies then top with whipped cream and berries.Cheesecake: Spread it on top of lemon cheesecake, lemon cheesecake bars or swirl a cup into unbaked cheesecake.Cookies: Use it in thumbprint cookies, sandwiched in between cookies or macaroons, or on shortbread, warmed gingerbread, etc.Ice cream: Spoon it onto ice-cream to create lemon sundaes and pile with your favorite toppings.Lighter: Stir it into yogurt, cottage cheese (my fav!), oats, or parfaits and top with fresh fruit or stir it into softened cream cheese to create a fruit dip.Whipped cream: Gently fold lemon curd into homemade whipped cream like I do in my Strawberry Shortcakes recipe. You can also use this Lemon Curd Whipped Cream as a dip for berries – yum! Here’s why this easy recipe for Lemon Curd is worth all the hype:
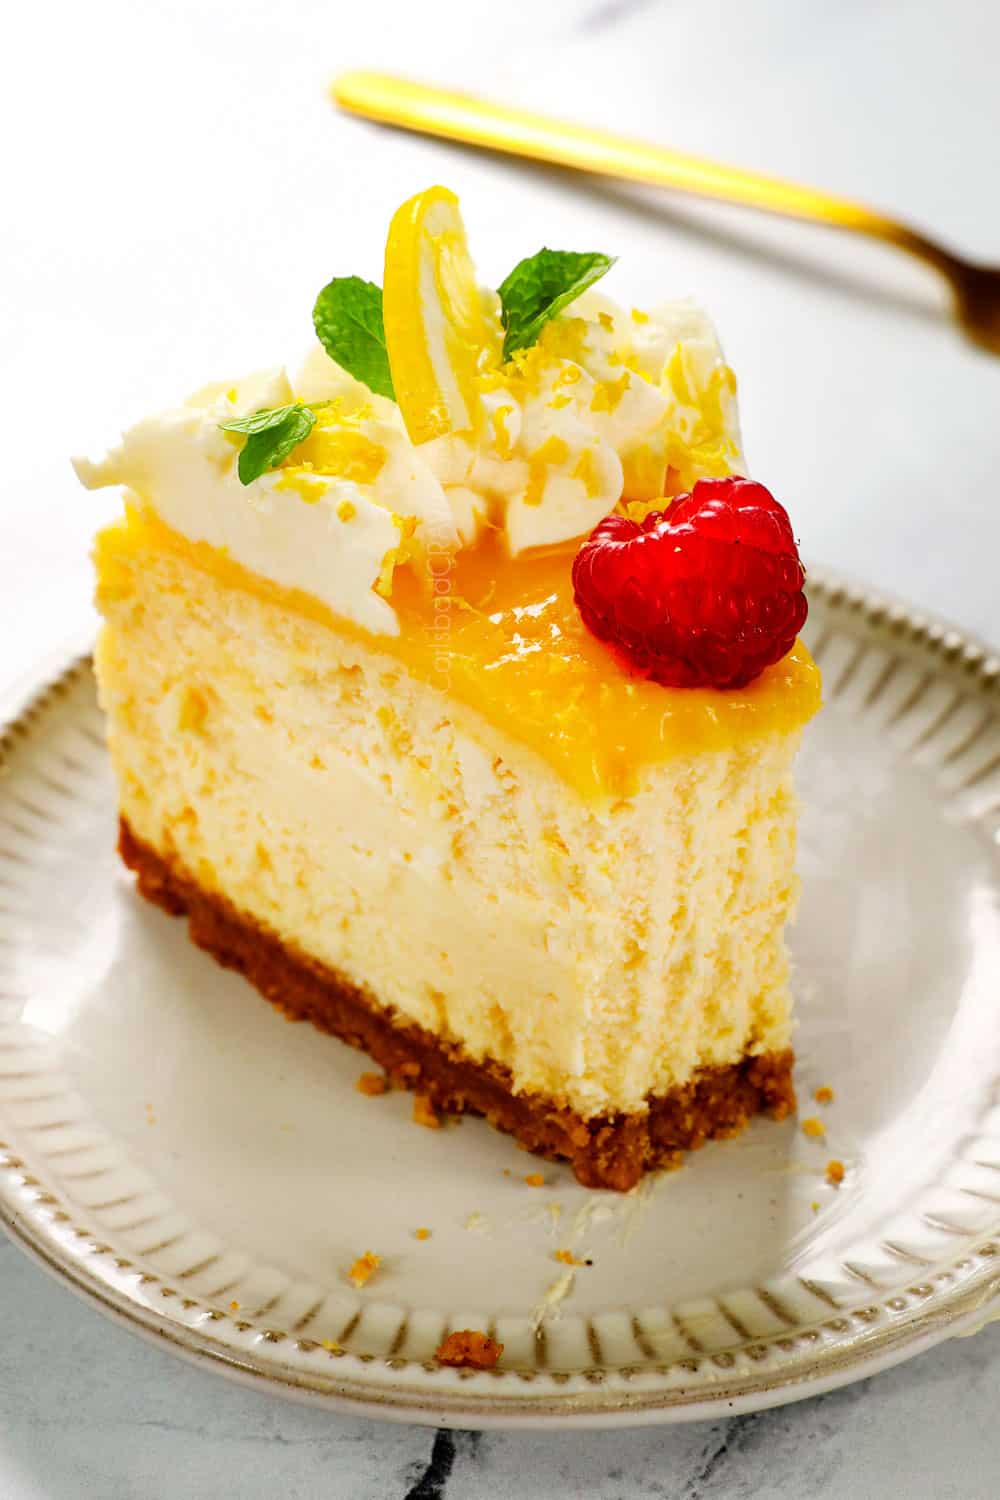
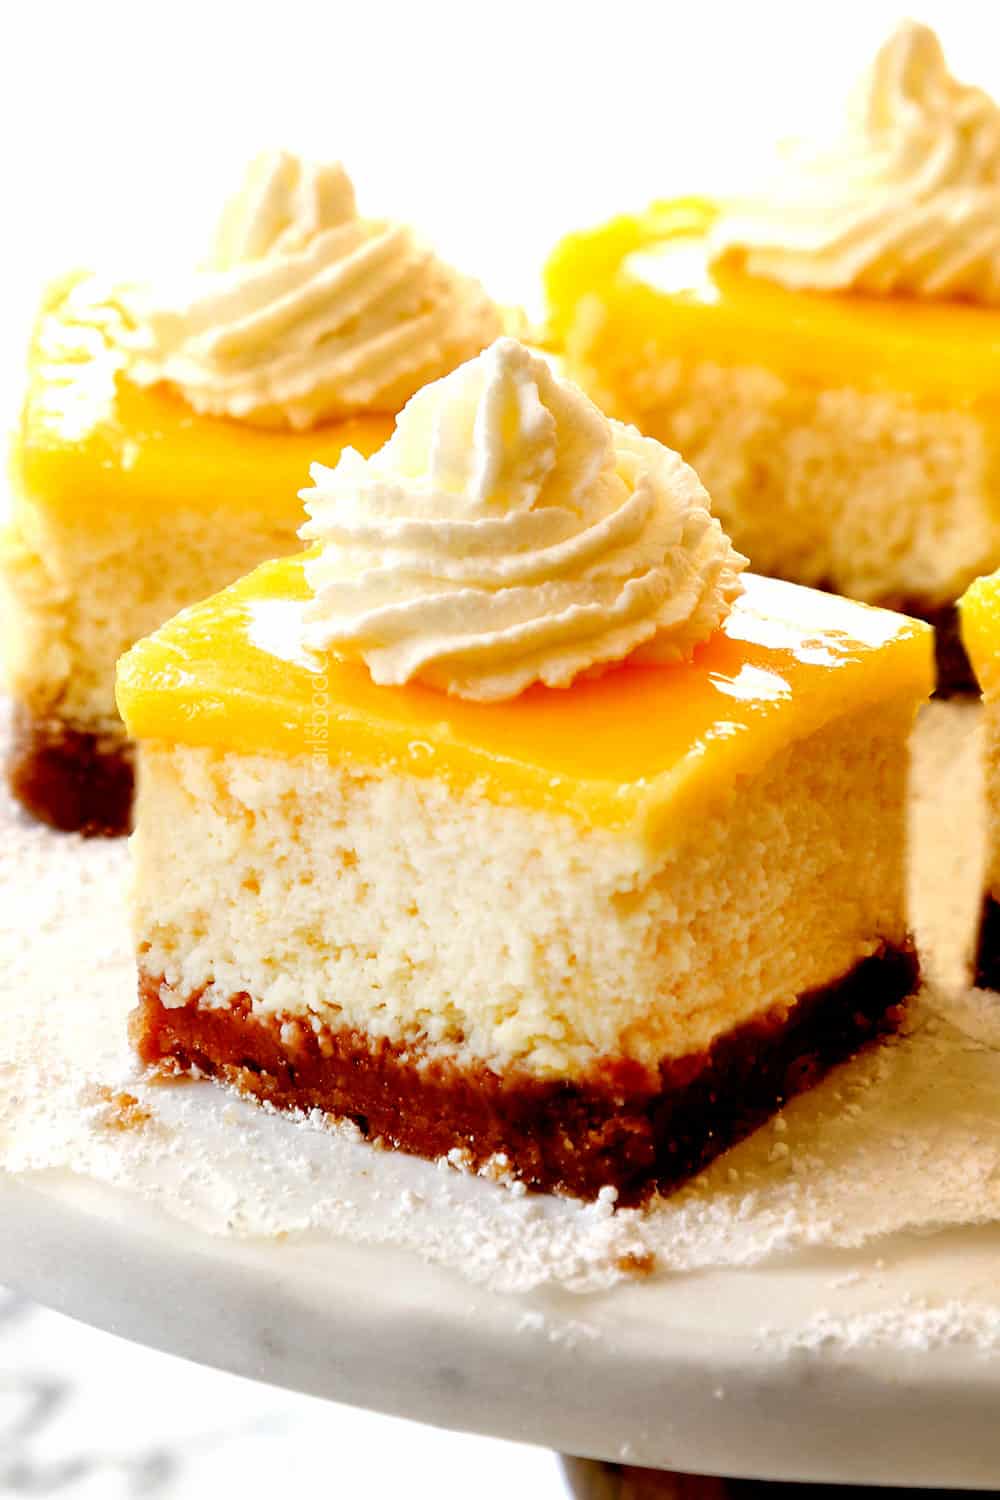
Intensely Flavorful: It’s bursting with an adept balance of bright, zingy citrus notes from the lemon and zest, sweetness from the sugar, and velvety richness from the butter. It’s eyes-roll-back-in-your-head-good straight from the jar.SO creamy and never runny: It’s irresistibly soft, smooth and silky creamy but sturdy enough to layer between rounds of cake. The secret? Adding a bit of cornstarch to the eggs and finishing with cold butter at the end.Made with a few ingredients: Gather up some fresh lemons, sugar, eggs, butter, vanilla and cornstarch and you’ll be enjoying fresh Lemon Curd in minutes.Better than store-bought: Once you make this easy homemade version, you’ll never be tempted to pick up a jar at the store again! This recipe for Lemon Curd is superior in both taste and natural ingredients, instead of difficult to pronounce fillers in a jar that has likely been sitting on the shelf for too long. Easy to make: This recipe is one of the easiest things to make! Simply whisk the eggs, sugar, lemon juice and cornstarch in a saucepan over moderately low heat for about five minutes until thickened, then stir in the butter and vanilla – that’s it!Stores beautifully: Homemade Lemon Curd keeps for up to 4 weeks in the fridge or for a year in the freezer so you can always have it at your fingertips. Great gifts: Jars of velvety sunshine make delightful gifts all year round.It makes everything better: I’ve already shared Lemon Curd on my Lemon Cheesecake Bars and Lemon Blueberry Cake and I’m excited to share it again on my Lemon Cheesecake coming Sunday! That being said, Lemon Curd doesn’t have to go on any fancy desserts, it will add a regal touch of tart sweetness to so many of your favorite breakfast foods like pancakes and waffles, or just swirl it in some yogurt and top with fresh fruit.
Lemons: For the best zingy and citrusy flavor, Lemon Curd should be made with freshly squeezed lemon juice and lemon zest. We will use a full 2/3 cup freshly squeezed lemon juice which is about 3-4 large lemons and 2 teaspoons lemon zest, although you can add additional zest depending on how tart you like your curd. Eggs: Eggs help the curd hold together like pudding. You will need 4 large eggs and 2 large egg YOLKS only for a total of 6 eggs in the recipe. Some recipes strictly use egg yolks and I find those curds way too rich. This recipe uses a combination of eggs and egg yolks for the ideal flavor and consistency.Butter: Helps to thicken the curd and makes it super creamy, rich and decadent with a velvety mouthfeel and subtle buttery flavor. Use unsalted butter or omit the salt in the recipe.Sugar: Provides the balancing sweetness to the tart lemon juice. Please use only granulated sugar. Do not use brown sugar or honey or the flavor and consistency will be ruined.Salt: A pinch of salt balances the flavors. Use regular table salt and not anything larger.Cornstarch: Set yourself up for lusciously thick and smooth success with this secret weapon. Cornstarch not only ensures the curd thickens properly but more importantly, it binds to the egg proteins and acts to protect them from denaturing, helping to prevent your curd from curdling.
TIPS FOR PICKING LEMONS
Lemons are the star of the show, so let’s pick good ones! Here are some helpful tips for picking the best lemons:
Appearance: The lemons should have bright yellow, smooth skin without mold, soft spots or wrinkles/shriveling.Smell: They should have a pleasant fragrance before cut into them and a clean, sharp, and citrussy fragrance once they’re sliced open. If they smell at all moldy, fermented or vinegary, they are bad.Weight: Look for lemons that are heavy for their size which means they are extra juicy. Texture: Look for lemons that yield slightly when gently squeezed. You don’t want lemons that are too firm because they won’t yield much juice and you don’t want lemons that are too soft, or they could be on the verge of spoiling. Size: Select smaller lemons because they will have thinner skins and are the best for juicing; whereas larger, thicker-skinned lemons are best for zesting.
What if your lemons are not very juicy?
You will need 2/3 cups lemon juice in this Lemon Curd recipe. To yield the most lemon juice out of your lemons, start by breaking down the membranes inside the lemon. The membranes hold all the juicy goodness we want! Here’s how:
Microwave the lemon for 15-30 seconds or until slightly warm to the touch because warm lemons release more juice than cold lemonsVigorously roll the lemon on the counter for a few seconds to loosen and break down some of the citrus membranes which will get the juices flowingUse a lemon squeezer or reamer to extract more juice
How to Make Lemon Curd
This recipe is easy to make from scratch on the stove without a double boiler or tempering the eggs. The key here is to work over medium-low heat and to whisk constantly – but that’s also the good part- all you have to do is whisk! Here’s how to make creamy Lemon Curd with step by step photos (full recipe measurements in the recipe card at the bottom of the post):
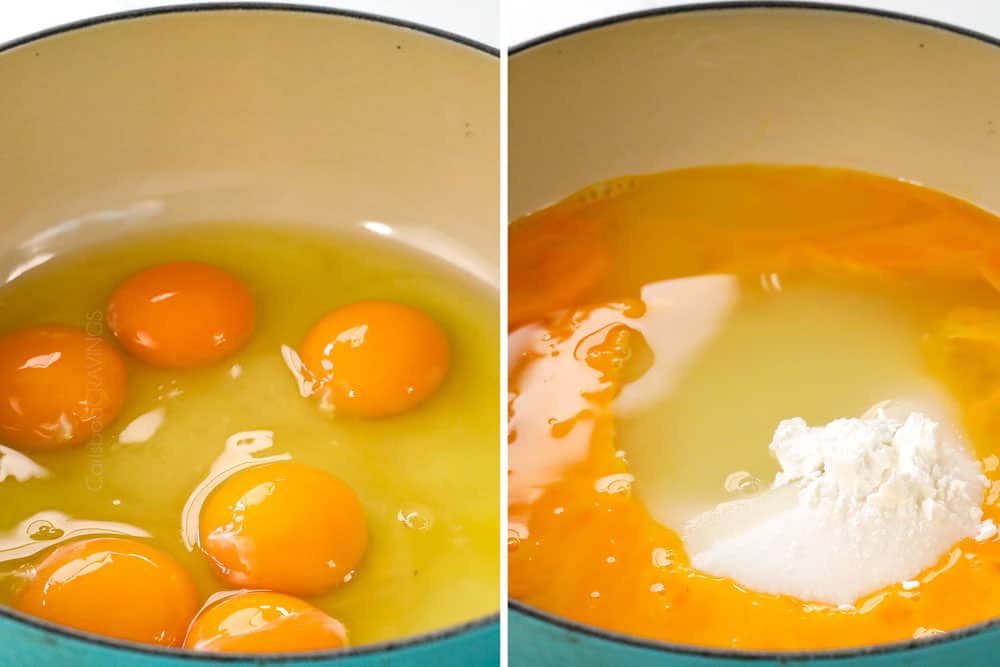
Step 1: Combine the ingredients. Whisk the eggs and egg yolks together in a small saucepan (stainless or enameled). Whisk in the lemon juice, lemon zest, sugar and cornstarch until the cornstarch dissolves and most of the sugar has dissolved.
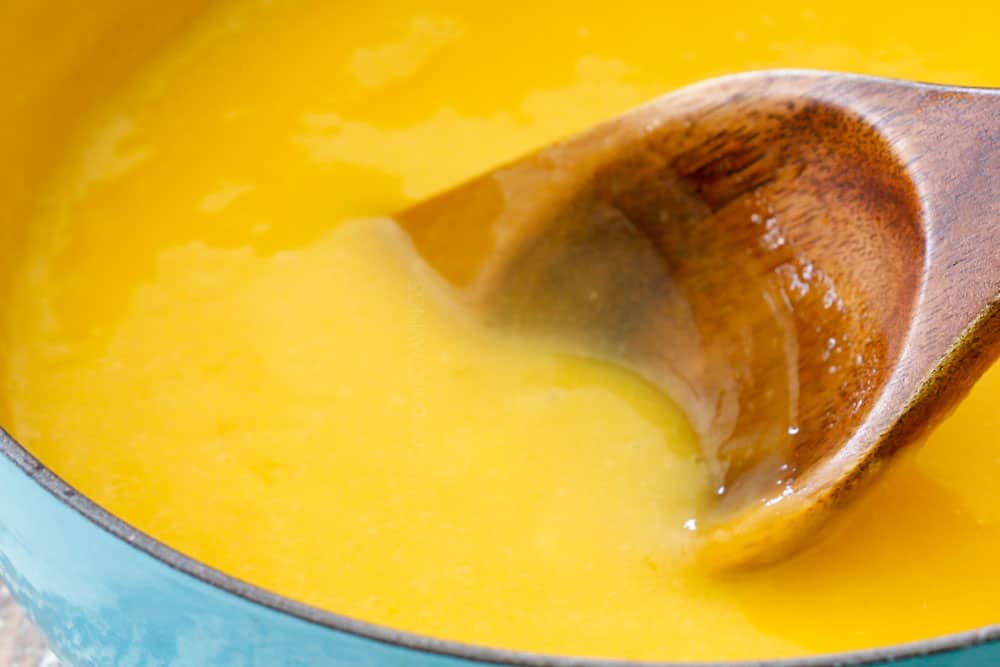
Step 2: Simmer until thickened. Cook over medium-low heat, stirring constantly, until thickened, about 4-8 minutes.
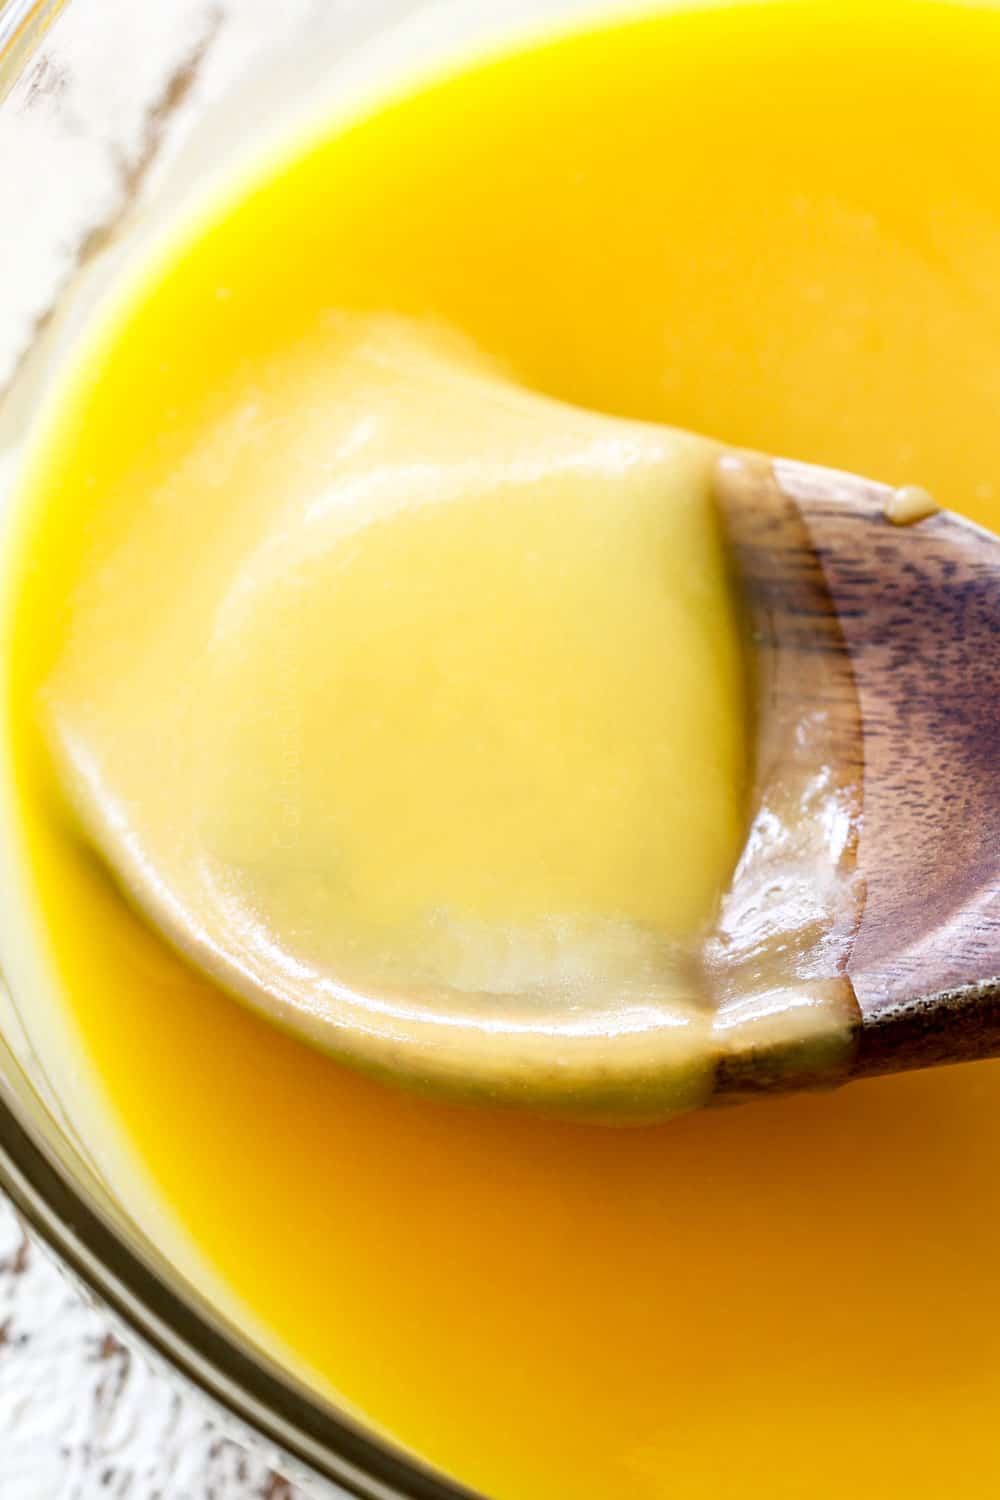
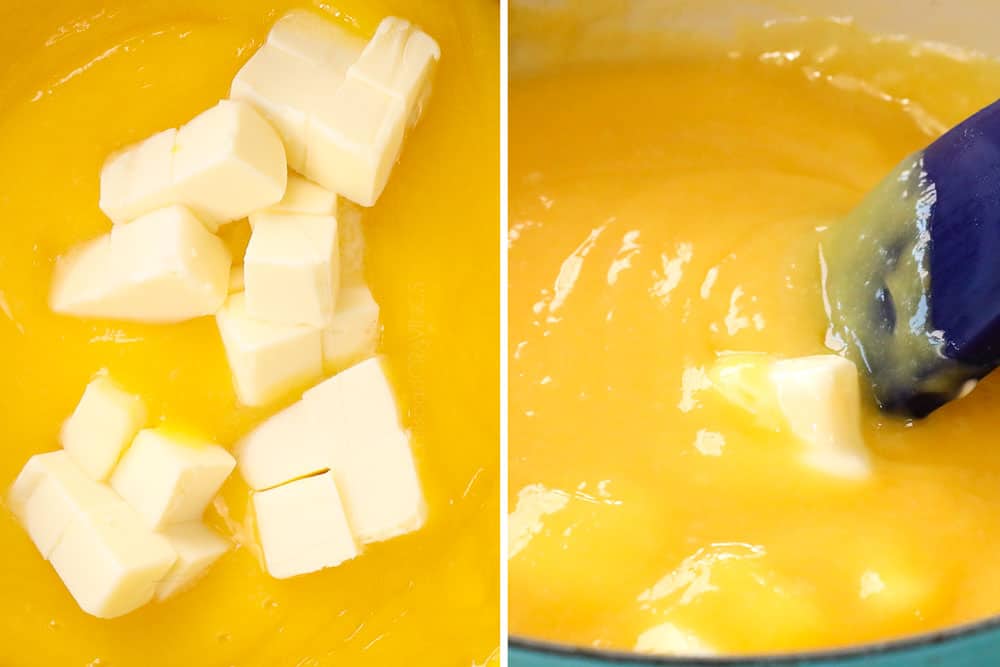
Step 3: Add the butter. Once thickened to the consistency of pourable pudding, immediately remove the saucepan from the heat and stir in the cubed butter until melted, followed by the vanilla and salt.
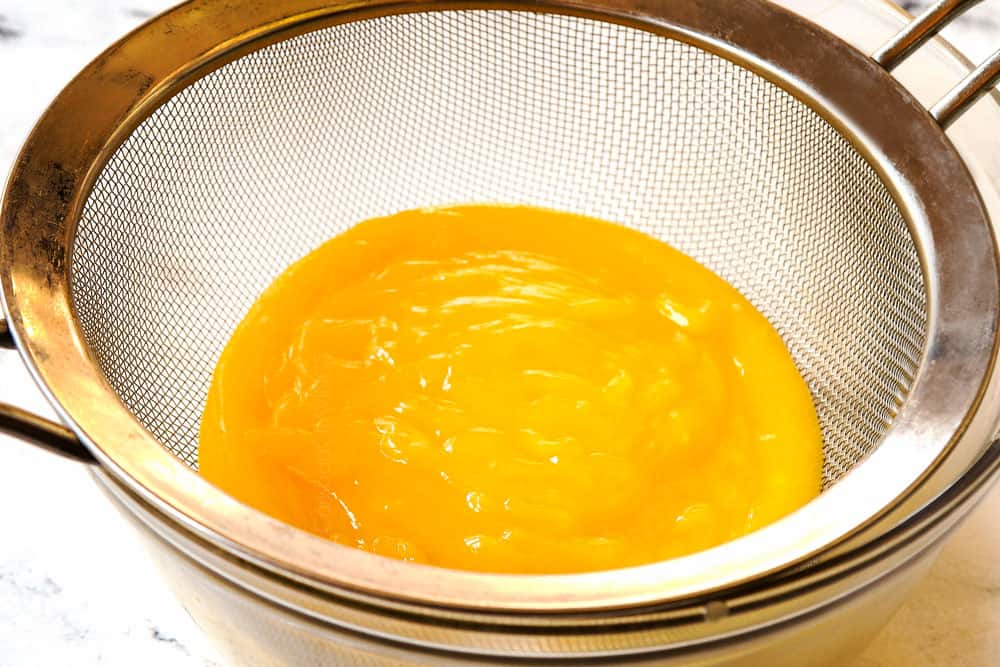
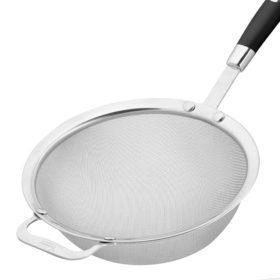
Step 4: Strain the Lemon Curd. Strain your curd through a fine mesh sieve to remove any cooked eggy bits to ensure it’s perfectly smooth and creamy. It helps to push the curd through with a back of a spatula.
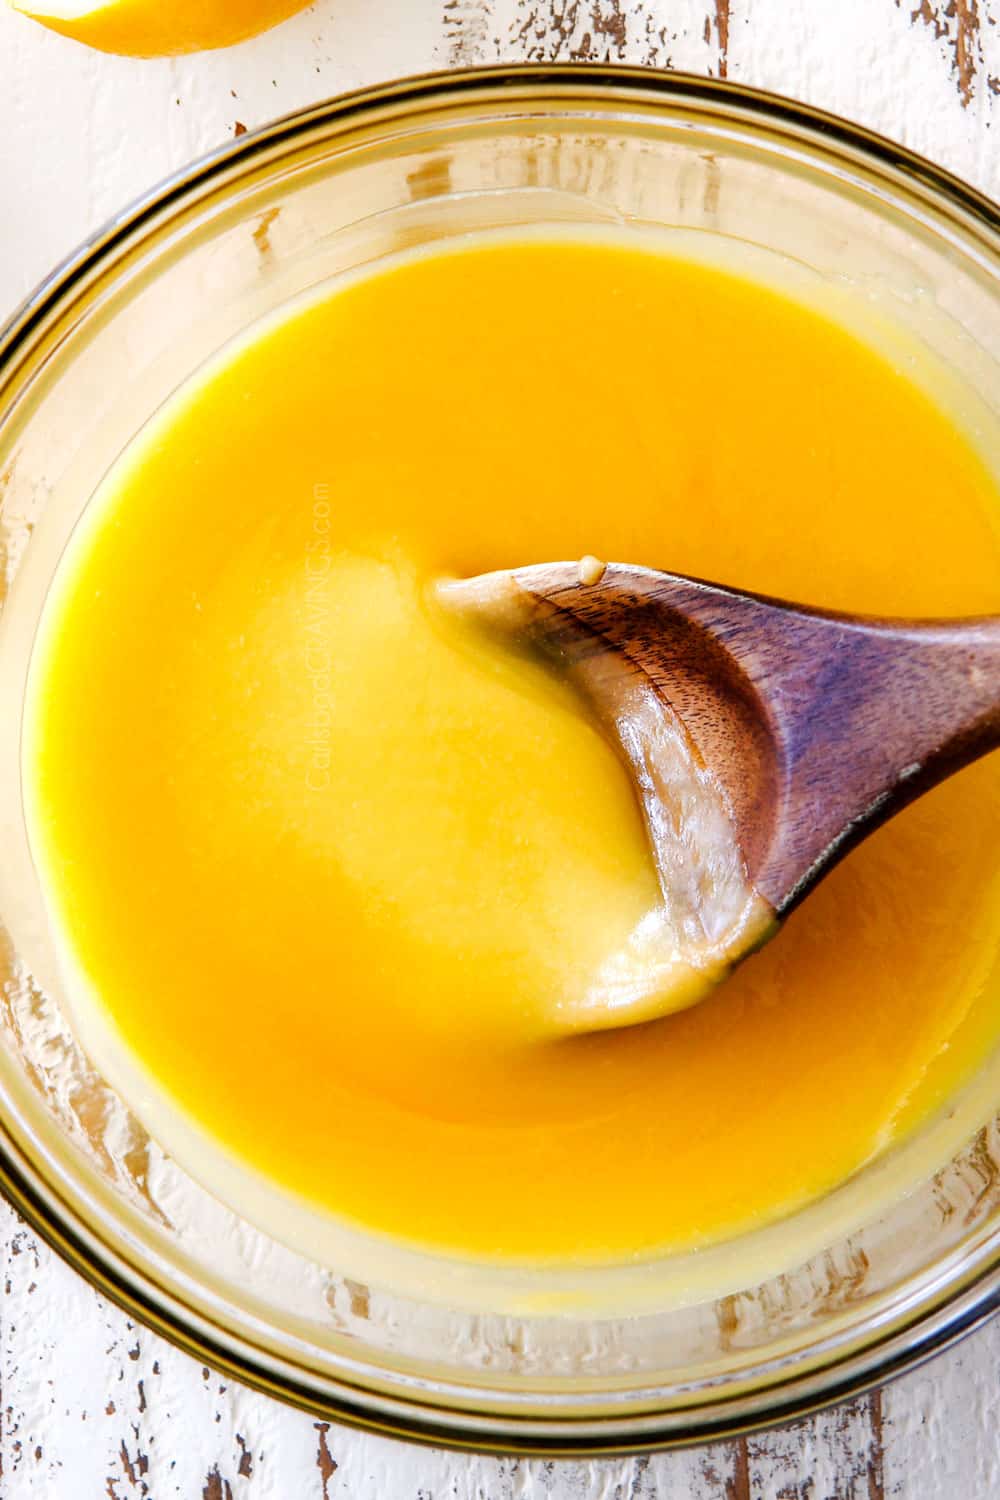
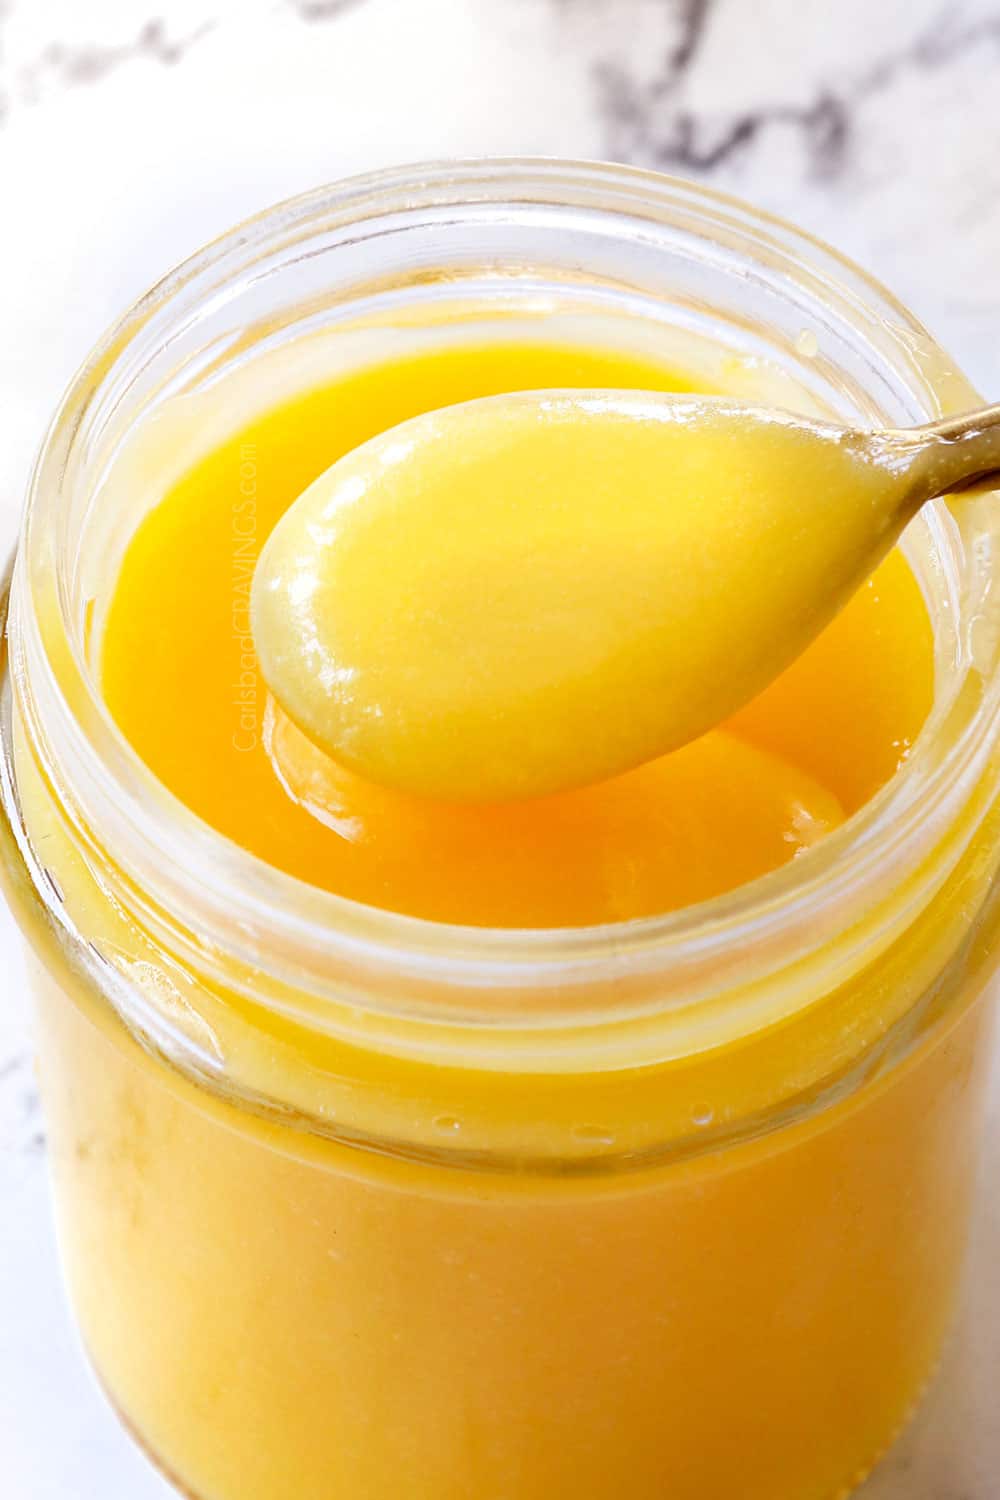
Step 5: Chill. Cover the lemon curd with plastic wrap placed directly on the surface of the curd to prevent a film from forming. Chill for at least two hours to thicken. The Lemon Curd will taste even more intensely glorious once chilled.
Should I Strain the Lemon Curd?
Straining your lemon curd will ensure gloriously smooth Lemon Curd every time. It removes the egg chalazae, possible scrambled bits and any lemon pulp. Here’s the deets:
Take care when zesting your lemons
Lemon zest is prized for its intense tart lemon flavor, just as long as you don’t remove the white membrane (pith) with it. Pith is the white spongy layer between the fruit and the peel, and it has a very bitter taste. If you zest the white pith, your curd can be tainted with a bitter aftertaste.
Use a heavy-based, nonreactive saucepan
Whenever cooking with highly acidic ingredients, it’s important to use a nonreactive pan otherwise the acid in the food can mix with the metal and results in an unpleasant metallic taste. It also can damage the pan. Examples of nonreactive saucepans that don’t react with food include stainless steel, anodized aluminum, and enameled. Avoid aluminum, unlined copper and non-enameled iron.
when to use a double boiler
If you don’t have a non-reactive saucepan (but have a heatproof bowl), are extra worried about scrambling the eggs or your stove runs hot, you can use a double boiler. To make a makeshift double boiler, use a heatproof mixing bowl on top of a pot of simmering water, and make sure the water doesn’t touch the bottom of the bowl. Add at least an 5 extra minutes to the cooking time because the double boiler method cooks more slowly and gently.
Stir constantly to prevent the eggs from scrambling
Be patient, and don’t stop stirring until the curd is removed from the heat. Stirring the curd evenly distributes the heat, otherwise the eggs will scramble. Take extra care that you alternate or switch to a rubber spatula to better scrape the sides, bottom, and corners of the pan, where the eggs can hide, cook and scramble.
Cook low and slow
Low and slow is the secret to smooth Lemon Curd. Cook the curd over medium-low heat or low if your stove runs hot. Don’t be tempted to turn the heat up to quicken the thickening process unless you’ve been stirring for 10 minutes without any results.
How to know when lemon curd is thickened
You’ll know the Lemon Curd is done when it’s the consistency of pourable pudding and the curd registers 180°F on an instant-read thermometer. I love taking the curd temperature for a foolproof method – just make sure to continue to stir while you’re taking the temperature because the curd as at peak heat and can scramble if you stop stirring. If you don’t have an instant read thermometer, you’ll know the curd is done when your finger leaves a clear path on the back of a spoon. Note that the curd will continue to thicken and set completely as it cools in the refrigerator.
Removes chalazae: Your whole eggs will often have a white cord-like attachment called a chalazae that hold the yolk in the center of the egg. These chalazae can leave little eggy bits in your curd that may look like scrambled eggs, but they’re not. They simply don’t break down easily and need to be strained out. Removes scrambled egg bits: Don’t let a few scrambled egg bits ruin your curd, it will still taste glorious. Just strain out any egg that got away from you and possibly scrambled on the sides or bottom of the pan. Removes lemon pulp: When juicing fresh lemons, sometimes a large piece of pulp or seed can make its way into the curd. Straining it will eliminate any of these strays. It will also strain out some zest, which I personally don’t mind but it will make it even silkier.
Why Won’t my Lemon Curd Thicken?
Lemon Curd should thick enough to coat the back of a spoon when it’s hot and should thicken up to pudding-like consistency when it’s chilled. The curd can take up to 10 minutes to thicken to the consistency of pourable pudding, so be patient (remember it will thicken more once it cools). Continue to cook over medium-low heat, whisking constantly, until thickened. It will seem like it’s not thickening at all and then out of nowhere it will thicken right up. If you’ve been cooking the curd for over 10 minutes, however, and your curd is still thin like heavy cream, then there are a few culprits:
It’s likely your measurements were off and you either added too much lemon juice or not enough egg.You may not have heated the lemon curd to the proper temperature. Using a thermometer is a great way to ensure that you are cooking the egg to the point of thickening – 170 degrees F.
Ways to Customize This Recipe
Lemon Curd is easy to customize to make it perfect for you. Here are a few suggestions:
Cook longer: Most Lemon Curds are runny because they don’t get cooked long enough to thicken the egg yolks. Continue to cook for at least 10 minutes, or up to 15 if using a double boiler. Increase the temperature: If you’ve cooked the curd for a full 10-15 minutes, and it’s still not thickening, then increase the temperature of the stove slightly – and don’t stop whisking! Add an egg yolk: First, ensure your curd is cooked to 170 degrees F and if it still hasn’t thickened, you can whisk an egg yolk in a small bowl then temper it by slowly drizzling in a small amount of the warm liquid curd while whisking constantly. Continue to whisk until smooth then whisk this mixture back into the lemon curd. Continue to cook over medium-low and whisk for an additional 5-10 minutes then repeat if needed.Add a cornstarch slurry: First, ensure your curd is cooked to 170 degrees F and if it still hasn’t thickened, whisk 1 teaspoon cornstarch with 1 tablespoon water until the cornstarch is completely dissolved. Slowly whisk the slurry into the liquid curd and whisk over medium-low heat for an additional 5 minutes then repeat if needed.
For a sweeter: increase the sugar For less sweet: reduce the sugarFor more tart: stir in an additional 1-2 teaspoons lemon zest after you’ve added the butterFor less tart: reduce the amount of lemon zestFor more buttery: add additional butterFor less rich: reduce the amount of butter For thicker: add an additional 1-2 egg yolksFor richer: add 1 extra egg yolk or additional butterFor a dairy-free lemon curd: swap the butter for your favorite dairy free butterOther fruit curds: In addition to lemon, you can make curd with Meyer lemons, oranges, limes, grapefruit, or passionfruit. Substitute equal amounts of one juice for another but you may need to reduce the sugar as lemon juice is tarter than some of the other fruit juices.
How long is lemon curd good for?
According to the National Center for Home Food Preservation, Lemon Curd will keep in an air tight container in the refrigerator for up to four weeks. Of course, always use your best judgement.
Can you freeze lemon curd?
Lemon Curd freezes well for up to one year without any change in quality. Another bonus is that it doesn’t freeze solid, so you can spoon out exactly what you need without thawing all of it.
How to freeze lemon curd
To freeze Lemon Curd, make sure that the curd has cooled completely. Transfer desired amount to a freezer safe, airtight container or freezer bag. If using a container, make sure there is at least ½ inch air at the top to allow for expansion. If using a freezer bag, squeeze out excess air to prevent freezer burn. Freeze for up to one year. When ready to use, transfer the curd to the refrigerator and let thaw for 24 hours. Tag @CarlsbadCravings and Use #CarlsbadCravngs Leave a Review, I Always Love Hearing From You!