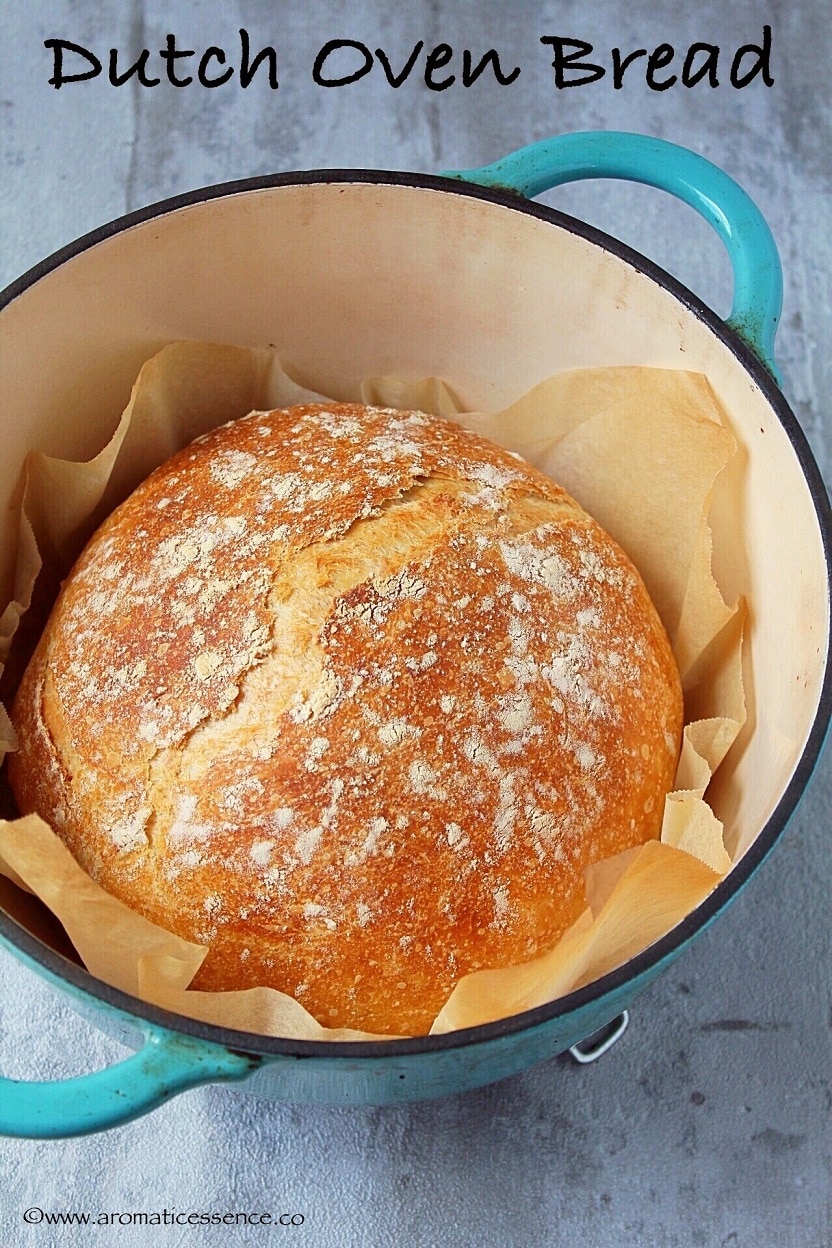
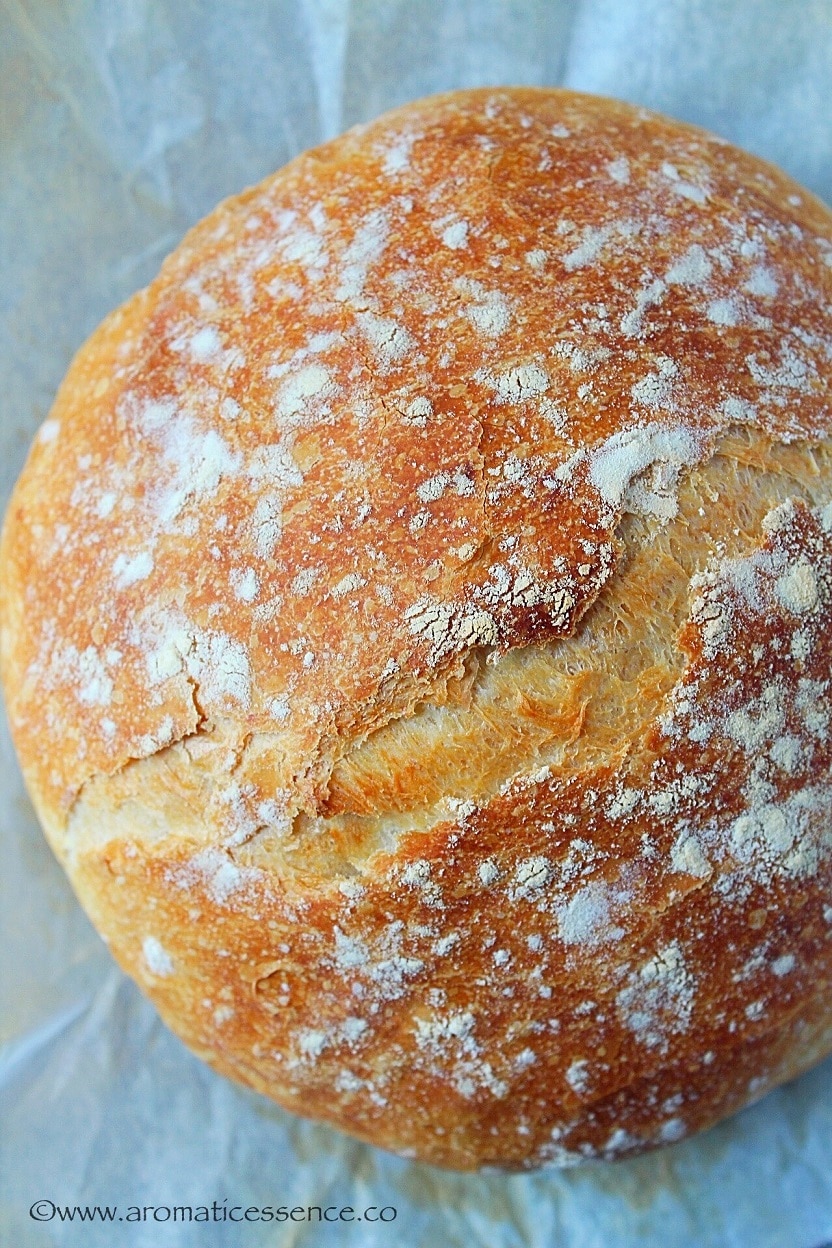
It’s been a while since I’ve shared a bread recipe here. So, I’m more than happy to share this Dutch oven bread recipe with you guys. I know many people find dealing with yeast a nightmare in itself, but honestly, it is not intimidating. And if you are a beginner in bread baking, then this is an easy recipe to start with. Baking bread does require patience, some amount of elbow-grease, and practice. But thanks to this classic recipe from Jim Lahey, owner of Sullivan street bakery in New York City, the life of an average bread baker has been simplified! This recipe requires no professional baking skills, zero-kneading, and is so darn easy. You really are missing out on something if you haven’t tried this yet! You guys! That finished boule just out of the oven with that perfect, deep brown crust is a joy to behold. The only way to experience this is by making one.
What is no-knead bread?
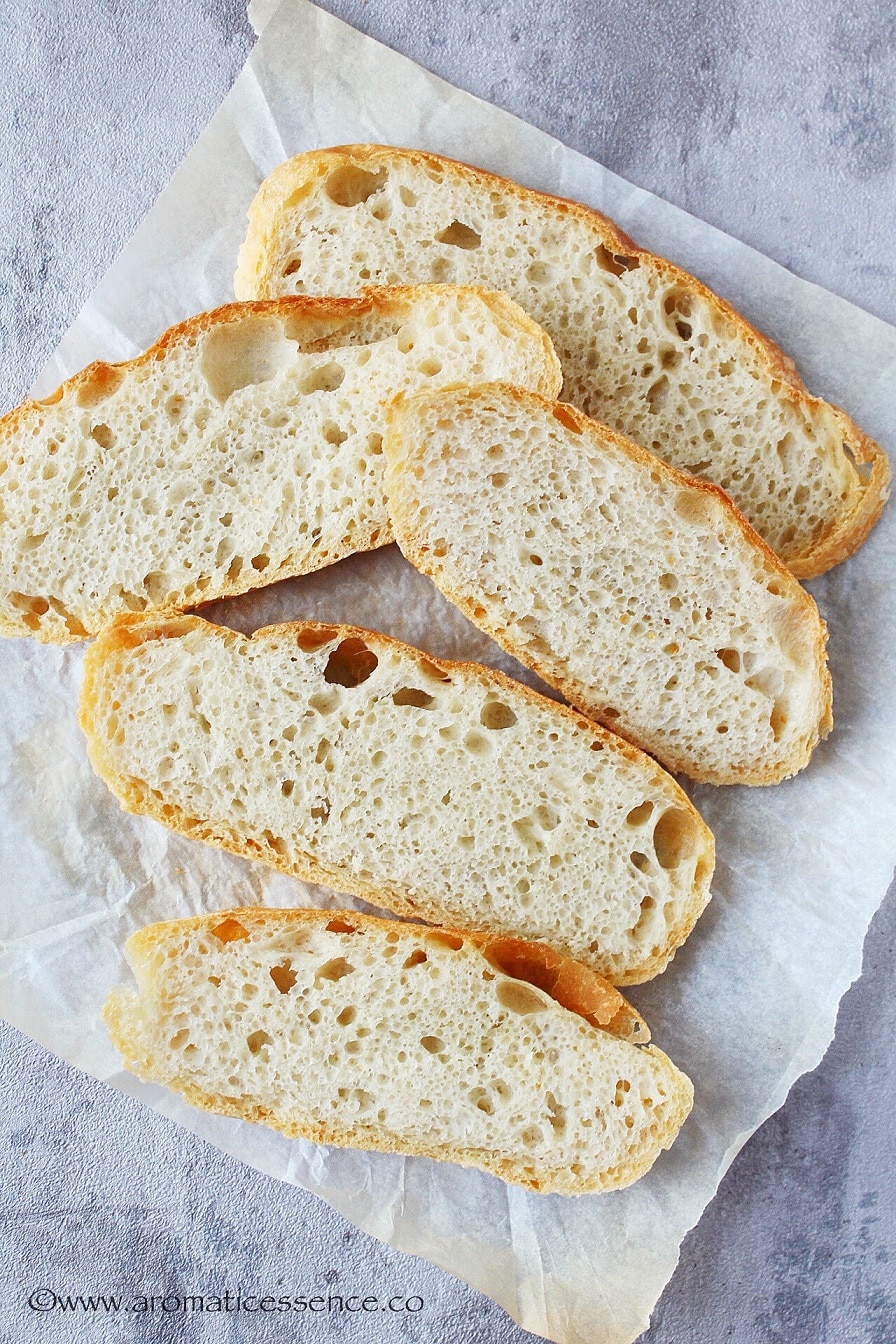
No-knead bread is just what it sounds! The dough is not kneaded in this recipe, rather the ingredients are simply mixed to form a shaggy dough. It is then left to sit for a good 18-24 hours. During this fermentation time, the yeast does all the work, creating gluten strands, which give strength and elasticity to the dough. Another typical thing about no-knead bread is that it requires a small quantity of yeast and a very wet dough aka higher hydration dough. The long rise imparts so much flavor to the overnight no-knead bread, it has a nice airy crumb and crackly golden-brown crust! It is perfect to enjoy with some butter, dunk in soups or simply transform them into sandwiches! The bread is baked in a Dutch oven. The relatively thick walls of the dutch oven retain the heat and the tight-fitting, oven-safe lid helps traps the steam. Steam is an important factor to achieve a crispy crust. You can read more about the role of steam in bread baking here. In short, a dutch oven imitates a similar baking environment used by professional bakers creating a rustic loaf of bread that looks just like the ones in your favorite bakery. A wet dough, long fermentation time, and a dutch oven are all you need to make this easy no-knead bread.
Why use the Instant Pot to proof the dough anyway?
The simple answer is to save time! With the help of the electric pressure cooker, you can prove this no-knead dough in just about 4 hours as opposed to 18-24 hours required otherwise. So even if you forget to prepare the dough the previous night, you can still make some fresh, homemade crusty bread in the morning and enjoy it for lunch or get it ready by dinner. You don’t have to wait for an entire day! It is a real time-saver IMHO, and even perfect during these winter months when the yeast activity is lowered. This method of proofing dough in the Instant Pot is perfect to make all kinds of bread, be it Challah, dinner rolls, brioche, baguette, French bread, and pita bread to name a few. If it is a regular kneaded dough you would just require about 30 minutes to proof in the IP, which again is a bonus in the winters! Note: You must have the yogurt function to be able to proof the dough in the Instant Pot. Don’t worry, even if you don’t have one, I’ve listed a few alternatives below.
Tips to make the best no-knead dutch oven bread
1. Yeast
Make sure your yeast has not expired. If you use expired yeast, the dough is never going to rise. What kind of yeast to use? Active-dry, instant or rapid-rise yeast, all work equally well in this recipe. I’ve used active-dry yeast for this recipe in the past, without activating it, and the dough proofed just as well. Tip: If you are unsure whether the yeast is active, heat the water called for in the recipe below to 105-110 degrees F. Add the yeast, and a teaspoon of sugar, mix well, and set aside. If it turns frothy and bubbly, you are good to go. Simply add that water to the rest of the ingredients and proceed with the recipe. Remember: Once you open a fresh jar of yeast, it has to be refrigerated for longer shelf life. If you do not bake often, then try and use those 1/4 ounce yeast packets preferably.
2. Measuring ingredients accurately
This dutch oven bread recipe is so simple and yet, even more, simpler to mess it up. Having made this countless times, I can tell you the quantity of ingredients i.e flour and water, play an important role. Too much flour and you will end up with a dense loaf of bread, using more water will result in such a sticky mass, that you are going to find it challenging to shape the dough. So follow these 2 steps really well,
Measuring the flour
It is advisable to always weigh ingredients using a weighing scale. However, if you do not possess one, follow the procedure below. First fluff the flour by stirring it with a spoon, then spoon the flour into the measuring cup. Do not tap the cup on the counter, then use the back of a knife to level off the excess flour by running it across the measuring cup. Always spoon the flour after aerating it into your measuring cup. Never scoop out the flour using the measuring cup directly, you always end up packing more flour than the recipe calls for.
The amount of water
I have reduced the amount of water in my recipe after reading an awesome tip in this post from Serious Eats. The water that the original recipe calls for had created an extremely sticky dough, which was really difficult to shape, meaning I would end up using an excessive amount of flour to shape it. Using more flour can result in a dense bread. I understand the water required can differ greatly depending on the humidity, and other conditions. By reducing the water, I still had that shaggy, sticky dough, and needed way lesser flour to shape it. I think it is a great tip to follow as you also end up with a beautiful looking crusty boule that is not too dense! The preferred ratio of ingredients for this no-knead bread recipe is 100 parts flour, 70 parts water, 1.5 parts salt, and 1 part instant yeast. Also, you don’t really need to use warm water for this recipe. Regular water works just as well, and that is what the original recipe calls for.
3. Shaping this sticky shaggy dough
This might seem complicated if you are just beginning, as it can be a challenge to shape this kind of dough. I’ve had a few failed attempts. I would get so frustrated that I would just dump the dough in the dutch oven, but the bread always tasted great, no matter how bad the shape of the dough was. A simple solution is to use a bench scraper to shape the dough. You can refer to the handy video for this process, as I thought it would be best to simply explain using a video tutorial.
4. The right yogurt setting
You must make sure the yogurt setting is set to ‘LESS’ or ‘NORMAL’. Setting it to ‘HIGH’ can kill the yeast, also the bottom of the dough will begin to dry out and start to cook. I prefer to use the ‘less’ setting, I’ve had consistent results with it.
What to serve with this artisan bread?
This flavorful crusty bread is good with just about anything.
Slather some butter and jam and enjoy the simplicity of this fresh homemade bread. This Instant pot strawberry jam is really delicious as is this mango jam if you’d like to try it out. Serve it alongside your favorite soups. Use the slices to make your favorite sandwich!
Try these different add-ins
While this Instant pot bread is so good on its own, I always love varying and switching it up with some add-ins. You can add these in the second step while mixing all the ingredients. Below are some of my favorites;
Garlic/roasted garlic & rosemary Seeds Warm spices like cinnamon Jalapeno cheddar Cranberry & walnuts Fresh or dried herbs Cheese Raisins
Which is the best flour for no-knead bread?
I recommend using bread flour to make any kind of bread. Bread flour is the preferred choice of flour to make these rustic bread recipes with a thin crust and chewy crumb. It has more protein content than all-purpose flour, which helps in better gluten development. If you don’t have it, you can use all-purpose flour, a direct 1:1 substitution will work just fine.
Can I use gluten-free flour?
Yes, you can swap the bread flour with gluten-free flour for a loaf of gluten-free bread. Simply use a 1:1 substitution. But, keep in mind, that the bread won’t be the same as the original. It will differ slightly in taste and texture.
Can I use whole wheat flour to make this bread?
You can use part whole wheat flour and part bread flour/all-purpose flour for a less dense loaf of bread. Using 100% whole wheat flour will result in an extremely dense bread. If you still choose to go in for whole wheat, I suggest adding 3 tablespoons of vital wheat gluten along with the rest of the ingredients. That will ensure you have a lighter loaf of bread.
Why is my no-knead bread dense?
The bread could be dense because you probably added more flour than that called for in the recipe. The dough is meant to be sticky, so avoid adding excess flour.
Can I use the ‘KEEP WARM’ setting to ferment the dough?
The temperature range of the ‘keep warm’ setting is between 145 to 165 degrees F which is not feasible for proofing the dough. It can get really hot, and that will kill the yeast. So, I do not recommend doing that.
I don’t have the yogurt setting, can I still make this Instant Pot bread?
Of course, you can still make this bread. It will only take longer for the fermentation process. Either of these following alternatives will work well;
Keep it on the countertop for 18-24 hours, just as the original recipe states. Below is a pic of the dough proofed on the countertop for 18 hours.
If you want to accelerate the fermentation process, pre-heat the oven to the lowest setting for 10-15 minutes. Then switch it off, and turn on the light. Place the bowl, covered with a lid in the warm oven. Proof for about 4-6 hours or until the dough has risen and is bubbly. I always used this method to ferment my idli dosa batter while I was in the US, and it always worked like a charm in the winters. The warmth of the oven light is good enough to speed up the fermentation process.
If you have more interesting ways, please leave a comment below. I’d be happy to add to this list for the benefit of others.
Can I bake bread in the Instant Pot?
Technically, you would be steaming the bread rather than baking it in a pressure cooker. Honestly, I’ve yet to try baking it directly in my IP. The bread will not have that crusty surface, rather it will be soft. I do hope to try this someday and will update that result here. And, if you have tried it, please share your feedback in the comments below.
What should I use to cover the insert of the IP while proofing the dough?
I’ve always used the lid of the IP to cover the pot while I proof the dough, without any problems. It is not really a necessity to use the lid, as we aren’t sealing the apparatus. The yogurt function does not cause the pot to pressurize, it simply maintains the ideal temperature for incubation. Though I have to caution you, you need to be careful here. A few folks have mentioned this on Facebook groups. If left to proof for too long, the dough can rise and push the pin up, which will lock the lid. It is really a hassle to open the lid. So I’d advise you to use any other lid or a plate, or simply cover the pot with a heavy-duty aluminum foil.
What is the size of the dutch oven required for this recipe?
I’ve baked this bread in a 5 quart enameled dutch oven. A 3.5 quart will also work well for this recipe. I’m not sure about using a bigger dutch oven with these quantities, I think the bread might spread out more due to the larger surface area of the pot and turn flat.
Do I need to grease the bottom of the dutch pot to prevent the bread from sticking?
No, you don’t need to. If the pot is super hot, the bread won’t stick. Also, I prefer to dump the dough all along with the parchment paper. It also makes it easier to remove the loaf of bread after it is done. Please use good quality parchment paper. If not using parchment paper, dust a little cornmeal on the bottom of the pot.
Do I need to score this no-knead bread before baking?
Scoring is a term used for slashing the dough before baking. The bread is not only scored to decorate it, but it also serves a purpose. The intentional slashes in the dough allow the loaf to expand in the right direction during baking. Without scoring, there are chances of the bread cracking in random places. I’ve yet to gain some confidence in scoring this kind of bread because it is a high hydration dough. Mine tends to look more messy than pretty. So, all I do is just dump the dough ball, and the bread still ends up looking pretty good and it tastes awesome as well!
Can I make this crusty bread without a dutch oven?
Yes, you can definitely make this no-knead bread without a dutch oven. You can use;
A pizza stone: Preheat the pizza stone as you would with the dutch pot. Then carefully transfer the dough (simply lift the dough in the parchment paper) onto the pizza stone. Cover the dough with a stainless steel pot or bowl that is oven safe up to 500 to 550 degrees F. Bake as directed in the recipe, remove the pot/bowl carefully after 30 minutes, and let the bread bake for another 15 minutes. Or use the stainless steel pot such as a soup pot that is oven-safe up to 500 to 550 degrees F, and cover it heavy-duty aluminum foil. Make sure that the handles are oven-proof and not plastic. There is no need to preheat the steel pot. A cast-iron skillet: Grease the bottom and sides of a 10 or 12-inch cast-iron skillet, transfer the dough ball onto the skillet, cover and let it proof for 30-45 minutes. Preheat the oven to 450 degrees F during the last 20 minutes, place the cast iron skillet on the middle rack, and bake and bake for 45-50 minutes
By using any of these above methods, make sure that the lid is covered tightly because you need that steam to have a finished loaf of boule with a crusty exterior and an airy crumb. Again, if you have more interesting alternatives to the dutch oven, please leave a comment below. I’d be happy to add to this list above.
How to store homemade bread?
Bread is best eaten the day it is baked. If I have some left, I store mine in a breadbox. If you don’t have one, wrap the loaf of bread in aluminum foil, or place it in a paper bag and store it in a cool, dark place for up to 2 days. Avoid refrigerating bread as it can dry it out.
How to freeze homemade bread?
Once the bread has cooled completely, slice the bread. Wrap individual serving portions (like 2 slices) in an aluminum foil, or cling wrap or resealable plastic bag and press out the air. Place everything in a large freezer bag and freeze for up to 3 months. Remember to label the contents along with the date. Pre-slicing the bread helps to avoid defrosting the entire loaf of bread, especially when you need only a few slices. Thaw the bread slices on the countertop or microwave it for 20-30 seconds or pop it in the toaster directly from the freezer.
How to make no-knead dutch oven bread – Step by step instructions
Step 1: Prepare the Instant Pot
Line the inner pot with parchment paper, grease with oil spray or a tablespoon or two of olive oil.
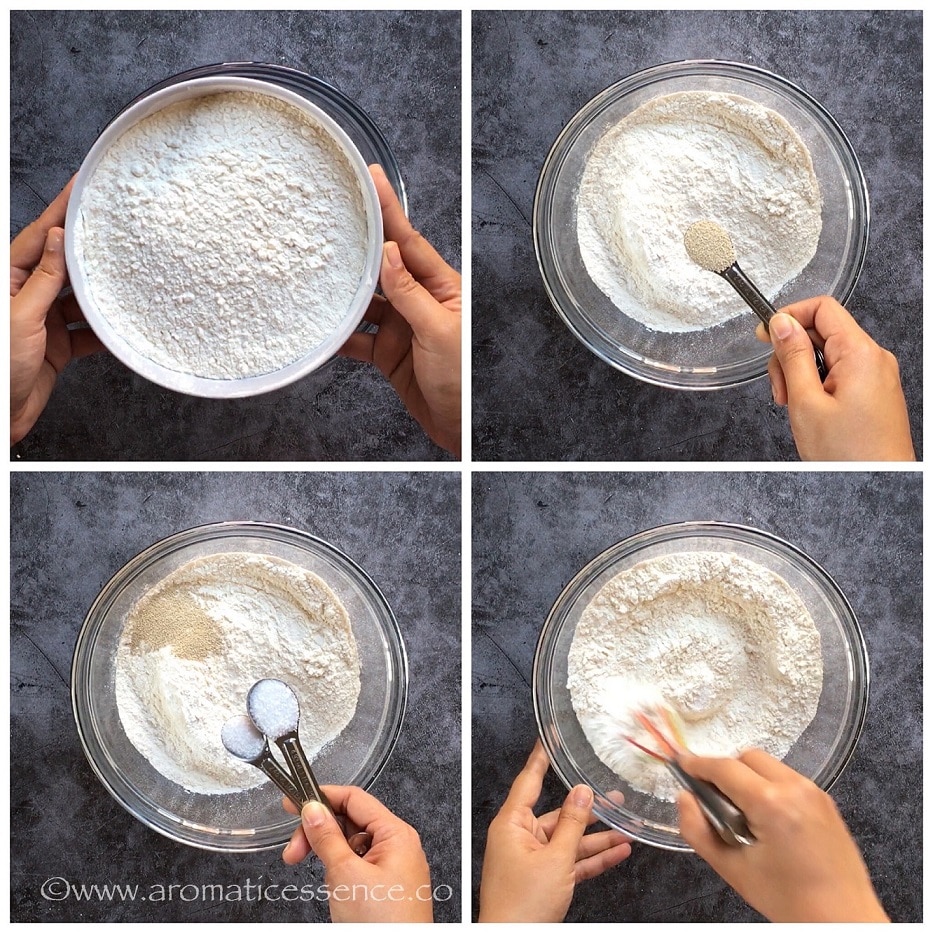
Step 2: Combine the dry ingredients
Combine 3 cups/430 grams bread flour, 1.5 teaspoons kosher salt, and 1/2 teaspoon of yeast in a big bowl, and whisk well.
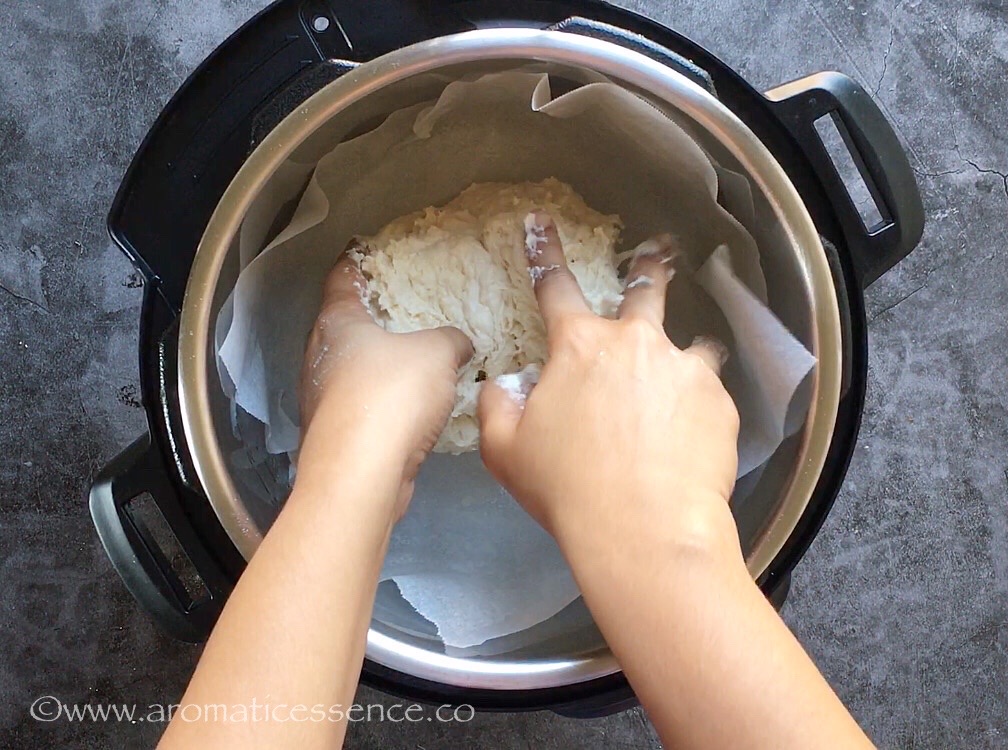
Step 3: Add water and olive oil
Add 300 ml of water and 2 tablespoons of olive oil, stir well with the help of a spatula or wooden spoon, until all the flour has mixed well with the water, and no dry flour pockets remain. The dough should look shaggy and be sticky at this stage. If not, add a few tablespoons of water, about 2-3 tablespoons should suffice.
Step 4: Transfer the shaggy dough to the inner pot
Transfer the dough to the greased parchment paper, cover the pot with any other lid or a plate or even aluminum foil. As a precautionary step, avoid using the lid of the IP.
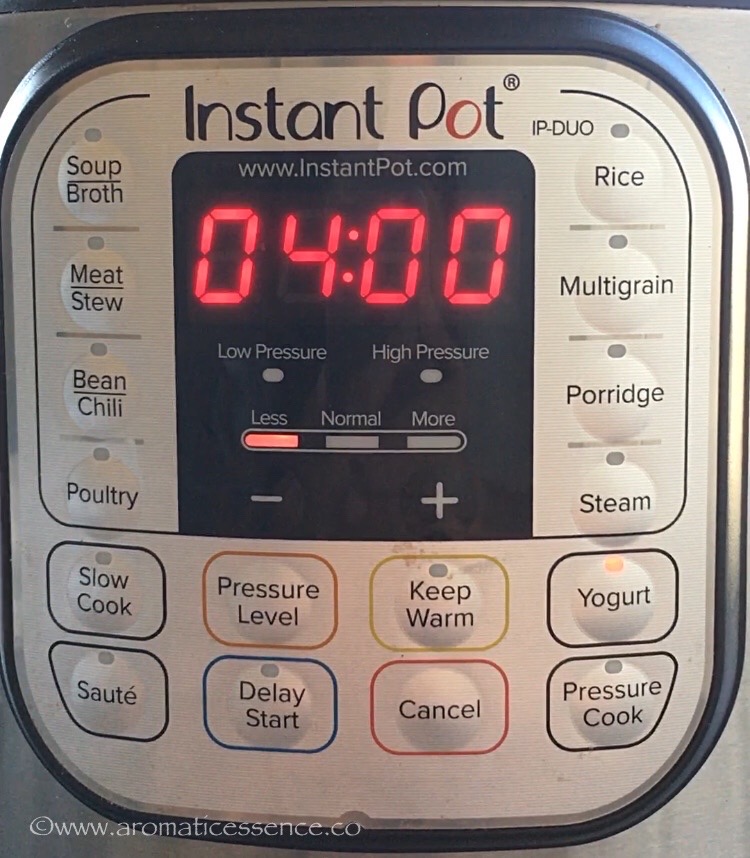
Step 5: Proof the dough in the Instant Pot using the ‘YOGURT’ function
Press the ‘YOGURT’ button, set it to ‘LESS’ OR ‘NORMAL’ setting. Set the timer for 4 hours using the +/- button.
Step 6: The dough looks like this after proofing
After 4 hours, remove the lid, the dough will have risen and the surface will be dotted with bubbles. So far, so good, carry on with the next steps.
Step 7: Shape the dough
Dust your hands and work surface with about 2 tablespoons of flour. Transfer the dough to the work surface, scatter another tablespoon or so of flour. Using a bench scraper, fold the dough from the edges towards the center, until it forms a rough ball. Turn it around a few times until it forms a ball. Refer to the video for the shaping process.
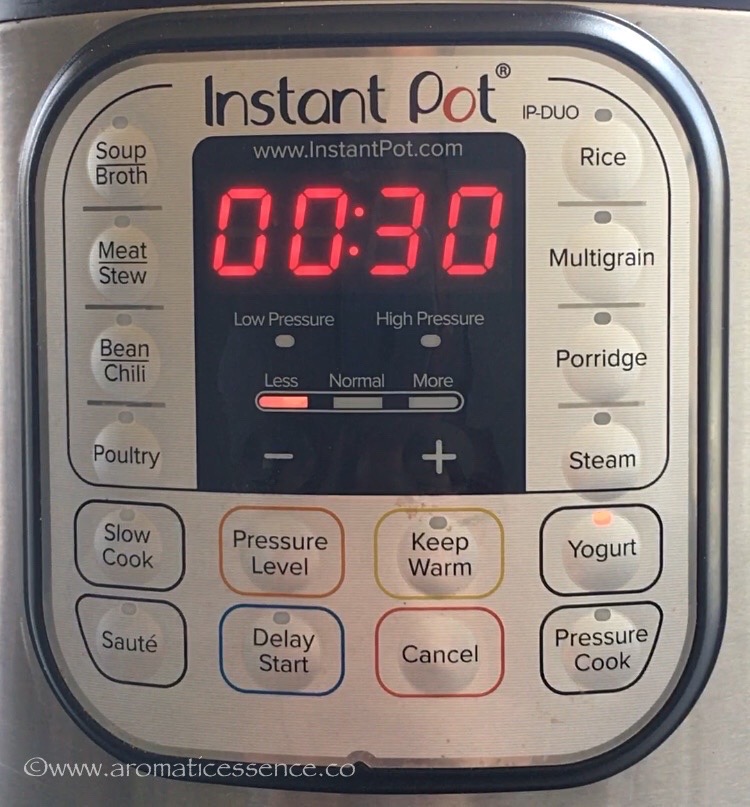
Step 8: Second proofing
Line the inner pot of the IP with parchment paper, transfer the dough to the parchment paper, sprinkle some flour.
Cover the pot with a glass lid/plate/aluminum foil. Press the ‘YOGURT’ button, set it to ‘LESS’ OR ‘NORMAL’ setting. Set the timer for 30 minutes using the +/- button.
Step 9: Preheat the dutch oven
While the dough is proofing, preheat the oven to 450 degrees F. Place a 3.5 or 5-quart enamel-coated dutch oven with the lid in the middle rack and preheat it for 30 minutes.
Step 10: Bake the bread
After 30 minutes, remove the hot dutch oven carefully, and place it on a wire rack. Open the lid, transfer the dough along with the parchment paper directly into the hot dutch oven. You may score/slash the bread with a sharp floured knife, at least 1/2 inch deep at this stage. Cover the pot with the lid, and bake at 450 degrees F for 30 minutes. After 30 minutes, remove the lid, and continue baking for another 15 minutes until the top is a golden brown or until the center of the bread registers 200- 210 degrees F on an instant-read thermometer. If you tap the bottom of the loaf, it should sound hollow and that’s how you know the bread is done. So you are baking the bread for a total of 45 minutes (30 minutes covered and 15 minutes uncovered).
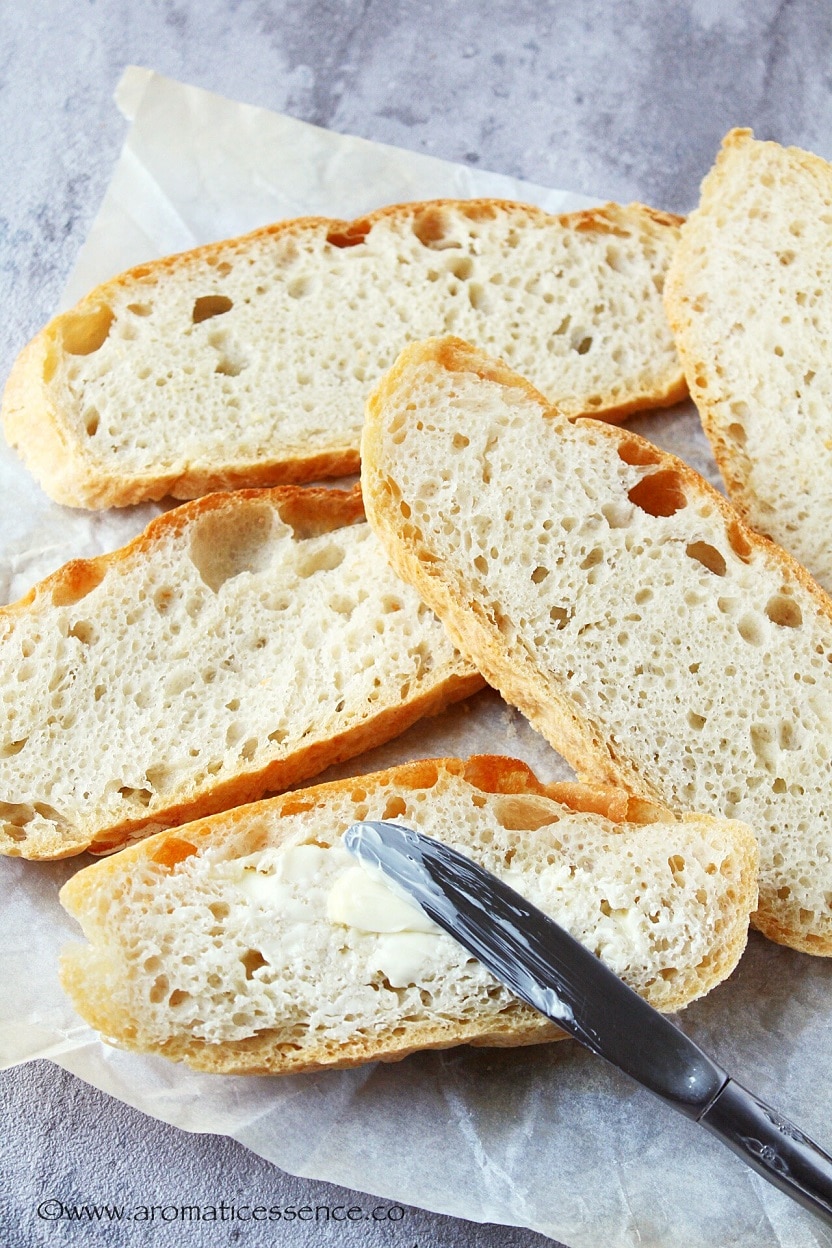
Step 11: Cool the loaf
Remove the loaf carefully, and transfer to a wire rack. Remove the parchment paper. Let the loaf cool for at least 1 hour before slicing. The bread continues to cook even when it is out of the oven, cutting it while it is still hot may not give you the desired crumb texture.
Important Notes
The original recipe calls for 1.5 cups of water. But that quantity has never worked for me, I have a really tough time shaping the dough. Secondly, the crust gets crinkly after cooling and turns soft. I’m no expert, but I guess it is due to the humidity in Southern US, due to which I had to adapt the recipe. These quantities work perfectly well for me. Also, I always measure the flour and water with a scale. If you live in a dry region, chances are that you will not have that problem, I’d recommend using the 1.5 cups of water. Any kind of yeast works for this recipe. If you are unsure about the yeast, activate it first as mentioned above, and then proceed with the recipe. Remember not to overwork the dough at any stage, it is not called no-knead for no reason. The less you work the dough, the better the crumb texture will be. You can shape the dough directly on the parchment paper, then simply lift the paper along with the dough, and dump it in the IP for the second proofing.
★ If you try this recipe, I would love to hear from you! I’d appreciate it if you could rate and leave a review below in the comments. Your reviews help others know the recipe better too. Feel free to share your feedback and suggestions at [email protected]. Thanks so much 🙂 You can also follow me on Facebook, Pinterest, Instagram & Twitter