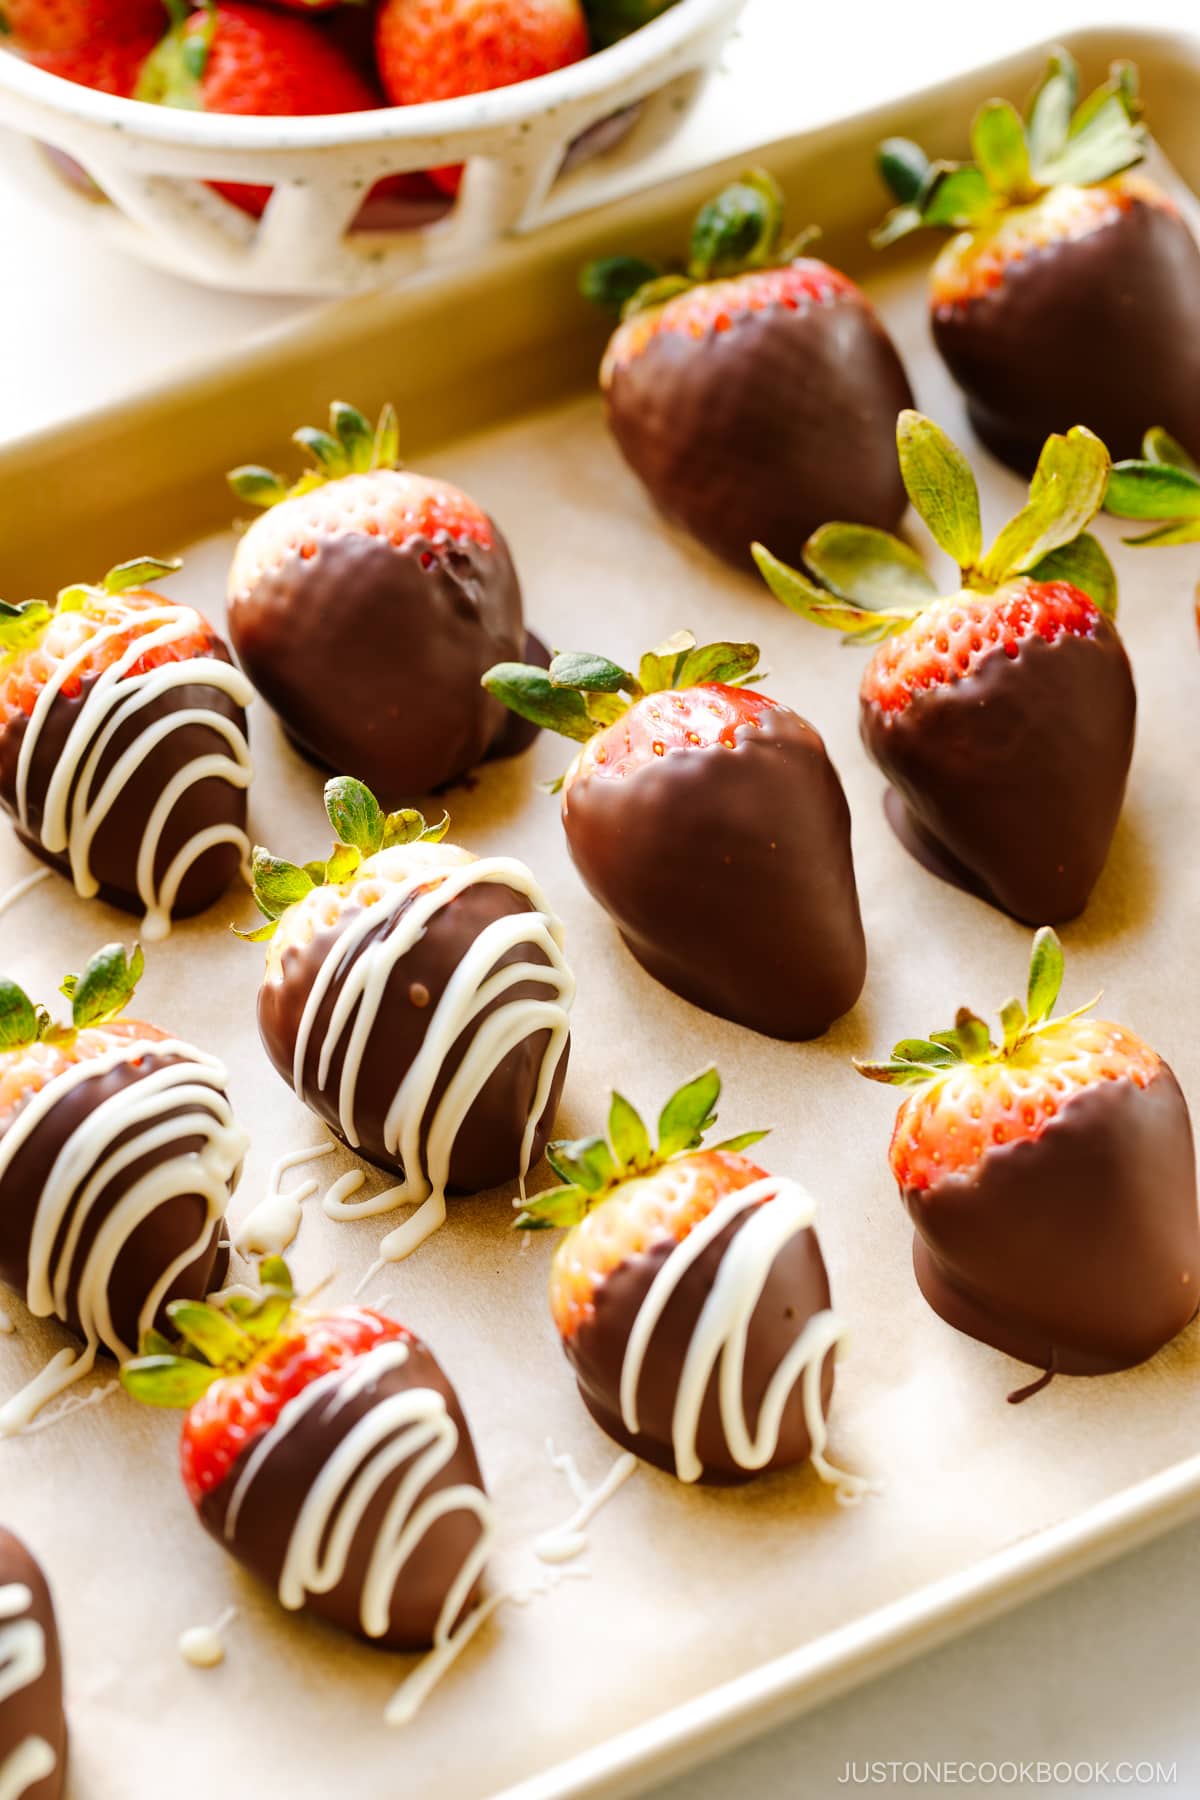
Whether it’s for Valentine’s Day, Mother’s Day, a baby shower, or a birthday party, these Chocolate-Covered Strawberries will be a wonderful treat for everyone! Made with simple ingredients—just fruits and chocolate, they are a healthier alternative to typical desserts. Plus, they look so pretty and elegant. If you’re looking for a quick dessert that adds brightness to the table, give these a try! They also make for a great edible gift during the holidays.
Why Make These Chocolate Covered Strawberries
I enjoy making these beautiful treats, and I hope you will too! Here are the reasons why you’ll love this recipe:
Super easy! This is one of the simplest dessert recipes on the website. My children have been making this since they were young! It’s a fun cooking project to do with little ones. Quick to make—under 30 minutes from start to finish. Just 2 ingredients! The basic recipe requires strawberries and chocolate. I’ll show you how to temper chocolate so your chocolate-covered strawberries will have a more professional look! A much healthier treat for anyone who wishes to watch their sugar intake.
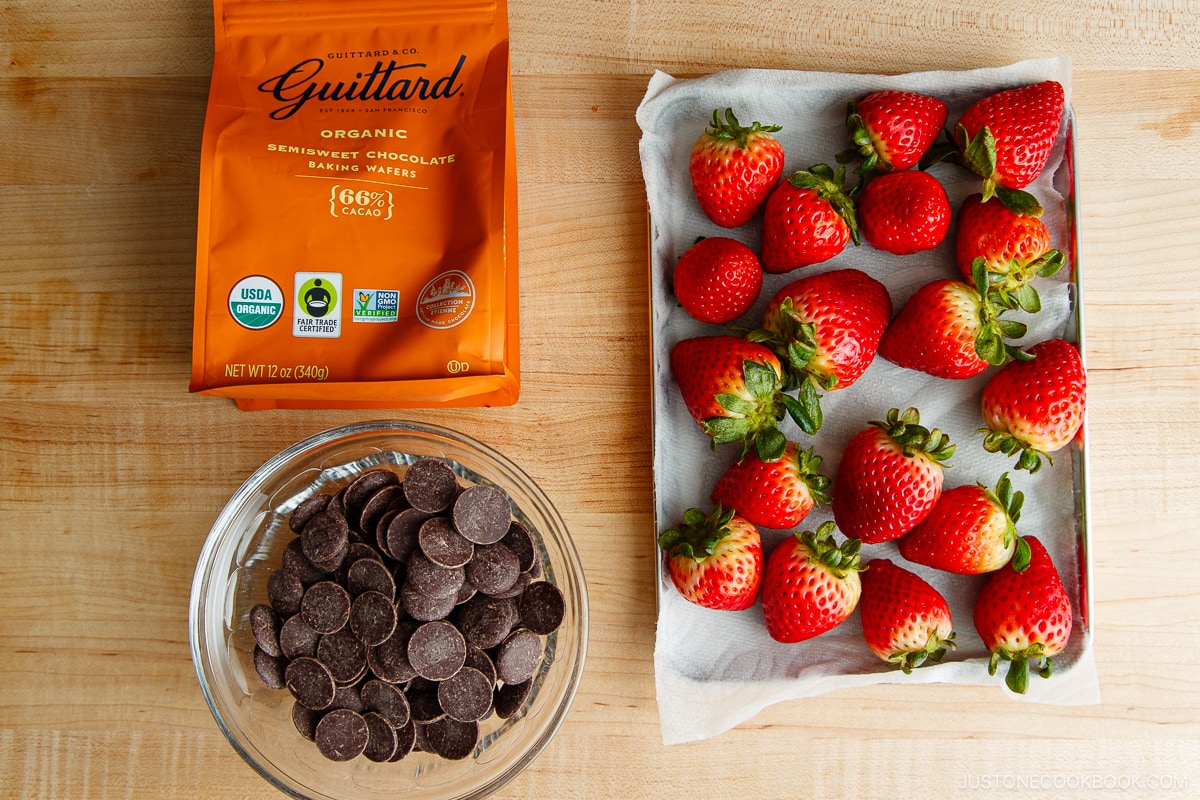
Ingredients You’ll Need
Strawberries – Get large, organic strawberries that are plump and firm. Whenever I find those, I always make this recipe. Chocolate – It’s crucial to get high-quality chocolate baking bars or wafers. I’ll cover this topic below.
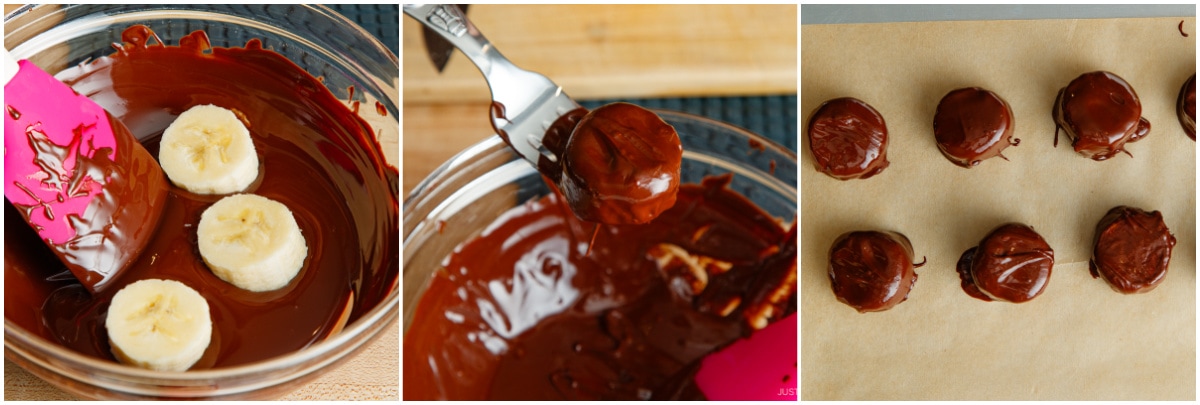
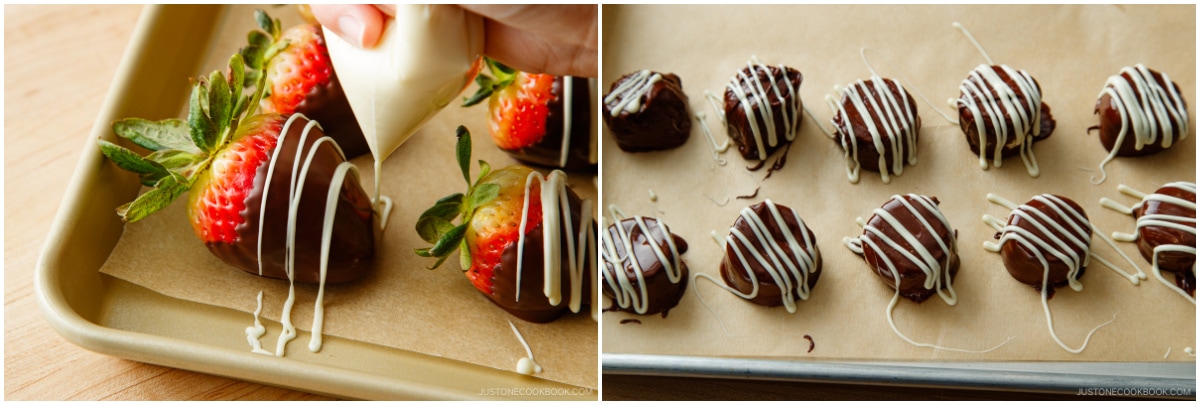
Optionally, you can decorate with other ingredients such as white chocolate, chopped nuts, or sprinkles. In my recipe below, I’ve included a white chocolate drizzle.
The Best Chocolate for Dipping Strawberries
There are so many chocolate brands and types available at the grocery store. Which one is good for this recipe? To temper chocolate successfully, it must contain cocoa butter in the ingredients. Here are my recommendations:
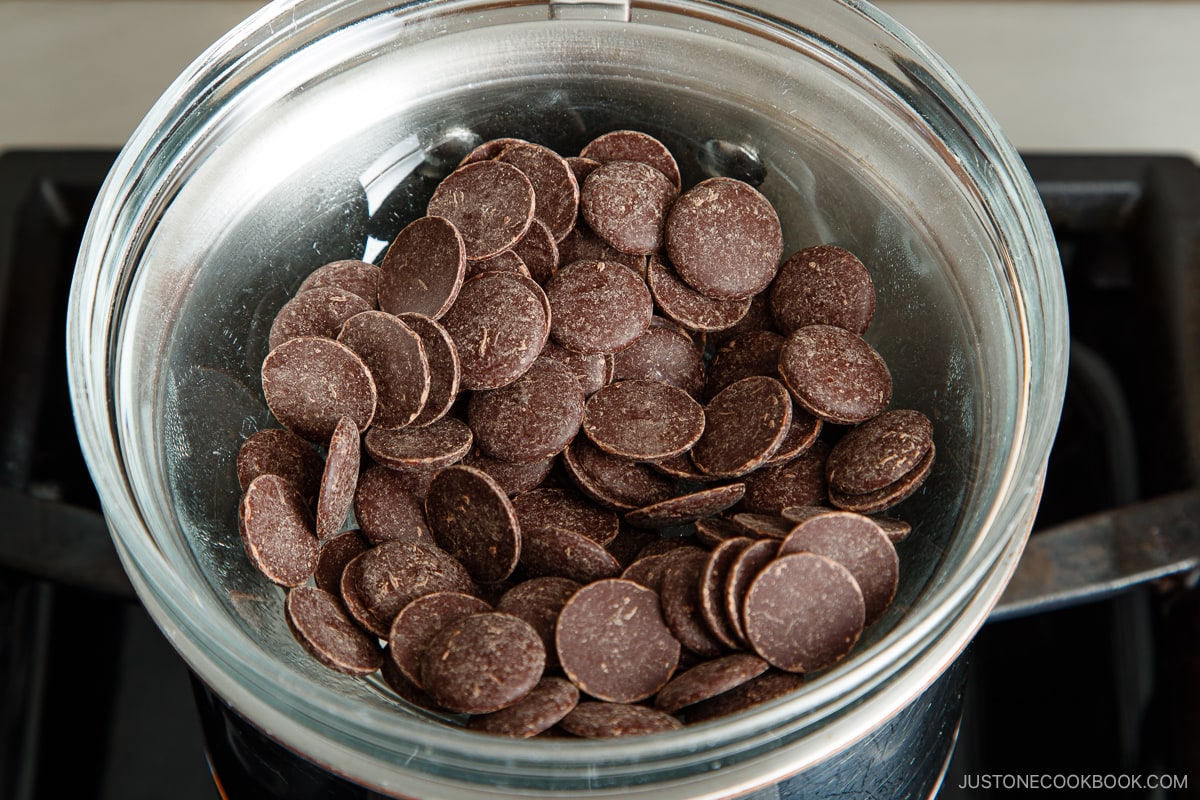
High-quality chocolate bars for baking (you’ll need to finely chop) Guittard semisweet baking bar Guittard bittersweet baking bar Ghirardelli semisweet baking bar Ghirardelli bittersweet baking bar Couverture chocolate wafers Guittard semisweet chocolate baking wafers Guittard bittersweet chocolate baking wafers Avoid using chocolate chips. They’re made with less cocoa butter and have added ingredients that help them maintain their chip shape when baking. Consequently, they will not melt smoothly for tempering. Instead, opt for couverture chocolate wafers.
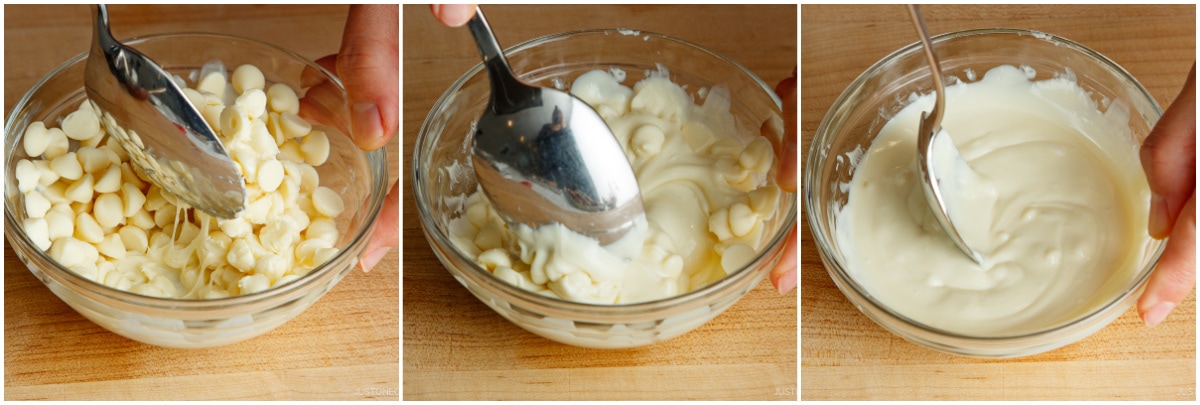
What is Tempering Chocolate?
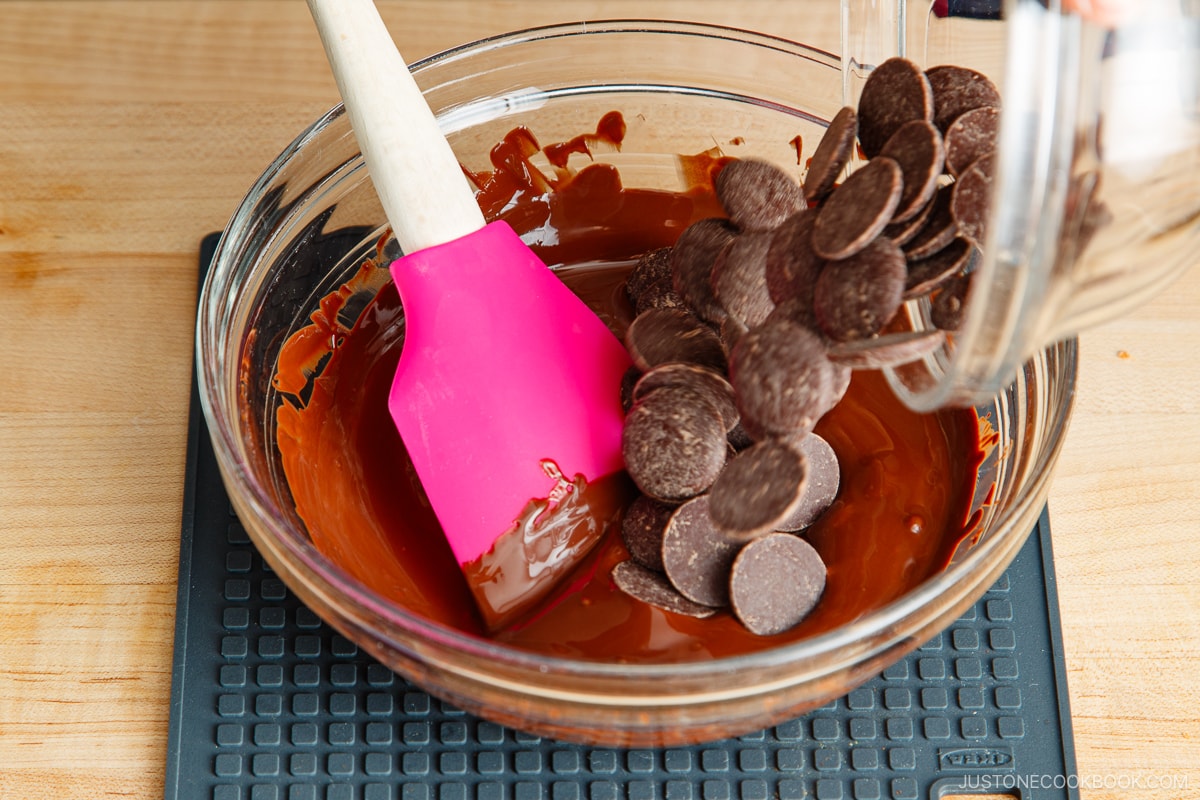
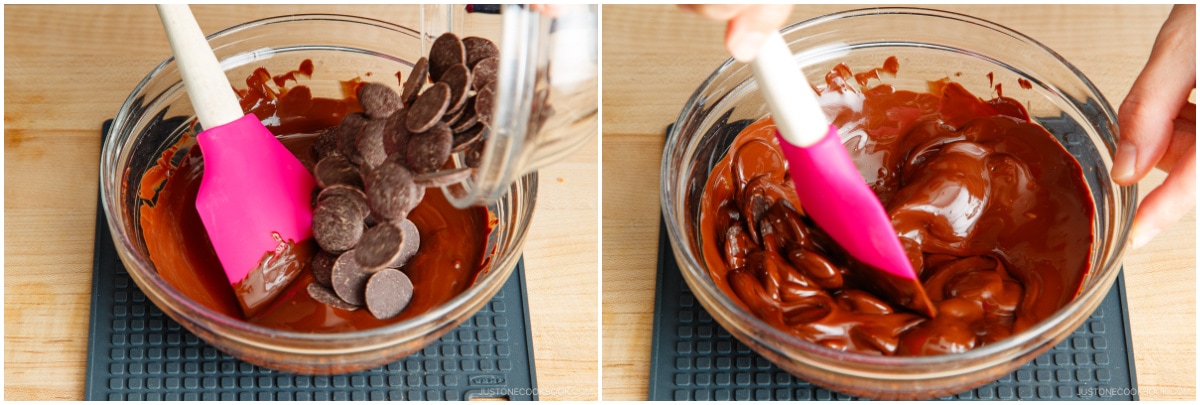
Instead of simply “melting” chocolate, I highly recommend “tempering” chocolate. When you make chocolate-covered strawberries with tempered chocolate, they will look more professional, akin to chocolates found in a candy store! Tempering—involving the heating and cooling of chocolate to stabilize it for making candies and confections—gives the chocolate a smooth and glossy finish. It prevents it from easily melting on your fingers and provides a snappy texture when you bite into it! The chocolate stays hard even at cooler room temperatures. What if we don’t temper chocolate? Melted chocolate looks dull, streaky, and possibly greyish, and it remains soft without that desired snappy texture. Additionally, it will melt easily, requiring refrigeration.
How to Temper (Melt) Chocolate
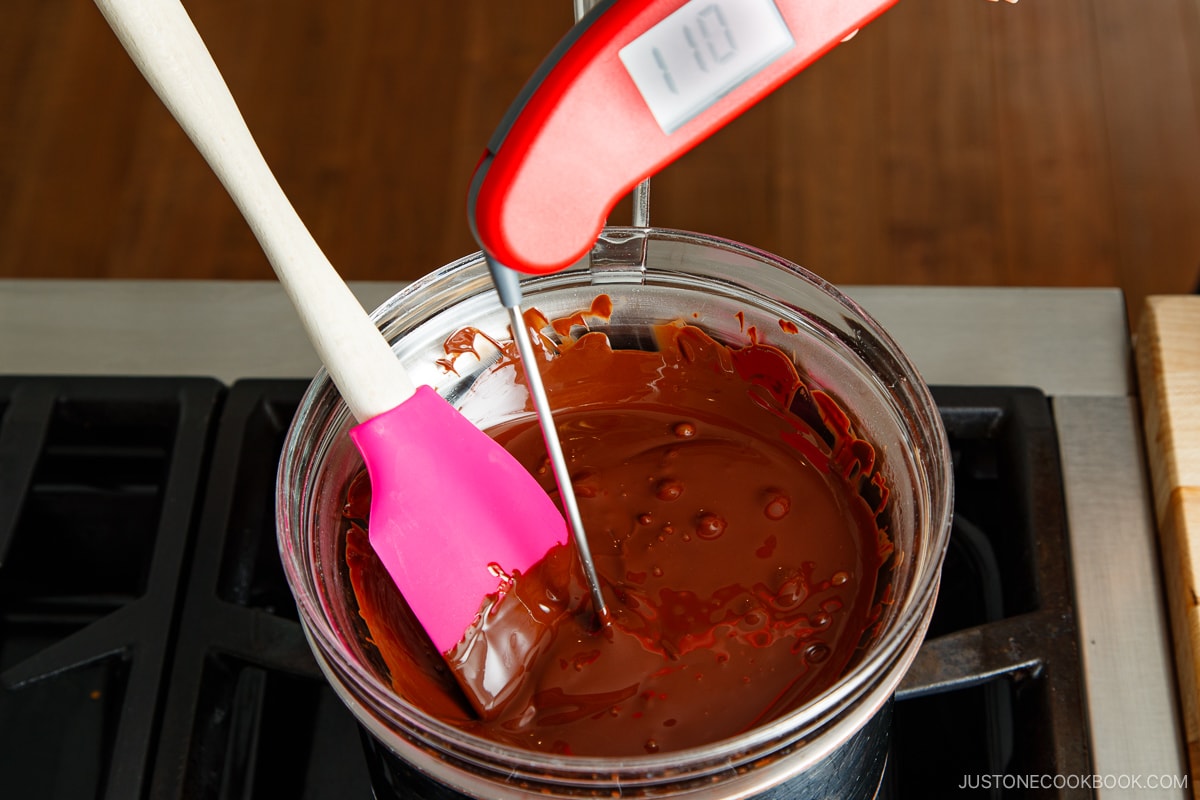
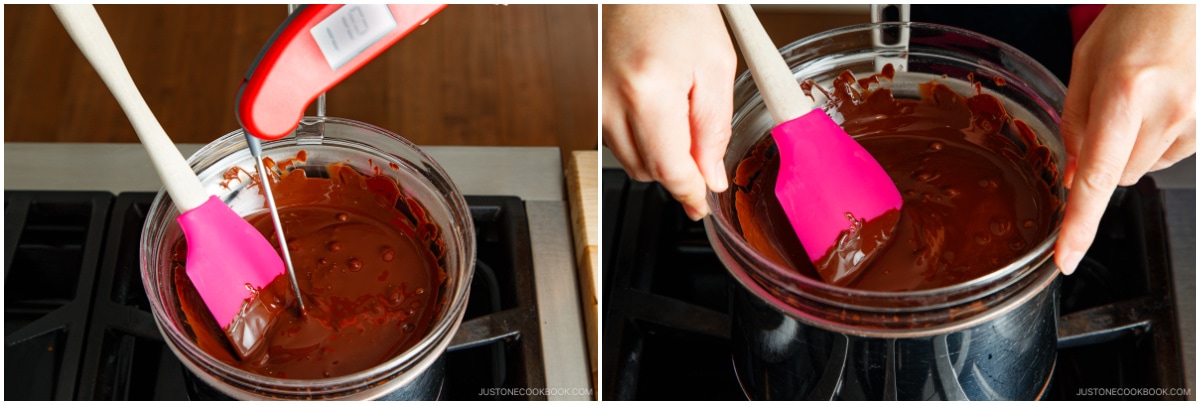
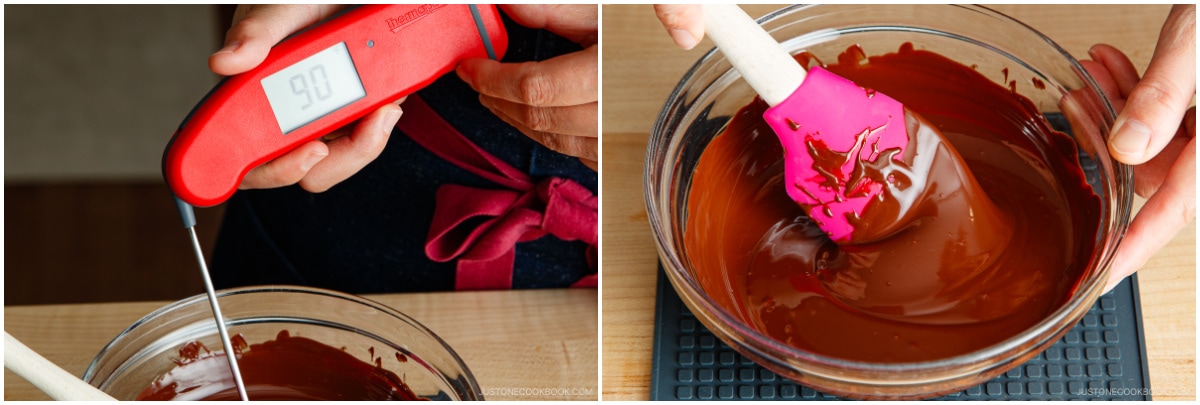
This step is very easy, especially when using a cooking thermometer, which helps with tempering chocolate by eliminating guesswork and ensuring success.
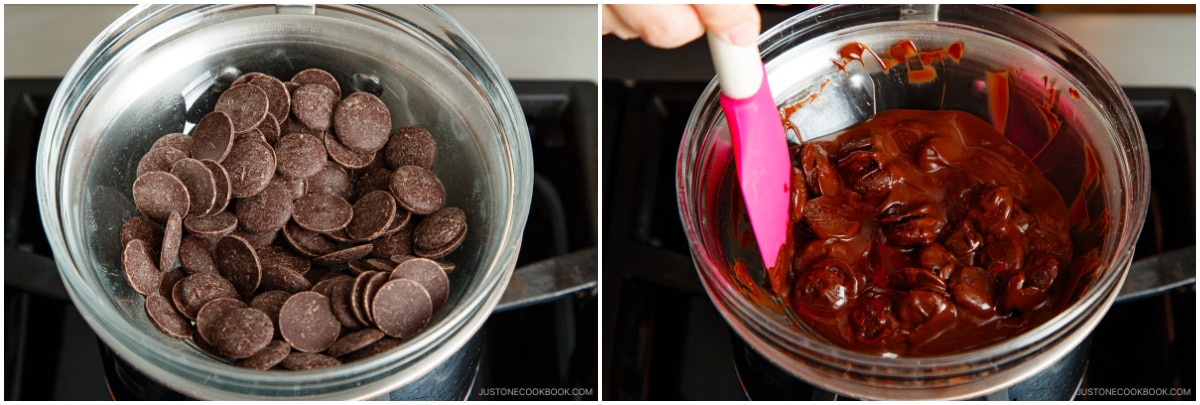
Tempering Chocolate on the Stove
For this process, use a double boiler, which I will discuss in the next section.
Tempering Chocolate by Microwave
You can use the microwave, but you must be extra cautious as it can burn the chocolate.
What to Watch Out For
Do not heat chocolate above the following temperature. Semisweet or bittersweet – Never above 120°F (49°C) Milk or white chocolate – Never above 110°F (43°C) Never expose melted chocolate to water. Any water (steam, condensation, or moisture attached to the heatproof bowl or utensil) will cause the chocolate to seize and become lumpy and dry. If your chocolate is seized, check out this video.
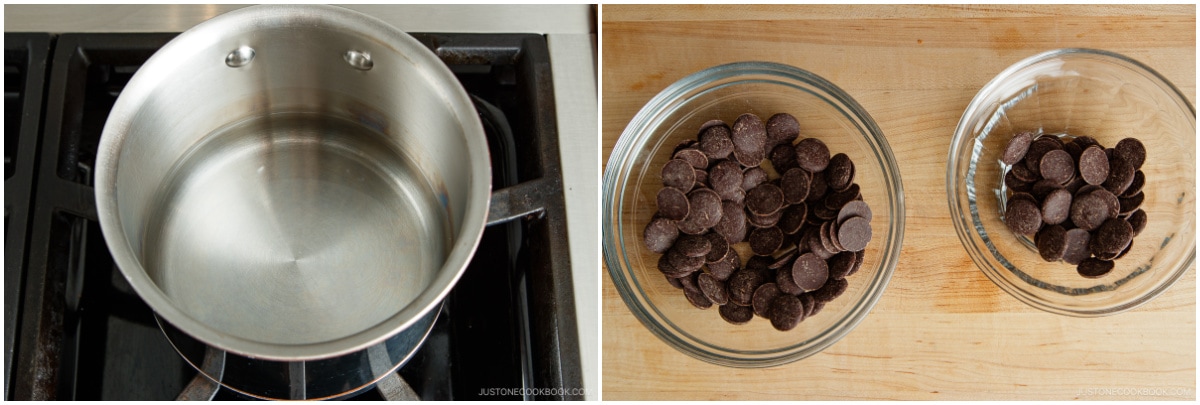
What is a Double Boiler?
A double boiler is a type of cookware, which typically consists of two pots, one placed over the other, or a bowl set over a saucepan. It utilizes steam as a heat source to gently melt or cook food. All you need is a heatproof bowl (metal or glass) set over a saucepan filled with about an inch of simmering water. Make sure the bowl is not touching the water.
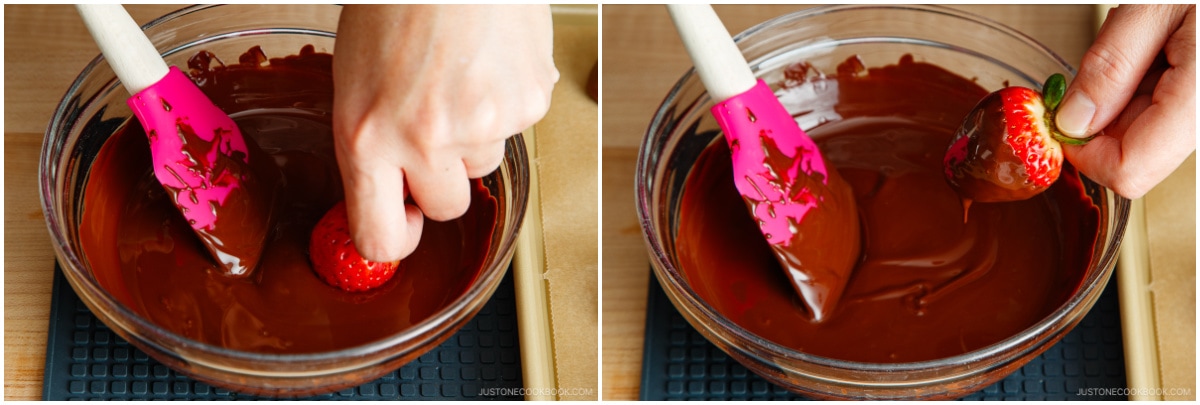
How to Make Chocolate Covered Strawberries
Recipe Tips
Here are a few things to keep in mind while making these chocolate-covered strawberries:
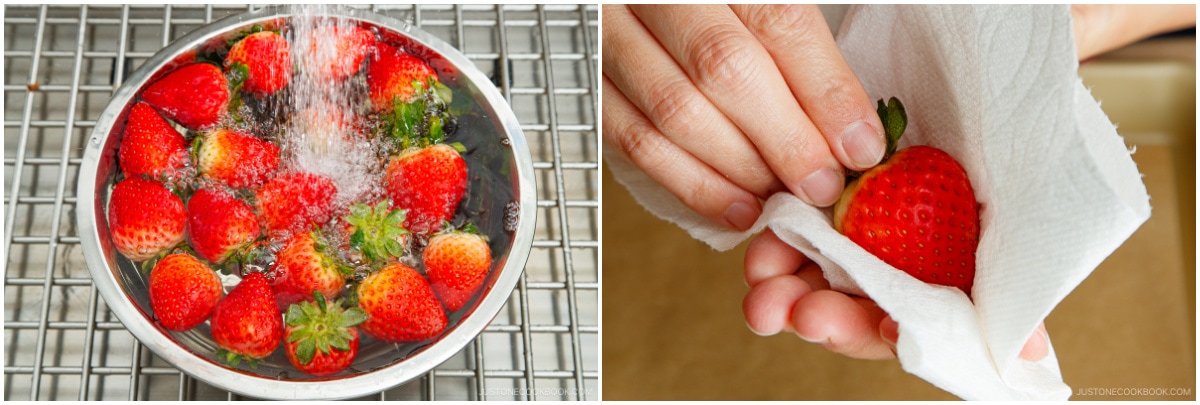
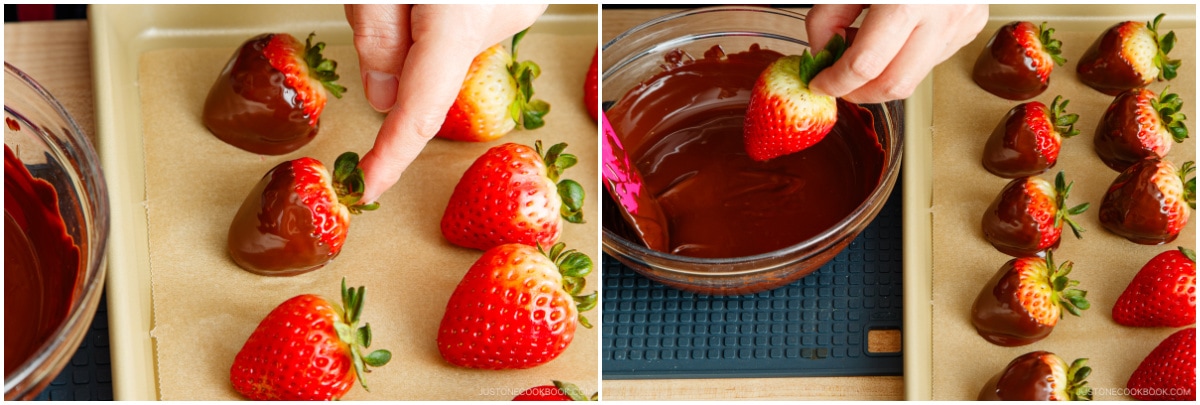
Pick good strawberries. Choose large, firm, ripe strawberries without bruises. If possible, opt for strawberries that are bright red all the way up to the stem for the best appearance! Dry the strawberries thoroughly. After washing, make sure to dry the strawberries completely, as water can prevent the chocolate from sticking. Strawberries should be at room temperature. Use a cooking thermometer to eliminate guesswork. I frequently use it in various recipes, such as for steak, salmon, deep-fried food, desserts, etc., to ensure precise cooking. It’s truly one of the must-have tools in the kitchen. Prevent chocolate pooling. As soon as you place the strawberries on parchment paper, push them forward to prevent chocolate from pooling. Decorate chocolate-covered strawberries. Use another chocolate to drizzle or add toppings to give them a gourmet look. Reheat cooled chocolate. If the chocolate cools, place the bowl of chocolate back over the double boiler, stirring continuously. Warm the chocolate back to 90˚F (32°C) and then remove it from the heat.
How to Store
Enjoy your chocolate-covered strawberries within 1 to 2 days. Keep them uncovered at room temperature for the first day and refrigerate uncovered overnight.
Other Chocolate Recipes
Chocolate Gateau (Chocolate Cake) Chocolate Chocolate Almond Toffee Chocolate Chiffon Cake
Wish to learn more about Japanese cooking? Sign up for our free newsletter to receive cooking tips & recipe updates! And stay in touch with me on Facebook, Pinterest, YouTube, and Instagram. Editor’s Note: This post was originally published on February 9, 2012. The post was republished with a revised recipe, new images, and more helpful content on February 7, 2024.